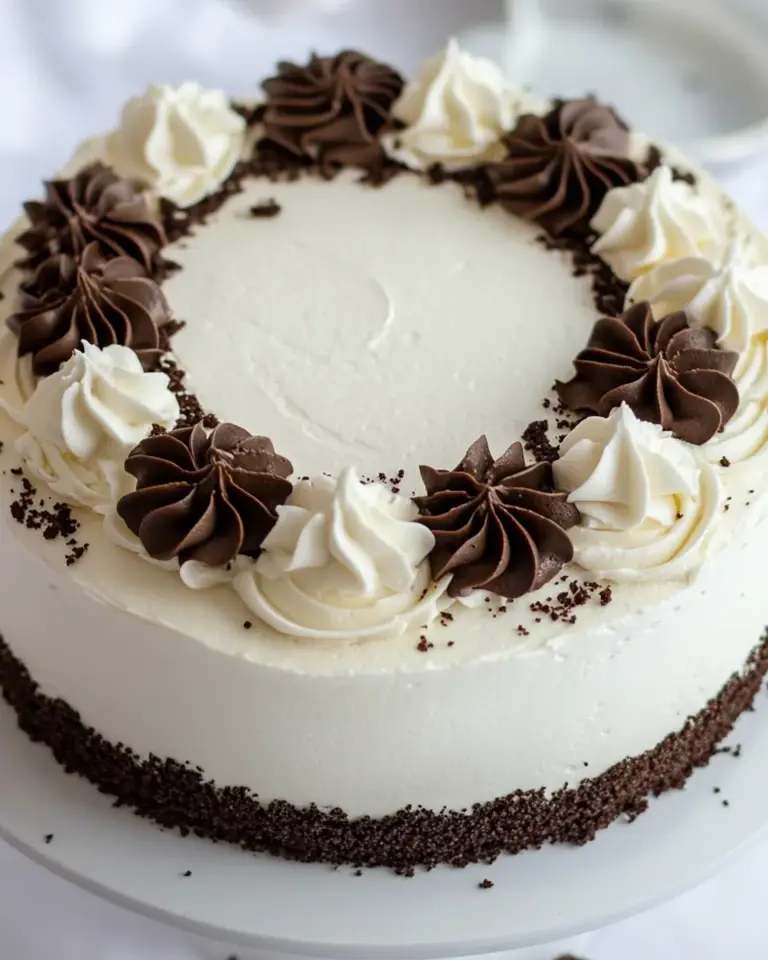
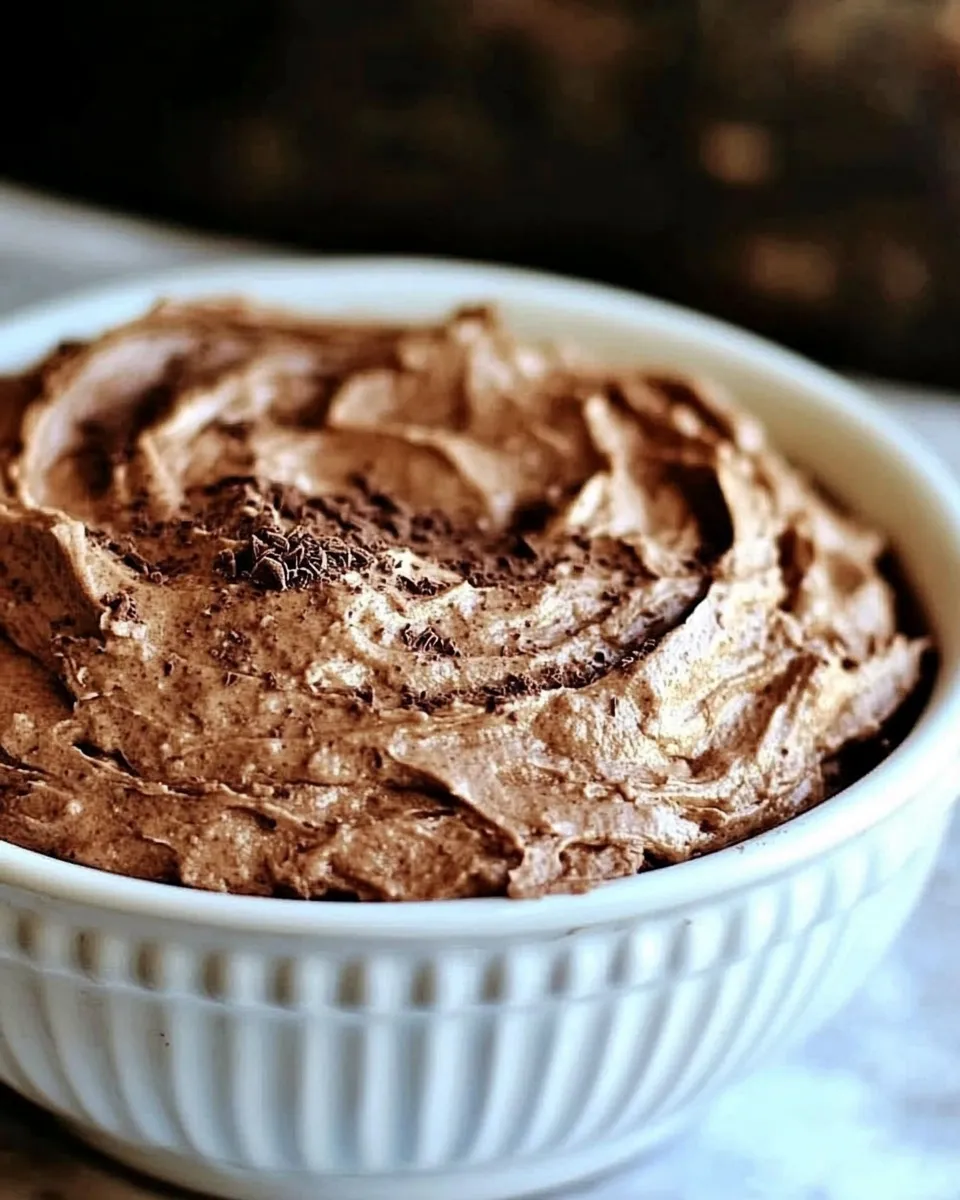
Chocolate Heritage Frosting Recipe
When it comes to frosting, nothing beats the rich and creamy taste of a good chocolate frosting. This Chocolate Heritage Frosting Recipe is a cherished family favorite that brings a nostalgic flavor to any dessert. Whether it’s a simple vanilla cake or a decadent chocolate layer cake, this frosting will elevate your treats to new heights. The velvety texture and deep chocolate flavor make it an ideal companion for cupcakes, cookies, and more. Let’s dive into why this recipe works so well and how you can make it at home.
Why It Works Every Time
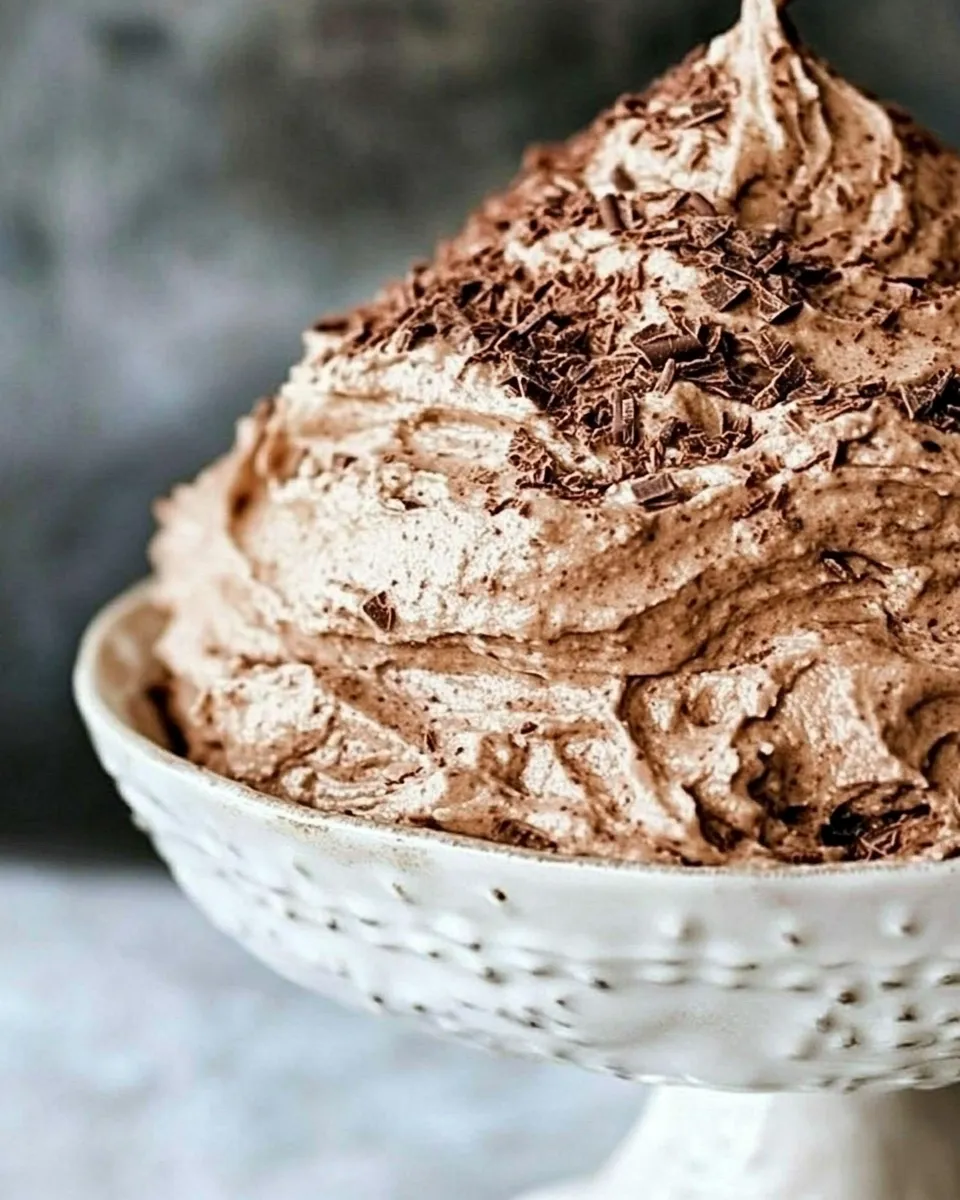
The secret behind this Chocolate Heritage Frosting Recipe lies in the combination of ingredients and the method of preparation. Using a flour-based roux creates a luscious texture that is both stable and easy to spread. The unsweetened cocoa powder adds a rich chocolate flavor without overwhelming sweetness, while the combination of butter and sugar ensures a creamy consistency. Plus, letting the mixture cool before adding butter guarantees a smooth and glossy finish. This method has been passed down through generations, making it a timeless recipe that you can trust.
The Ingredient Lineup
To whip up this delightful frosting, you’ll need the following ingredients:
- 6 tablespoons (45g) all-purpose flour – This forms the base of your roux, giving the frosting its unique texture.
- 2 cups (454g) whole milk, room temperature – This helps create a smooth and creamy consistency.
- 2 cups (452g) unsalted butter, softened – The star ingredient that adds richness and a creamy texture.
- 2 cups (396g) granulated sugar – This sweetens the frosting and balances the cocoa flavor.
- 6 tablespoons (32g) unsweetened cocoa powder – Adds the essential chocolate flavor.
- 1 teaspoon (5g) vanilla extract – Enhances the overall flavor profile.
Cook’s Kit
To prepare this Chocolate Heritage Frosting Recipe, gather the following kitchen tools:
- Whisk – For mixing the roux and ensuring a smooth texture.
- Medium saucepan – To cook the flour and milk mixture.
- Mixing bowl – To combine the cooled roux with butter and sugar.
- Electric mixer – For whipping the frosting until fluffy.
- Spatula – For scraping down the sides of the bowl and ensuring everything is well combined.
Chocolate Heritage Frosting Recipe in Steps

Step 1: Make the Roux
In a medium saucepan, whisk together the all-purpose flour and whole milk over medium heat. Continue to whisk until the mixture thickens and starts to bubble. This process should take about 5-7 minutes. Once thickened, remove it from the heat and let it cool completely.
Step 2: Cream the Butter and Sugar
In a mixing bowl, beat the softened unsalted butter and granulated sugar together using an electric mixer on medium speed. Mix until the mixture is light and fluffy, about 3-5 minutes.
Step 3: Combine the Roux and Butter Mixture
Once the roux has cooled, add it to the butter and sugar mixture. Beat on medium speed until everything is well combined and smooth.
Step 4: Add Cocoa Powder and Vanilla
Sift the unsweetened cocoa powder into the frosting mixture along with the vanilla extract. Beat until fully incorporated and the frosting is fluffy and creamy.
Step 5: Adjust Consistency (if needed)
If the frosting is too thick, you can add a tablespoon of milk at a time until it reaches your desired consistency. If it’s too thin, add a bit more cocoa powder or let it sit for a few minutes to thicken.
Substitutions by Category
If you’re looking to customize your Chocolate Heritage Frosting Recipe, consider these substitutions:
- For Dairy-Free: Use almond milk or oat milk in place of whole milk and substitute the butter with a dairy-free butter alternative.
- For Low Sugar: You can use a sugar substitute like erythritol or stevia, but keep in mind that this may alter the texture.
- For Gluten-Free: Substitute all-purpose flour with a gluten-free flour blend.
- For Extra Flavor: Add a pinch of espresso powder to enhance the chocolate flavor or mix in chocolate chips for added texture.
Cook’s Notes
- Make sure the roux is completely cool before combining it with the butter. This prevents the butter from melting and ensures a fluffy frosting.
- This frosting can be made ahead of time and stored in the refrigerator. Just be sure to let it come to room temperature and re-whip before using.
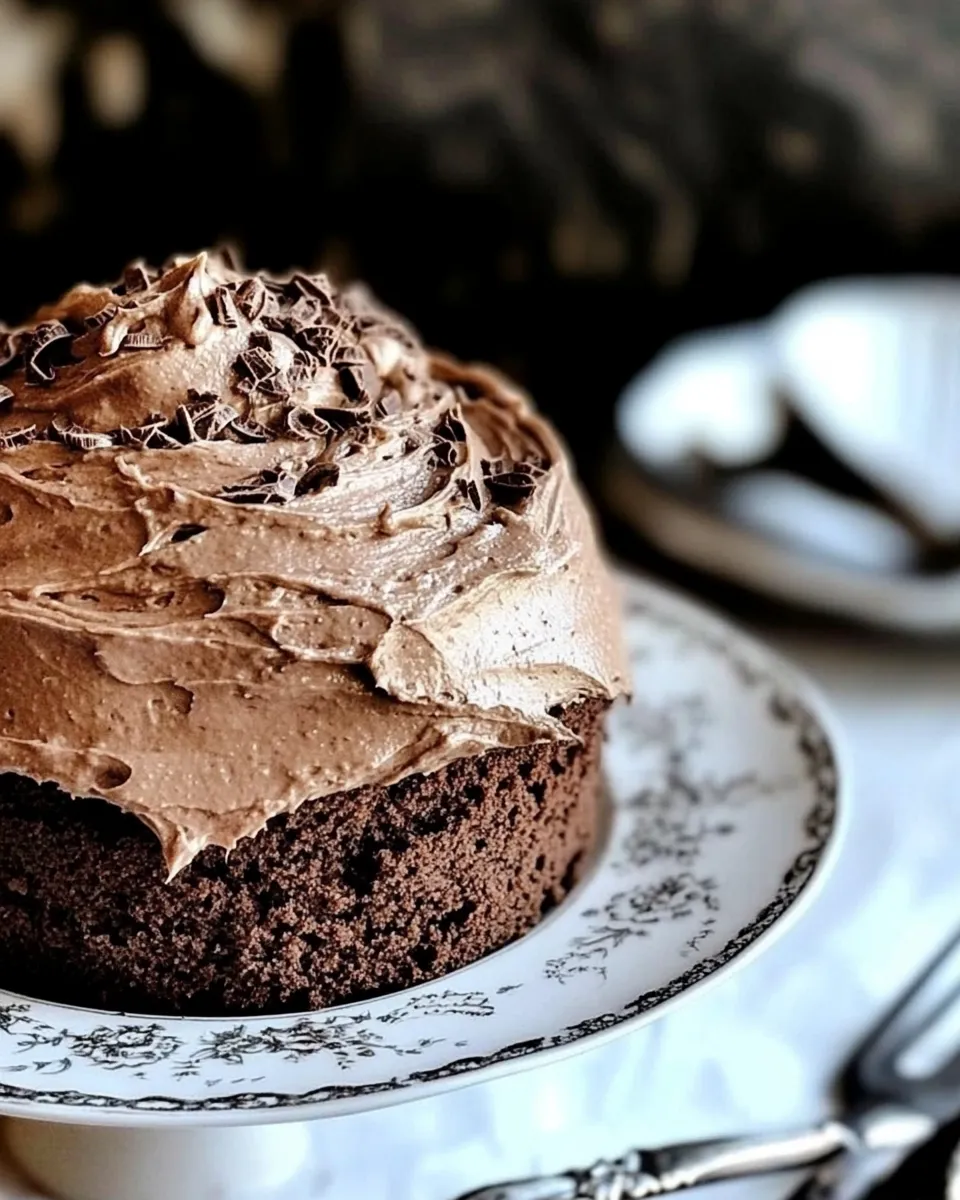
- This Chocolate Heritage Frosting Recipe is perfect for layering cakes and can also be used as a filling for cookies.
- Feel free to adjust the cocoa powder amount to suit your taste; for a richer chocolate flavor, you can add more.
Refrigerate, Freeze, Reheat
If you have leftover frosting, it can be refrigerated in an airtight container for up to one week. To freeze, place the frosting in a freezer-safe container and store for up to three months. When you’re ready to use it, simply thaw it in the refrigerator overnight and re-whip it before spreading.
Your Top Questions
Can I make this frosting ahead of time?
Yes! You can make this Chocolate Heritage Frosting Recipe in advance. Just store it in the refrigerator and allow it to come to room temperature before re-whipping it for a fluffy texture.
How do I store leftover frosting?
Leftover frosting can be stored in an airtight container in the refrigerator for about a week. For longer storage, freeze it for up to three months.
Can I use this frosting for piping decorations?
Absolutely! This frosting is thick enough to hold its shape when piped, making it perfect for decorating cupcakes and cakes.
What type of cake pairs best with this frosting?
This Chocolate Heritage Frosting Recipe complements a variety of cakes, but it pairs exceptionally well with chocolate, vanilla, or red velvet cakes. Its rich flavor enhances any dessert!
That’s a Wrap
This Chocolate Heritage Frosting Recipe is not just a treat; it’s a celebration of flavors and memories. With its creamy texture and rich chocolate taste, it’s bound to become a staple in your baking repertoire. Whether you’re frosting a birthday cake, a holiday dessert, or simply indulging yourself, this frosting is sure to delight. Enjoy making it, and don’t be surprised if it becomes a family favorite!
Chocolate Heritage Frosting Recipe
Ingredients
Equipment
Method
- In a medium saucepan, whisk together the all-purpose flour and whole milk over medium heat. Continue to whisk until the mixture thickens and starts to bubble, about 5-7 minutes. Remove from heat and let cool completely.
- In a mixing bowl, beat the softened unsalted butter and granulated sugar together using an electric mixer on medium speed until light and fluffy, about 3-5 minutes.
- Once the roux has cooled, add it to the butter and sugar mixture. Beat on medium speed until well combined and smooth.
- Sift the unsweetened cocoa powder into the frosting mixture along with the vanilla extract. Beat until fully incorporated and the frosting is fluffy and creamy.
- If the frosting is too thick, add a tablespoon of milk at a time until it reaches the desired consistency. If it’s too thin, add more cocoa powder or let it sit for a few minutes to thicken.
Notes
- Ensure the roux is completely cool before combining it with the butter to maintain a fluffy texture.
- This frosting can be made ahead and stored in the refrigerator; re-whip before using.
- Perfect for layering cakes or as a filling for cookies.