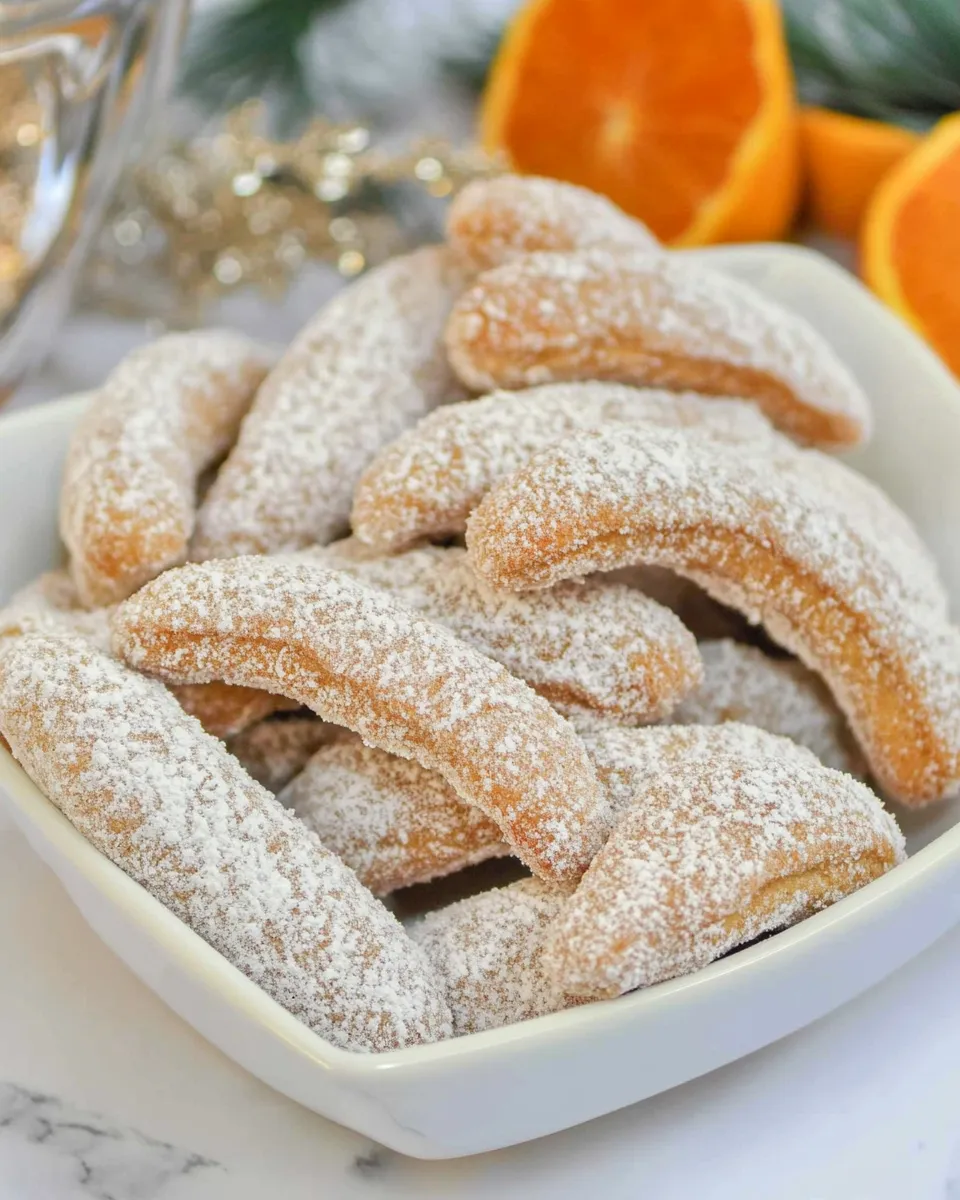
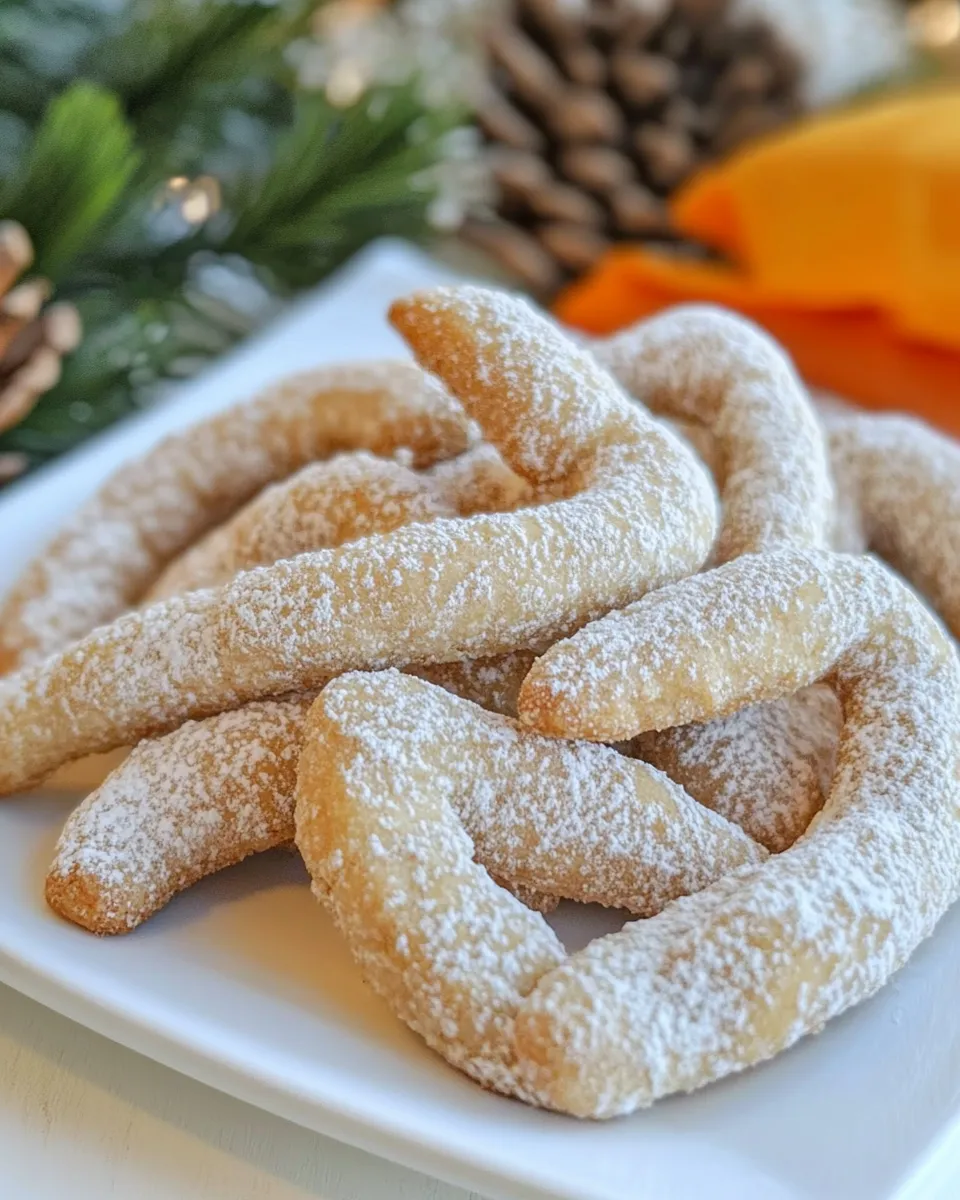
Walnut Crescent Cookies
When it comes to classic holiday treats, Walnut Crescent Cookies hold a special place in the hearts of many. These delicate, buttery cookies, shaped like crescents, are not only a feast for the eyes but also a delight for the taste buds. With their nutty flavor and melt-in-your-mouth texture, they make for the perfect accompaniment to your afternoon tea or coffee. Whipping up a batch of these cookies is a wonderful way to create cozy memories during the festive season or any time of the year. Let’s dive into the world of Walnut Crescent Cookies and discover how to make this delicious treat.
Why Walnut Crescent Cookies is Worth Your Time

Walnut Crescent Cookies are a timeless favorite, and for good reason. They are incredibly easy to make and require only a handful of simple ingredients. The combination of ground walnuts and rich butter creates a nutty flavor that is both satisfying and comforting. These cookies are perfect for sharing with loved ones, making them an ideal choice for gatherings or holiday celebrations. Plus, their unique crescent shape adds a touch of elegance to any dessert platter. Once you experience the delightful crunch paired with the soft, buttery texture, you’ll understand why these cookies are cherished by so many.
What You’ll Need
To create these delightful Walnut Crescent Cookies, gather the following ingredients:
- 100g butter, softened
- 100g ground walnuts
- 2 tablespoons powdered sugar
- 1 teaspoon vanilla paste
- 1 pinch of salt
- 2 egg yolks
- 200-220g flour
- Powdered sugar for decoration
These ingredients come together to create a cookie that is rich in flavor and pleasing to the palate.
Appliances & Accessories
Before you start baking, make sure you have the following appliances and accessories on hand:
- Mixing bowl: Essential for combining your ingredients.
- Electric mixer or whisk: Helps achieve a smooth dough.
- Baking sheet: For placing the cookies while they bake.
- Parchment paper: To prevent the cookies from sticking to the baking sheet.
- Measuring cups and spoons: To ensure accurate measurements of your ingredients.
- Cooling rack: To let your cookies cool properly after baking.
Having these tools ready will streamline your baking process and make it enjoyable.
How to Prepare Walnut Crescent Cookies

Follow these easy steps to prepare your Walnut Crescent Cookies:
Step 1: Preheat Your Oven
Begin by preheating your oven to 180°C (350°F). This ensures that your cookies bake evenly and achieve that perfect golden color.
Step 2: Cream the Butter and Sugar
In a large mixing bowl, combine the softened butter and powdered sugar. Use an electric mixer or whisk to cream them together until the mixture is light and fluffy. This process should take about 2-3 minutes.
Step 3: Add Egg Yolks and Vanilla
Next, add the egg yolks and vanilla paste to the bowl. Mix until well combined, ensuring everything is incorporated smoothly.
Step 4: Incorporate Dry Ingredients
In a separate bowl, whisk together the ground walnuts, flour, and salt. Gradually add this dry mixture to the butter mixture, mixing until a soft dough forms. Be careful not to overmix; you want the dough to be just combined.
Step 5: Shape the Cookies
Once the dough is ready, take small portions and roll them into crescent shapes. Aim for about 1 inch in length. Place the shaped cookies onto a baking sheet lined with parchment paper, leaving some space between each one.
Step 6: Bake the Cookies
Bake the cookies in your preheated oven for about 15-20 minutes, or until they are lightly golden. Keep an eye on them during the last few minutes to prevent over-baking.
Step 7: Cool and Decorate
Once baked, remove the cookies from the oven and let them cool on the baking sheet for a few minutes. Then, transfer them to a cooling rack. Once completely cooled, dust them with powdered sugar for that finishing touch.
Warm & Cool Weather Spins
Walnut Crescent Cookies are versatile, and you can adapt them for different seasons:
- Warm Weather: Add a pinch of lemon zest for a refreshing twist that brightens the flavor.
- Cool Weather: Incorporate spices like cinnamon or nutmeg to give your cookies a cozy, warm flavor that’s perfect for fall and winter.
- Festive Touch: During the holiday season, you can add a hint of almond extract instead of vanilla for a deeper flavor profile.
These variations can help you keep the recipe exciting year-round.
Pitfalls & How to Prevent Them
Baking can sometimes be tricky, but here are some common pitfalls and how to avoid them:
- Overmixing the Dough: Be cautious not to overmix once you add the flour. This can result in tough cookies.
- Inconsistent Sizes: Ensure that each cookie is of similar size for even baking. A small cookie scoop can help.
- Not Preheating the Oven: Always preheat your oven before baking to ensure consistent results.
- Storage Issues: If you want your cookies to stay fresh, store them in an airtight container at room temperature. This prevents them from becoming stale.
Being aware of these potential issues will help you achieve the best results.
Save It for Later
If you want to save your Walnut Crescent Cookies for later, here are some tips:
These cookies can be stored in an airtight container at room temperature for up to a week. For longer storage, consider freezing the baked cookies. Place them in a single layer on a baking sheet, freeze until solid, then transfer them to a freezer-safe container. They can last up to three months in the freezer. When you’re ready to enjoy them again, simply thaw at room temperature and dust with powdered sugar before serving.
Reader Questions
Can I use nuts other than walnuts in this recipe?
Absolutely! While walnuts are traditional, you can substitute them with ground almonds or pecans for a different flavor profile.
What can I do if the dough is too crumbly?
If your dough seems too crumbly, try adding a teaspoon of cold water or an extra egg yolk to help bring it together.
Can I make these cookies gluten-free?
Yes, you can substitute the all-purpose flour with a gluten-free flour blend. Just ensure it is a blend that can be used for baking.
How can I make these cookies more festive for the holidays?
Consider adding festive spices like cinnamon or nutmeg, or even dipping the ends in melted chocolate before dusting with powdered sugar for a luxurious touch.
Let’s Eat
Now that you have all the tips, tricks, and steps to create the perfect Walnut Crescent Cookies, it’s time to enjoy the fruits of your labor. Share these delightful treats with friends and family, or indulge in them yourself while sipping your favorite beverage. Each bite is a celebration of flavor and tradition, making these cookies a beloved addition to any dessert table. Happy baking!
The experience of making Walnut Crescent Cookies is not just about the final product; it is about the joy of creating something delicious with your own hands. So roll up your sleeves, gather your ingredients, and let the aroma of freshly baked cookies fill your kitchen. You’ll be glad you did!
Walnut Crescent Cookies
Ingredients
Equipment
Method
- Step 1: Preheat your oven to 180°C (350°F).
- Step 2: In a large mixing bowl, cream together the softened butter and powdered sugar until light and fluffy.
- Step 3: Add the egg yolks and vanilla paste, mixing until well combined.
- Step 4: In a separate bowl, whisk together ground walnuts, flour, and salt. Gradually add this to the butter mixture until a soft dough forms.
- Step 5: Roll small portions of dough into crescent shapes and place on a baking sheet lined with parchment paper.
- Step 6: Bake for 15-20 minutes or until lightly golden. Watch closely to avoid over-baking.
- Step 7: Cool on the baking sheet for a few minutes, then transfer to a cooling rack. Dust with powdered sugar once cooled.
Notes
- Store cookies in an airtight container at room temperature for up to a week.
- For longer storage, freeze in a single layer and transfer to a container after solid.
- Add lemon zest for a refreshing twist in warm weather.
- In cool weather, incorporate spices like cinnamon for added warmth.
- Ensure even baking by keeping cookie sizes consistent.