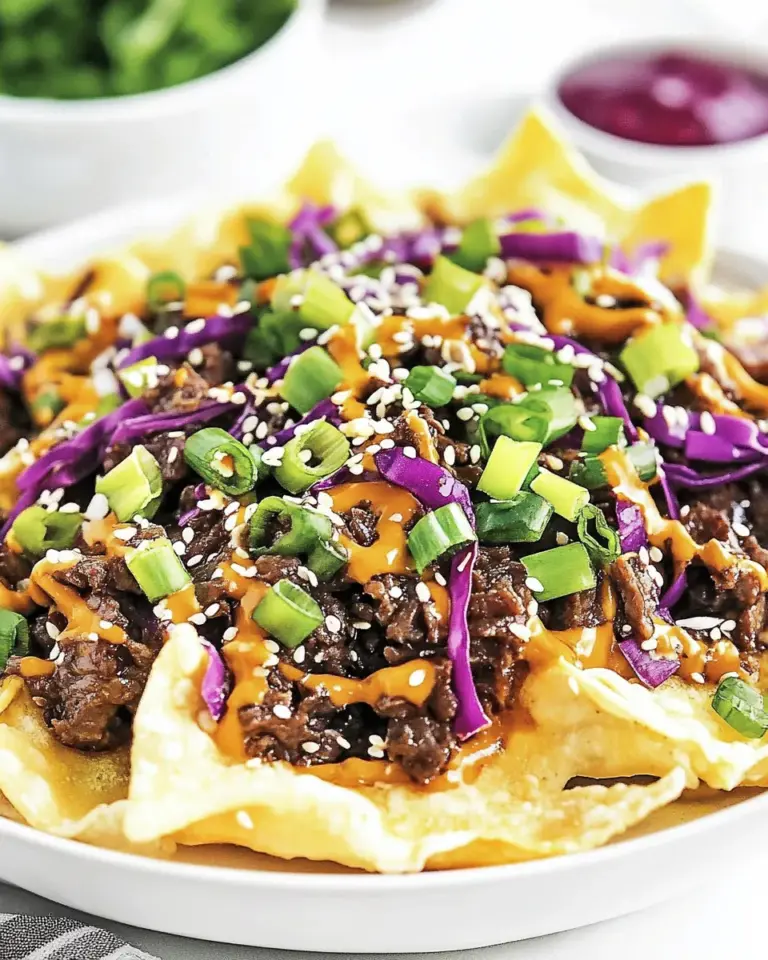
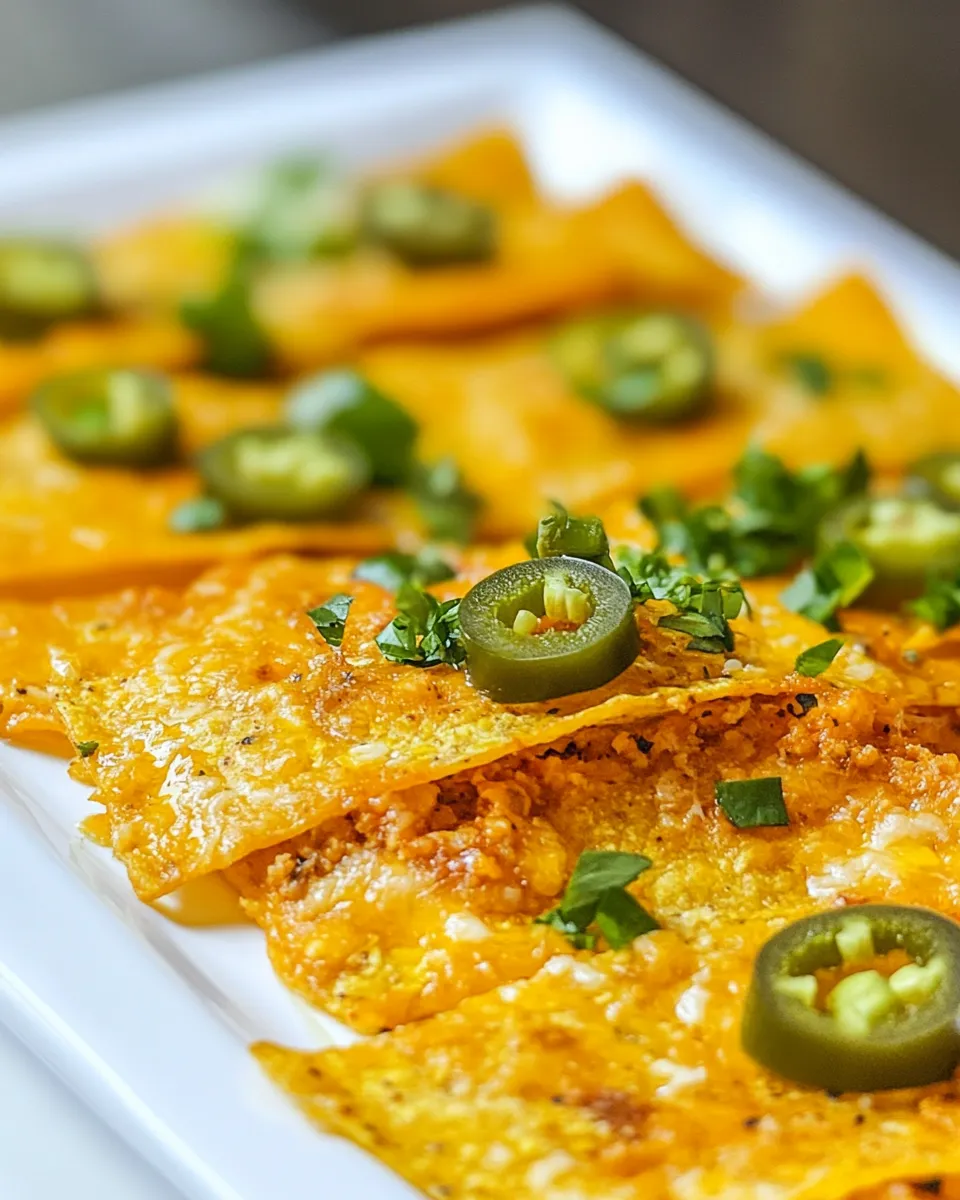
Best-Ever Classic Nachos
If you’re looking for the ultimate snack or appetizer that brings everyone together, look no further than these Best-Ever Classic Nachos. Crispy, cheesy, and loaded with flavor, nachos are a crowd-pleaser at parties, game days, or even a cozy night in. With just a handful of simple ingredients, you can create a delicious plate of nachos that will have your friends and family coming back for seconds. Let’s dive into what makes these nachos the best ever!
Top Reasons to Make Best-Ever Classic Nachos

– **Quick and Easy**: With minimal prep time, these nachos come together in no time, making them perfect for unexpected guests or late-night cravings.
– **Customizable**: You can easily adapt the toppings to suit your taste, whether you prefer spicy jalapeños, guacamole, or additional proteins.
– **Great for Sharing**: Nachos are meant to be shared! They create a fun and communal dining experience.
– **Flavorful and Satisfying**: The combination of crunchy tortillas, melted cheese, and zesty toppings makes every bite delicious.
– **Perfect for Any Occasion**: Whether it’s a casual gathering or a celebration, nachos fit right in.
The Essentials
- Vegetable oil for frying: This will give the tortillas their crispy texture.
- 6 corn tortillas (yellow): The base of your nachos, providing that authentic crunch.
- Kosher salt or coarse sea salt: For sprinkling on the tortillas to enhance flavor.
- 1 lb mild cheddar cheese (shredded): Creates a gooey, cheesy layer that’s irresistible.
- ½ cup jalapeño peppers (pickled, finely minced): Adds a kick of heat and tanginess.
What’s in the Gear List
- Deep frying pan or heavy-bottom pot: Essential for frying the tortillas to a perfect crisp.
- Slotted spoon: For safely removing the fried tortillas from the oil.
- Paper towels: To drain excess oil from the fried tortillas.
- Baking sheet: For assembling your nachos before baking.
- Oven: To melt the cheese and bring everything together.
Best-Ever Classic Nachos: How It’s Done

Step 1: Prepare the Tortillas
Begin by cutting the corn tortillas into triangles. You can stack them and use a sharp knife or kitchen scissors for quick cutting.
Step 2: Heat the Oil
In a deep frying pan or heavy-bottom pot, pour enough vegetable oil to cover the bottom of the pan by about an inch. Heat the oil over medium-high heat until it reaches about 350°F (175°C).
Step 3: Fry the Tortillas
Carefully add a few tortilla triangles at a time to the hot oil. Fry for about 2-3 minutes per side, or until golden brown and crispy. Use a slotted spoon to flip them halfway through.
Step 4: Drain and Season
Once fried, remove the tortillas from the oil and place them on a plate lined with paper towels to drain excess oil. While they’re still hot, sprinkle with kosher or coarse sea salt.
Step 5: Assemble the Nachos
Preheat your oven to 350°F (175°C). On a baking sheet, layer the fried tortillas, covering them with shredded mild cheddar cheese and minced jalapeños.
Step 6: Bake
Place the baking sheet in the oven and bake for about 10 minutes, or until the cheese is completely melted and bubbly.
Step 7: Serve and Enjoy
Remove the nachos from the oven and let them cool for a minute. Serve immediately with your favorite sides, such as salsa, guacamole, or sour cream.
Allergy-Friendly Swaps
- Use gluten-free corn tortillas for a gluten-free version.
- Swap cheddar cheese with your favorite dairy-free cheese for a vegan option.
- For a milder flavor, replace jalapeños with bell peppers.
- Utilize olive oil or avocado oil for frying if preferred.
Pitfalls & How to Prevent Them
- Greasy Tortillas: Ensure the oil is hot enough before adding the tortillas; this helps them crisp up rather than absorb oil.
- Burnt Cheese: Keep an eye on the nachos in the oven to prevent the cheese from burning; every oven is different.
- Stale Tortillas: Use fresh corn tortillas for the best flavor and texture.
- Uneven Toppings: Distribute cheese and jalapeños evenly to ensure every bite is flavorful.
Meal Prep & Storage Notes
For meal prep, you can fry the tortillas and store them in an airtight container for up to 2 days. When ready to serve, just add cheese and jalapeños, and bake as instructed. Leftover nachos can be stored in the fridge for up to 1 day, but keep in mind that they may lose their crispiness. Reheat them in the oven for a few minutes to revive some texture.
Reader Questions
Can I use other types of cheese?
Absolutely! Feel free to experiment with different cheeses like Monterey Jack, pepper jack, or even a blend of cheeses for extra flavor.
How can I make my nachos spicier?
Add fresh sliced jalapeños, spicy salsa, or even a drizzle of hot sauce over the top before serving for an extra kick!
What can I add as toppings besides cheese and jalapeños?
Popular toppings include black beans, diced tomatoes, avocado, green onions, and sour cream. Get creative with your favorites!
Can I make these nachos in advance?
While the fried tortillas can be made ahead and stored, it’s best to assemble and bake the nachos just before serving to maintain their crispiness.
In Closing
Whether you’re hosting a game day party or simply indulging in a movie night at home, these Best-Ever Classic Nachos are sure to impress. With their crispy texture, gooey cheese, and zesty jalapeños, they provide a perfect balance of flavors and textures. So grab your ingredients, gather your friends, and get ready to enjoy a plate of nachos that will leave everyone satisfied. Happy nacho-making!

Best-Ever Classic Nachos
Ingredients
Equipment
Method
- Step 1: Prepare the Tortillas. Begin by cutting the corn tortillas into triangles. You can stack them and use a sharp knife or kitchen scissors for quick cutting.
- Step 2: Heat the Oil. In a deep frying pan or heavy-bottom pot, pour enough vegetable oil to cover the bottom of the pan by about an inch. Heat the oil over medium-high heat until it reaches about 350°F (175°C).
- Step 3: Fry the Tortillas. Carefully add a few tortilla triangles at a time to the hot oil. Fry for about 2-3 minutes per side, or until golden brown and crispy. Use a slotted spoon to flip them halfway through.
- Step 4: Drain and Season. Once fried, remove the tortillas from the oil and place them on a plate lined with paper towels to drain excess oil. While they're still hot, sprinkle with kosher or coarse sea salt.
- Step 5: Assemble the Nachos. Preheat your oven to 350°F (175°C). On a baking sheet, layer the fried tortillas, covering them with shredded mild cheddar cheese and minced jalapeños.
- Step 6: Bake. Place the baking sheet in the oven and bake for about 10 minutes, or until the cheese is completely melted and bubbly.
- Step 7: Serve and Enjoy. Remove the nachos from the oven and let them cool for a minute. Serve immediately with your favorite sides, such as salsa, guacamole, or sour cream.
Notes
- For a gluten-free version, use gluten-free corn tortillas.
- Experiment with different cheeses like Monterey Jack for variety.
- Store fried tortillas in an airtight container for up to 2 days for meal prep.