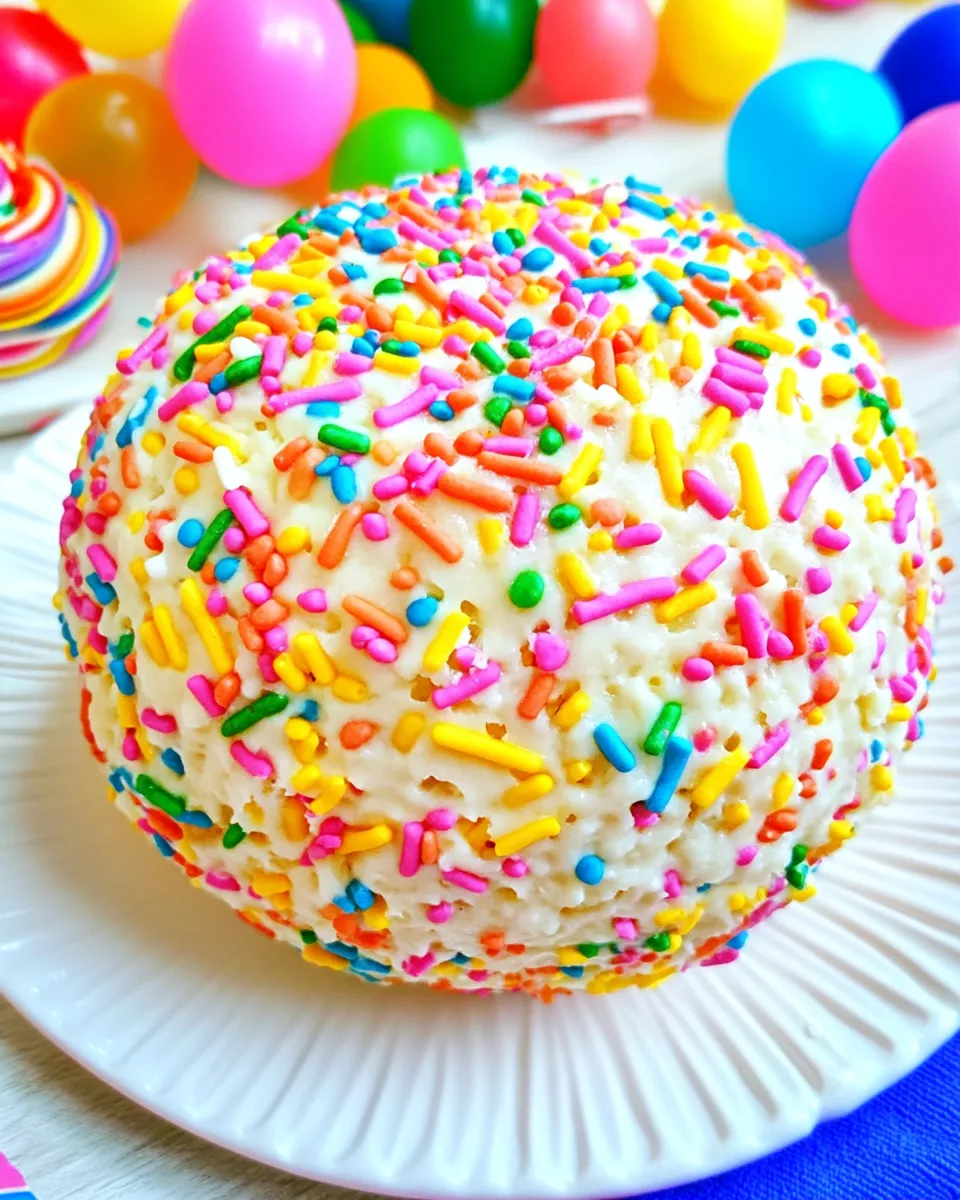
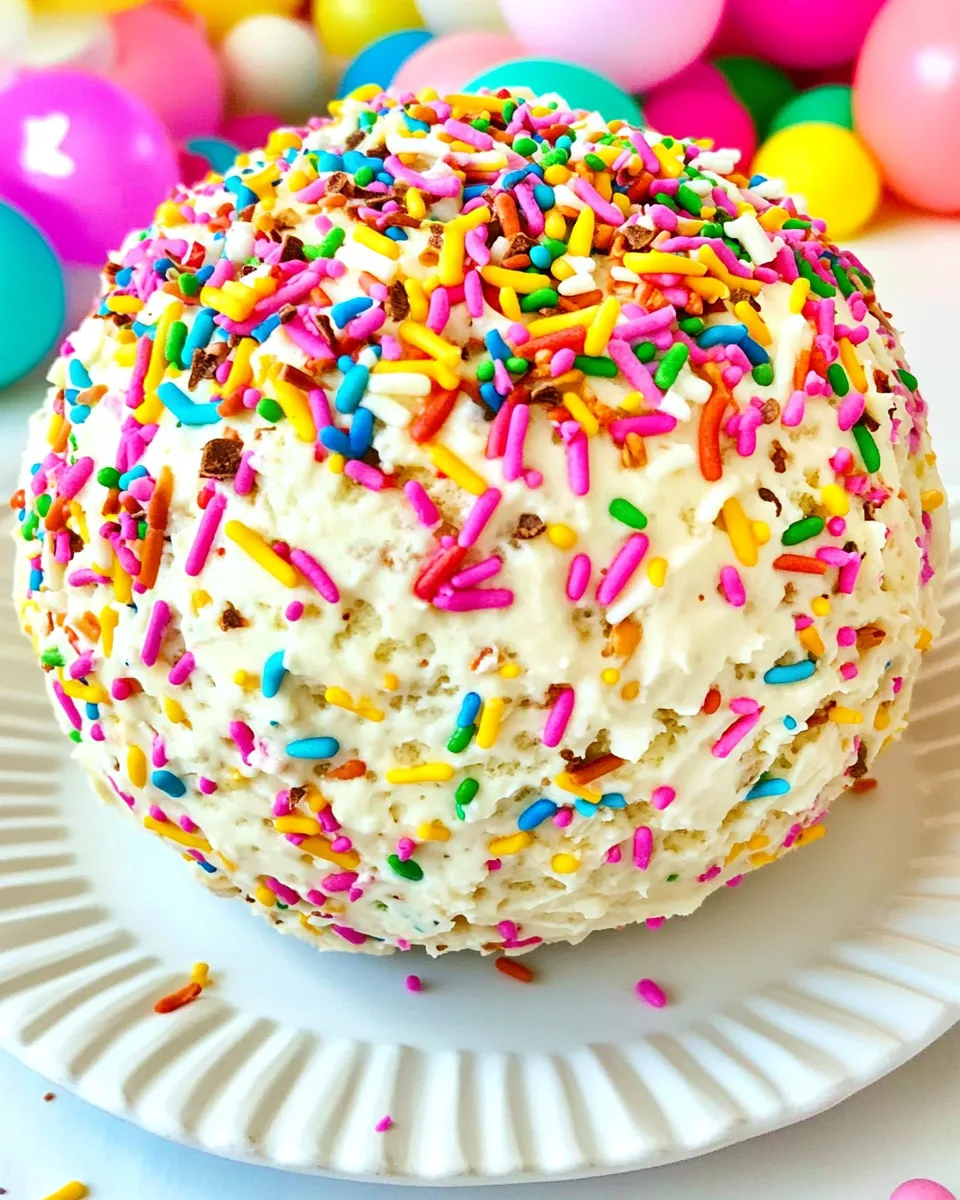
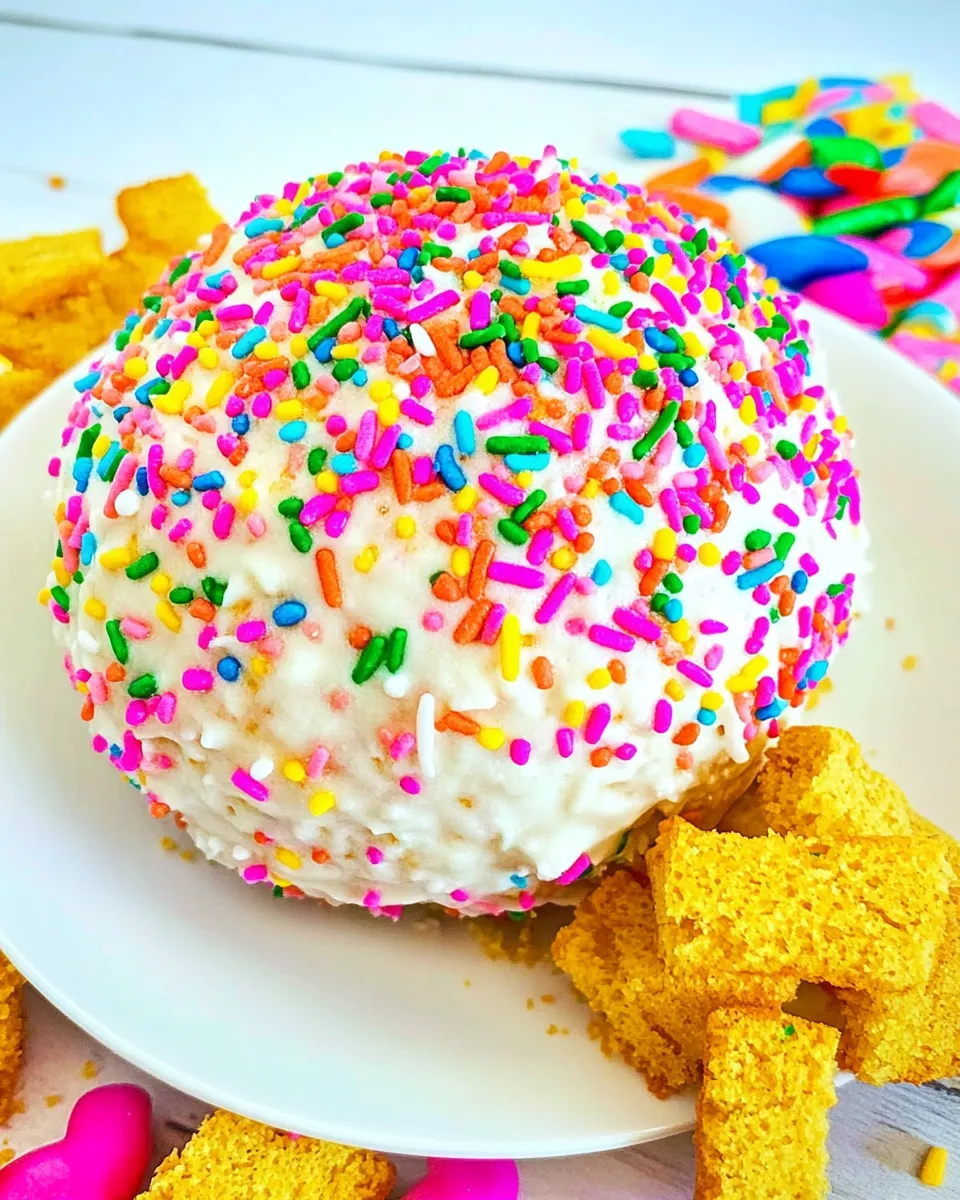
Birthday Cake Cheeseball
What better way to celebrate a birthday than with a fun and festive dessert that’s both delicious and visually appealing? Enter the Birthday Cake Cheeseball! This whimsical treat is perfect for parties, gatherings, or just a delightful indulgence at home. With the rich flavors of cream cheese and butter blended with sweet Funfetti cake mix, this dessert is sure to bring a smile to anyone’s face. Plus, it’s simple to make and can be prepared ahead of time, giving you more time to enjoy the festivities. Let’s dive into this delightful recipe that’s perfect for all ages!
What You’ll Love About This Recipe
There are so many reasons to love this Birthday Cake Cheeseball! Here are just a few:
- Fun and Festive: The rainbow sprinkles and cake mix give it a celebratory feel.
- Easy to Make: No baking is required, making it a quick and simple dessert option.
- Customizable: You can add different flavors or toppings to suit your taste.
- Perfect for Sharing: This cheeseball is great for parties or gatherings, encouraging everyone to dig in.
The Ingredient Lineup
To create this delicious Birthday Cake Cheeseball, you’ll need the following ingredients:
- 16 oz cream cheese, softened – This forms the creamy base of the cheeseball.
- 1 stick unsalted butter (1/2 cup), softened – Adds richness and depth of flavor.
- 13.25 oz Funfetti cake mix, heat-treated – Gives the cake flavor without the baking hassle. (Make sure it’s heat-treated for safety.)
- 1 cup powdered sugar – Sweetens the mixture perfectly.
- 2 teaspoons vanilla extract – For that classic cake flavor.
- 1-1/4 cups rainbow sprinkles, divided (about 7 oz) – Adds color and texture, making it visually appealing.
Must-Have Equipment
Before you start making your Birthday Cake Cheeseball, gather these essential tools:
- Mixing Bowl: A large bowl is needed for mixing all the ingredients together.
- Hand Mixer or Stand Mixer: This will help achieve a smooth and creamy consistency.
- Plastic Wrap: To form and chill the cheeseball properly.
- Serving Platter: To display your beautiful creation when it’s time to serve.
Build Birthday Cake Cheeseball Step by Step
Follow these simple steps to whip up your Birthday Cake Cheeseball:
Step 1: Prepare Your Ingredients
Make sure your cream cheese and butter are softened to room temperature. This will ensure a smooth mixture.
Step 2: Mix Cream Cheese and Butter
In a large mixing bowl, combine the softened cream cheese and butter. Using a hand mixer or stand mixer, beat them together until creamy and well combined.
Step 3: Add Cake Mix and Sugar
Gradually add the heat-treated Funfetti cake mix and powdered sugar to the cream cheese mixture. Mix on low speed until combined.
Step 4: Flavor It Up
Pour in the vanilla extract and mix until everything is evenly incorporated.
Step 5: Fold in the Sprinkles
Gently fold in 1 cup of the rainbow sprinkles, reserving the remaining 1/4 cup for coating the cheeseball.
Step 6: Shape and Chill
Using plastic wrap, form the mixture into a ball shape. Wrap tightly and refrigerate for at least 2 hours, or until firm.
Step 7: Coat with Sprinkles
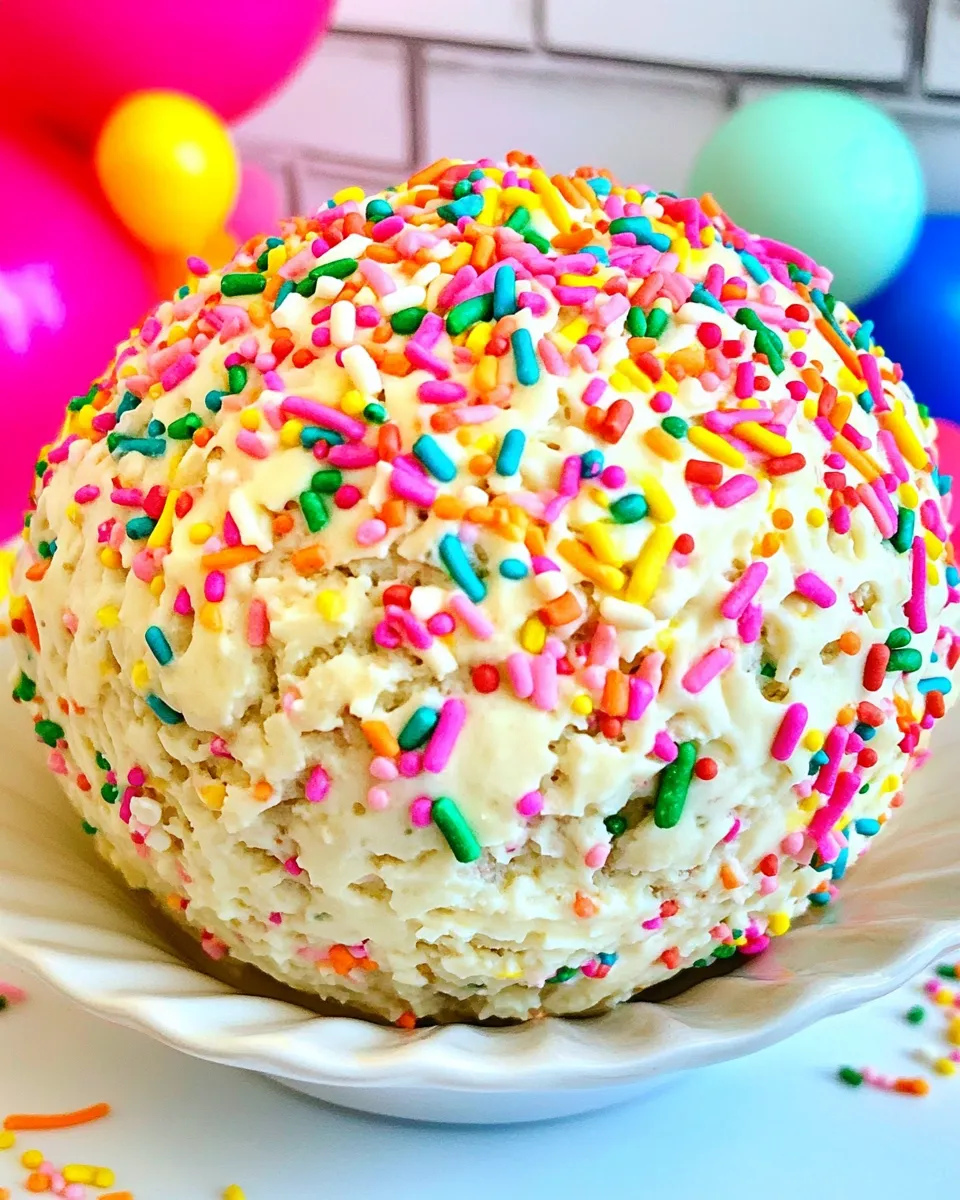
Once chilled, remove the cheeseball from the fridge and unwrap it. Roll the cheeseball in the remaining sprinkles until fully coated.
Step 8: Serve and Enjoy!
Transfer the cheeseball to a serving platter. Pair it with graham crackers, pretzels, or fruit for dipping. Enjoy the sweet celebration with friends and family!
Adaptations for Special Diets
If you have dietary restrictions or preferences, here are some adaptations for the Birthday Cake Cheeseball:
- Vegan Version: Substitute cream cheese and butter with vegan cream cheese and coconut oil.
- Gluten-Free: Use gluten-free cake mix for a gluten-free version.
- Reduced Sugar: Use a sugar substitute in place of powdered sugar to cut down on sweetness.
- Dairy-Free: Opt for dairy-free cream cheese and butter alternatives.
Mistakes Even Pros Make
Even seasoned bakers can make a few common mistakes when making a Birthday Cake Cheeseball. Here are some to watch out for:
- Not Softening the Cream Cheese: If the cream cheese is too cold, you’ll end up with a lumpy mixture.
- Skipping the Chilling Step: Chilling is crucial for achieving the right texture; don’t skip it!
- Using Regular Cake Mix: Ensure the cake mix is heat-treated; otherwise, it may not be safe to consume.
- Overmixing: Mixing too much can lead to a dense texture; mix just until combined.
Storing, Freezing & Reheating
To keep your Birthday Cake Cheeseball fresh and tasty, consider the following:
- Storing: Cover the cheeseball with plastic wrap and store it in the refrigerator for up to 5 days.
- Freezing: You can freeze the uncoated cheeseball for up to 2 months. Thaw in the fridge before coating and serving.
- Reheating: There’s no need to reheat, as this dessert is best served cold.
Popular Questions
Can I make the Birthday Cake Cheeseball in advance?
Absolutely! You can prepare it a day or two ahead of time. Just make sure to keep it refrigerated until you’re ready to serve.
What can I serve with the cheeseball?
This delightful cheeseball pairs well with graham crackers, pretzels, fresh fruit, or even vanilla wafers. Get creative!
Can I use another flavor of cake mix?
Yes! Feel free to use any flavor of heat-treated cake mix that you enjoy. Chocolate, red velvet, or lemon would all be fabulous options.
Is there a way to make this dessert lower in calories?
You can reduce the portion size or use lower-calorie alternatives for cream cheese and butter. Also, consider serving with fresh fruit instead of sweets for dipping.
Ready, Set, Cook
Now that you have all the details, it’s time to get in the kitchen and create your very own Birthday Cake Cheeseball. This recipe is not only a treat for the taste buds but also a feast for the eyes. With its vibrant colors and creamy texture, it’s sure to be the centerpiece of any celebration. So gather your ingredients, follow the steps, and enjoy the joy that comes with sharing this delightful dessert with your loved ones. Happy celebrating!
Birthday Cake Cheeseball
Ingredients
Equipment
Method
- Make sure your cream cheese and butter are softened to room temperature. This will ensure a smooth mixture.
- In a large mixing bowl, combine the softened cream cheese and butter. Using a hand mixer or stand mixer, beat them together until creamy and well combined.
- Gradually add the heat-treated Funfetti cake mix and powdered sugar to the cream cheese mixture. Mix on low speed until combined.
- Pour in the vanilla extract and mix until everything is evenly incorporated.
- Gently fold in 1 cup of the rainbow sprinkles, reserving the remaining 1/4 cup for coating the cheeseball.
- Using plastic wrap, form the mixture into a ball shape. Wrap tightly and refrigerate for at least 2 hours, or until firm.
- Once chilled, remove the cheeseball from the fridge and unwrap it. Roll the cheeseball in the remaining sprinkles until fully coated.
- Transfer the cheeseball to a serving platter. Pair it with graham crackers, pretzels, or fruit for dipping. Enjoy the sweet celebration with friends and family!
Notes
- Cover the cheeseball with plastic wrap and store it in the refrigerator for up to 5 days.
- You can freeze the uncoated cheeseball for up to 2 months. Thaw in the fridge before coating and serving.
- Consider using gluten-free cake mix for a gluten-free version.