M&Ms Marshmallow Dream Bars
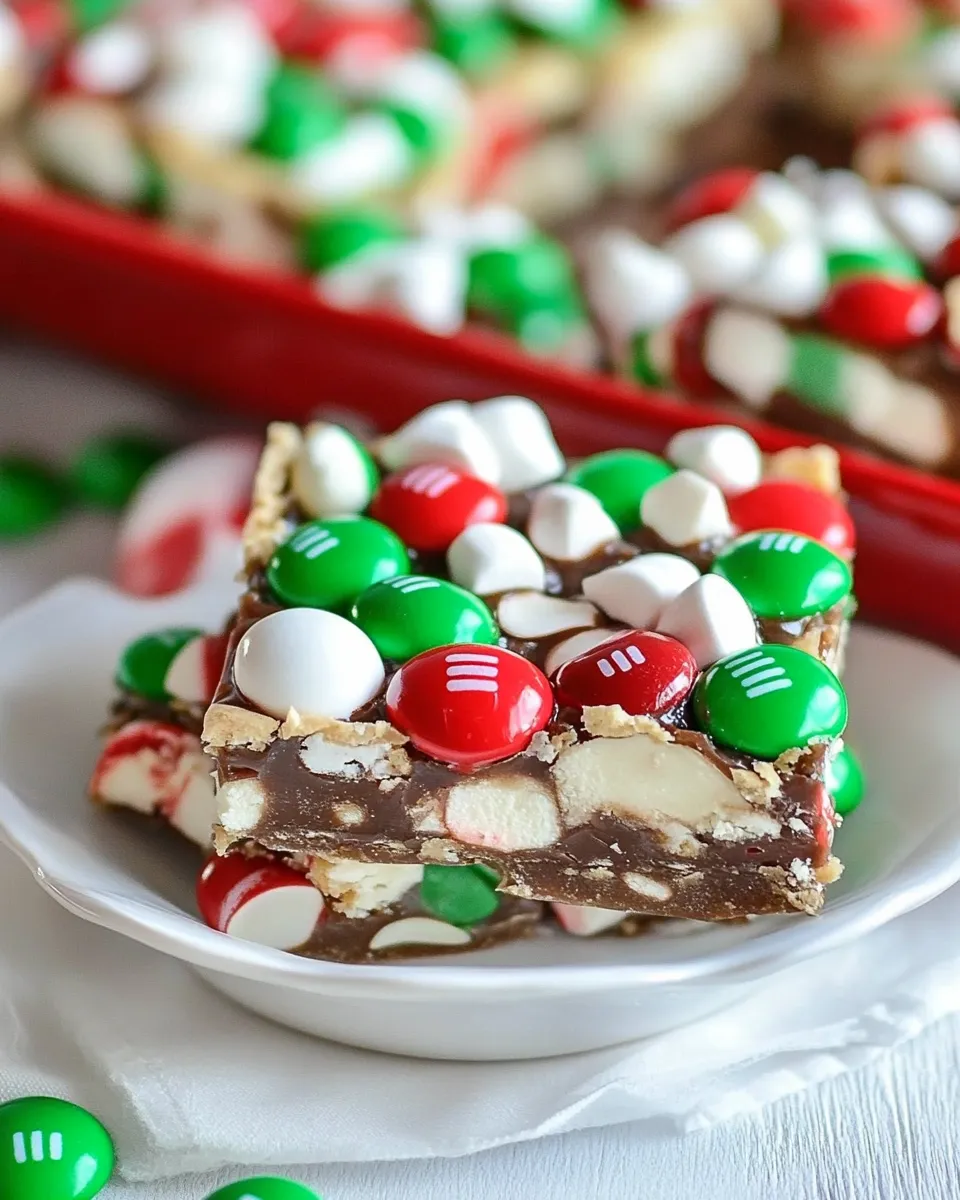
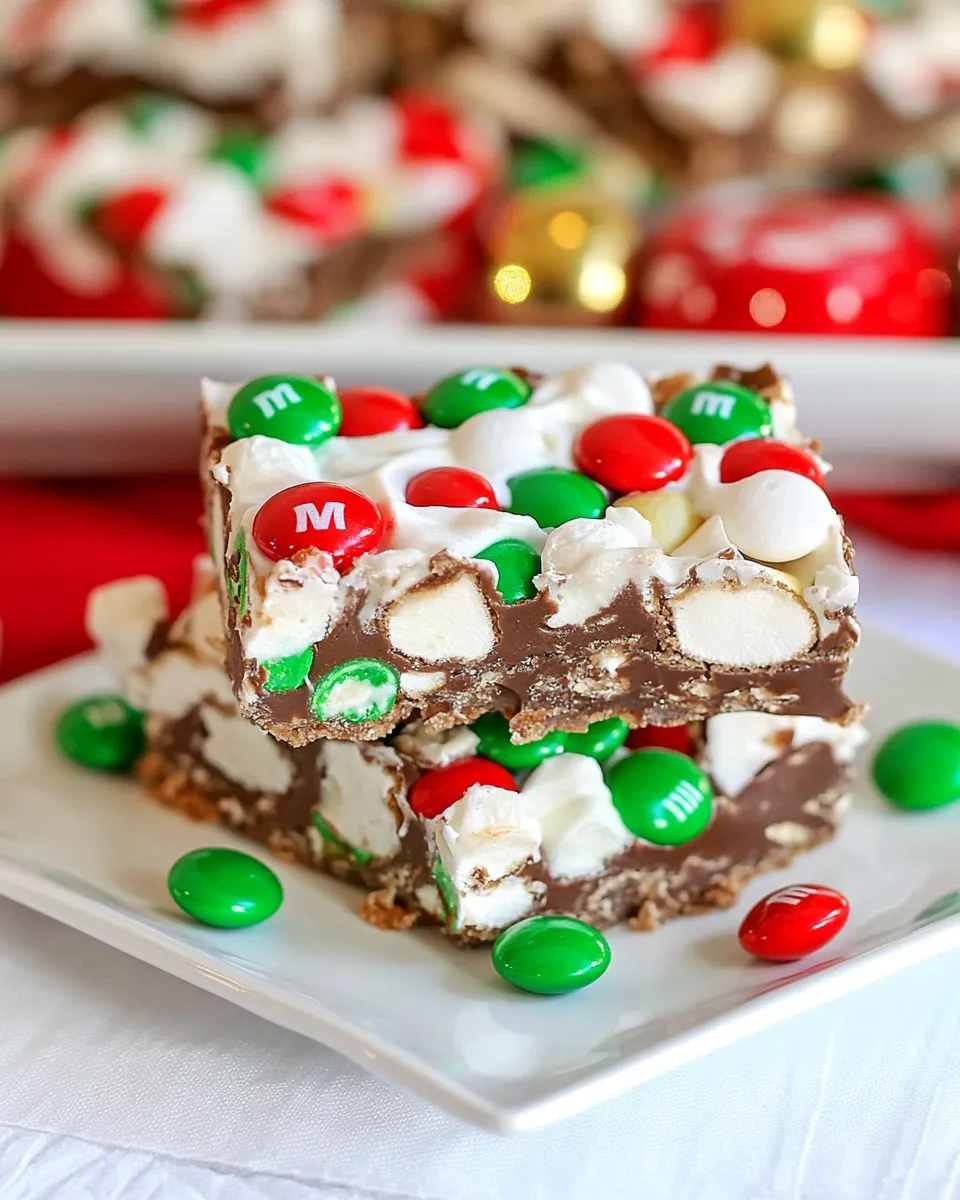
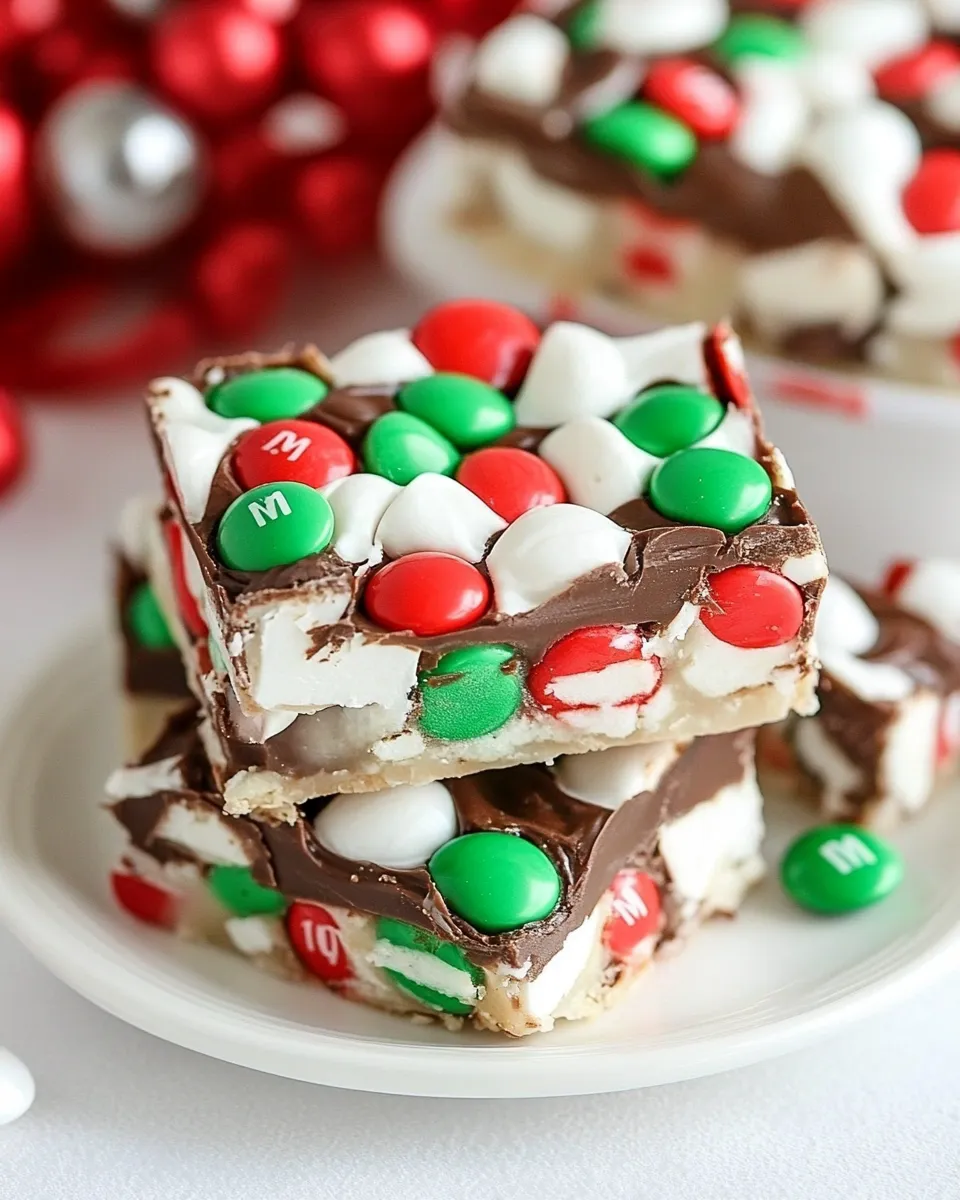
If you’re looking for a sweet treat that combines chewy marshmallows, creamy peanut butter, and a burst of chocolatey goodness, then M&Ms Marshmallow Dream Bars are just what you need! These bars are a delightful blend of flavors and textures, perfect for satisfying your sweet tooth or impressing guests at your next gathering. Imagine biting into a rich, chewy bar packed with delightful M&Ms and fluffy marshmallows melting in your mouth. Let’s dive into this dreamy recipe!
Why It Deserves a Spot

M&Ms Marshmallow Dream Bars deserve a prominent place in your dessert repertoire for several reasons. First, they are incredibly easy to make, requiring no special equipment or baking skills. Second, the combination of semi-sweet chocolate chips and butterscotch chips creates a rich, decadent flavor profile that pairs beautifully with the gooey marshmallows. Finally, these bars are highly customizable; you can mix and match add-ins like nuts or dried fruits to make them your own. Whether you’re serving them at a birthday party, a family gathering, or just indulging yourself, these bars are sure to be a hit!
Your Shopping Guide
Before we get started on making these delicious M&Ms Marshmallow Dream Bars, let’s gather our ingredients. Here’s a detailed shopping list:
- 12 oz package semi-sweet chocolate chips: The star of the show, providing rich chocolate flavor.
- 11 oz package butterscotch chips: Adds a sweet, buttery flavor that complements the chocolate.
- 1 cup creamy peanut butter: For a nutty, creamy texture that binds the ingredients together.
- 10.5 oz bag mini marshmallows: The gooey, fluffy goodness that makes these bars irresistible.
- 1 cup M&Ms: For color, crunch, and a burst of candy sweetness in every bite.
Gear Up: What to Grab
Before you start, make sure you have the right tools on hand. Here’s a quick list of what you’ll need:
- Large mixing bowl: For combining all your ingredients.
- Wooden spoon or spatula: To mix everything together thoroughly.
- 9×13 inch baking pan: The perfect size for these delicious bars.
- Parchment paper: For easy removal and cleanup.
- Measuring cups and spoons: To ensure accurate ingredient amounts.
Build M&Ms Marshmallow Dream Bars Step by Step
Now that we have our ingredients and tools ready, let’s get started on these mouthwatering M&Ms Marshmallow Dream Bars!
Step 1: Prepare the Baking Pan
Begin by preheating your oven to 350°F (175°C). Line your 9×13 inch baking pan with parchment paper, leaving some overhang on the sides for easy removal later.
Step 2: Melt the Chocolate and Butterscotch Chips
In a large mixing bowl, combine the semi-sweet chocolate chips and butterscotch chips. Microwave them in 30-second intervals, stirring in between, until completely melted and smooth. Be careful not to overheat!
Step 3: Mix in the Peanut Butter
Once the chocolate and butterscotch mixture is melted, stir in the creamy peanut butter until fully incorporated. The mixture should be smooth and glossy.
Step 4: Fold in the Marshmallows and M&Ms
Add the mini marshmallows and M&Ms to the chocolate-peanut butter mixture. Gently fold them in until they are evenly distributed throughout.
Step 5: Spread the Mixture in the Pan
Pour the mixture into the prepared baking pan, spreading it out evenly with a spatula. Make sure it reaches all corners of the pan.
Step 6: Bake to Perfection
Bake in the preheated oven for 20-25 minutes, or until the edges are set and the center is slightly soft. The bars will firm up as they cool.
Step 7: Cool and Cut
Remove the pan from the oven and let it cool completely on a wire rack. Once cooled, lift the bars out of the pan using the parchment paper overhang. Cut into squares and serve!
Health-Conscious Tweaks
If you’re looking to make some healthier modifications to your M&Ms Marshmallow Dream Bars, consider the following options:
- Use dark chocolate chips: For a richer flavor and less sugar.
- Opt for natural peanut butter: Choose a brand with no added sugars or oils.
- Replace marshmallows with dried fruit: For a chewy texture with added vitamins.
- Experiment with nut butters: Almond or cashew butter can add different flavors and nutrients.
Troubles You Can Avoid
Making M&Ms Marshmallow Dream Bars is a breeze, but here are a few common pitfalls to steer clear of:
- Overheating the chocolate: Melt it just until smooth to avoid a grainy texture.
- Not letting the bars cool completely: Cutting them too soon will result in messy bars.
- Skipping the parchment paper: This will make it difficult to remove the bars from the pan.
- Using old marshmallows: Fresh marshmallows will give the best texture and flavor.
Save for Later: Storage Tips
To keep your M&Ms Marshmallow Dream Bars fresh and delicious, follow these simple storage tips:
- Store in an airtight container: This keeps them moist and prevents them from drying out.
- Keep at room temperature: They’re best enjoyed soft and chewy, so avoid refrigeration if possible.
- Freeze for longer storage: Wrap individual bars in plastic wrap and place them in a freezer-safe bag for up to three months.
M&Ms Marshmallow Dream Bars Q&A
Can I use different types of chocolate chips?
Absolutely! You can mix and match chocolate chips according to your taste. Milk chocolate, white chocolate, or even flavored chips can add a unique twist.
How do I make these bars gluten-free?
Ensure that all your ingredients, including the chocolate chips, are labeled gluten-free. This way, you can enjoy these bars without any gluten worries.
Can I make these ahead of time?
Yes! M&Ms Marshmallow Dream Bars can be made a day in advance. Just store them in an airtight container to keep them fresh.
What can I serve with these bars?
These bars pair wonderfully with a scoop of vanilla ice cream or a drizzle of chocolate sauce. They also make a perfect snack alongside a glass of milk!
Bring It to the Table
These M&Ms Marshmallow Dream Bars are a delightful addition to any dessert table or gathering. Their vibrant colors and indulgent flavors make them an eye-catching treat that everyone will love. Whether you’re serving them at a party, sharing them with friends, or enjoying them as a sweet snack at home, they are sure to bring joy to all who try them.
Indulge in the blissful combination of chocolate, butterscotch, peanut butter, marshmallows, and M&Ms that make these bars so irresistible. With a simple process and easily accessible ingredients, you’ll find yourself making these bars again and again. Get ready to take your taste buds on a dreamy adventure with these delicious M&Ms Marshmallow Dream Bars!
M&Ms Marshmallow Dream Bars
Ingredients
Equipment
Method
- Preheat your oven to 350°F (175°C). Line your 9x13 inch baking pan with parchment paper, leaving some overhang on the sides for easy removal later.
- In a large mixing bowl, combine the semi-sweet chocolate chips and butterscotch chips. Microwave them in 30-second intervals, stirring in between, until completely melted and smooth. Be careful not to overheat!
- Once the chocolate and butterscotch mixture is melted, stir in the creamy peanut butter until fully incorporated. The mixture should be smooth and glossy.
- Add the mini marshmallows and M&Ms to the chocolate-peanut butter mixture. Gently fold them in until they are evenly distributed throughout.
- Pour the mixture into the prepared baking pan, spreading it out evenly with a spatula. Make sure it reaches all corners of the pan.
- Bake in the preheated oven for 20-25 minutes, or until the edges are set and the center is slightly soft. The bars will firm up as they cool.
- Remove the pan from the oven and let it cool completely on a wire rack. Once cooled, lift the bars out of the pan using the parchment paper overhang. Cut into squares and serve!
Notes
- Store in an airtight container for optimal freshness.
- For a richer flavor, use dark chocolate chips.
- These bars can be frozen for up to three months if wrapped well.