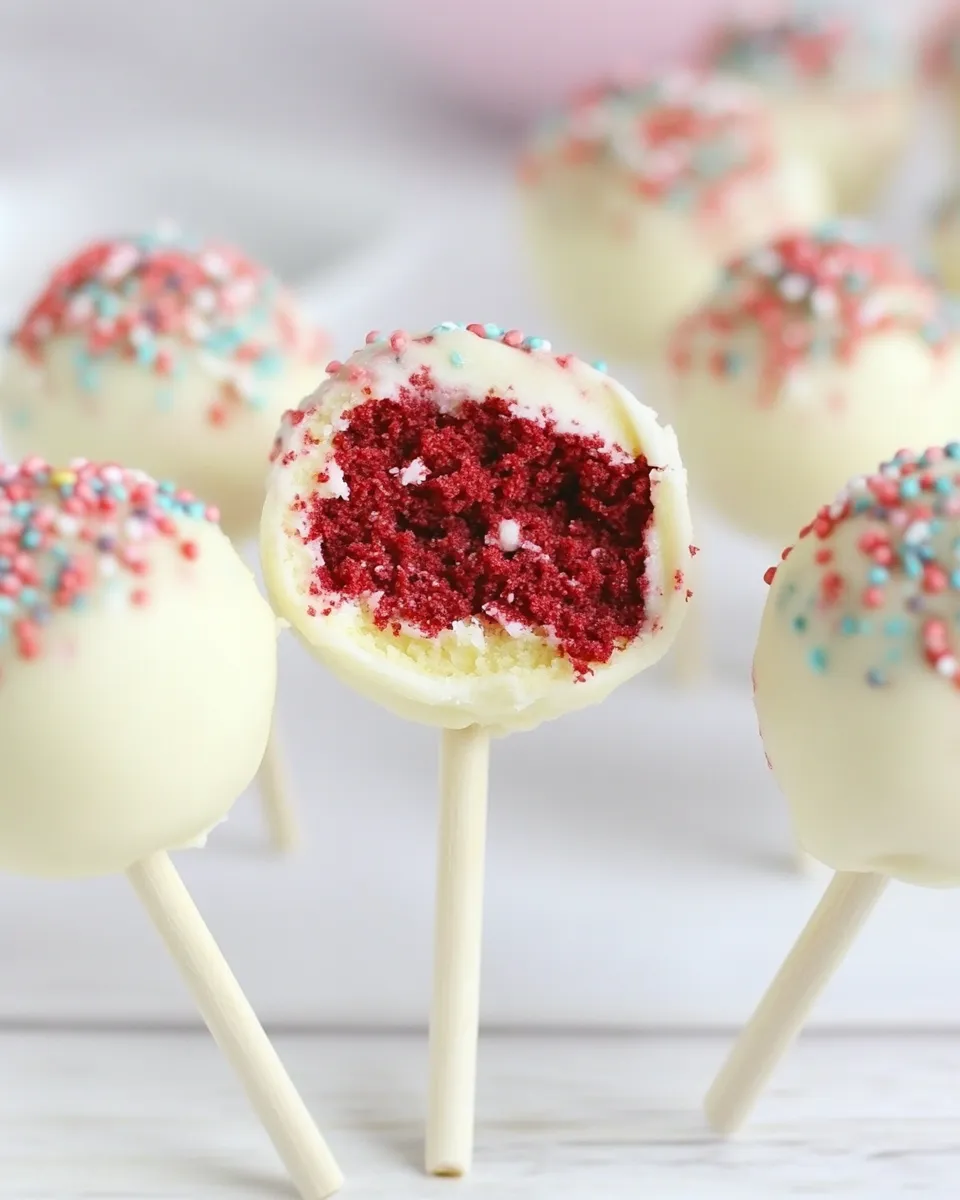
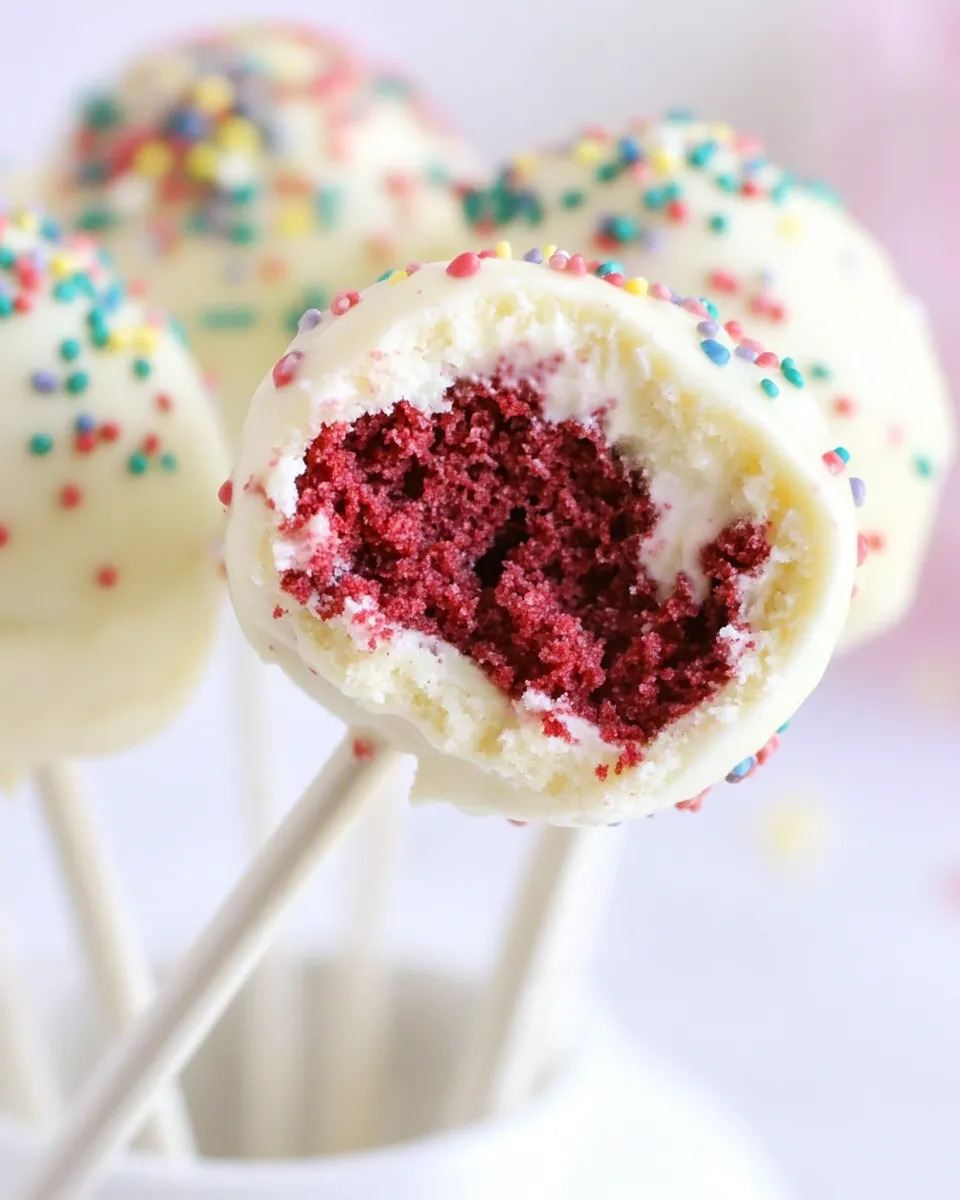
Red Velvet Cheesecake Pops
If you’re looking for a decadent treat that combines the rich, velvety flavor of red velvet cake with the creamy texture of cheesecake, then look no further! These Red Velvet Cheesecake Pops are not only visually stunning but also incredibly delicious. Perfect for parties, special occasions, or just a sweet indulgence at home, these pops are sure to impress both friends and family. The best part? They’re surprisingly easy to make, and you only need a handful of ingredients to whip up this delightful dessert.
Reasons to Love Red Velvet Cheesecake Pops
- Delicious Flavor Combination: The rich, buttery taste of red velvet cake paired with smooth cheesecake creates an irresistible dessert.
- Fun and Interactive: Making pops is a fun activity, especially for kids. They can help dip and decorate!
- Perfect for Any Occasion: Whether it’s a birthday party, holiday gathering, or just a cozy night in, these pops fit right in.
- Make Ahead: These treats can be made in advance, making them a great option for busy schedules.
Gather These Ingredients
- 1 box red velvet cake mix
- 1/2 cup store-bought buttercream or cream cheese frosting (I used Betty Crocker Whipped Buttercream)
- 1 7-inch plain cheesecake
- 1-2 cups graham crackers, crumbled into small crumbs
- 1 bag of 10-12 oz. candy melts, your favorite color (I used Wilton Color Burst Pastels)
- 1/4 to 1/2 cup vegetable oil
- 24-30 candy/cookie sticks (found at craft store)
Toolbox for This Recipe
- Microwave-safe bowl: At least 3 inches deep for melting candy melts.
- 1/2 tablespoon measuring spoon: For precise measuring of oil.
- Cookie sheet: Covered in foil for easy cleanup.
- Rectangular foam block: Or another cookie sheet covered in foil and topped with parchment paper to hold the pops while setting.
Step-by-Step: Red Velvet Cheesecake Pops
Step 1: Bake the Red Velvet Cake
Prepare the red velvet cake mix according to the package instructions. Bake in a 9×13 inch pan until a toothpick comes out clean. Allow it to cool completely.
Step 2: Crumble the Cake
Once cooled, crumble the red velvet cake into a large bowl, ensuring there are no large chunks. The texture should be fine and crumbly.
Step 3: Mix in the Frosting
Add the 1/2 cup of buttercream or cream cheese frosting to the crumbled cake. Mix until fully combined. The mixture should be moist but not overly sticky.
Step 4: Prepare the Cheesecake Layer
Take your 7-inch plain cheesecake and cut it into small squares. Take each square and flatten it slightly in your hand.
Step 5: Assemble the Pops
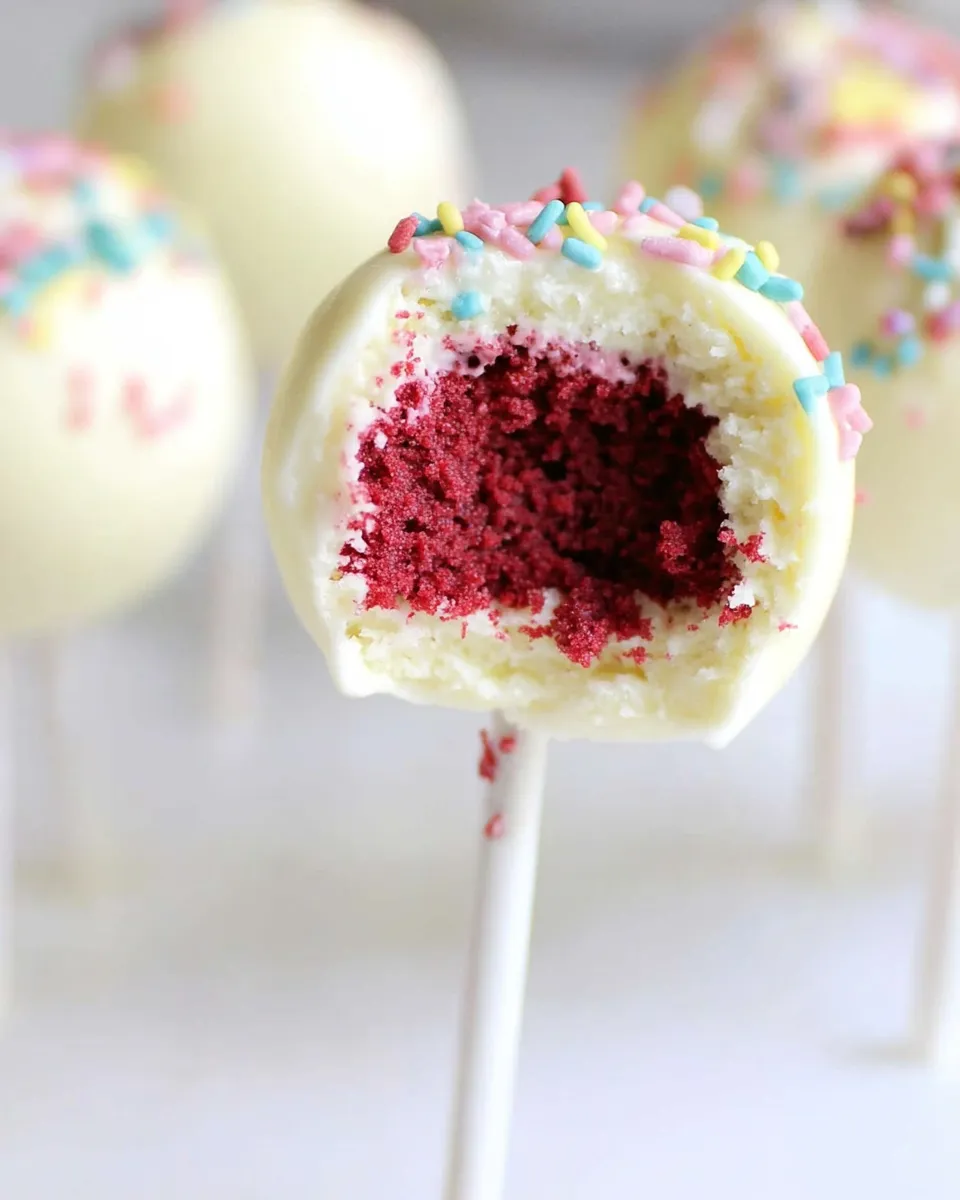
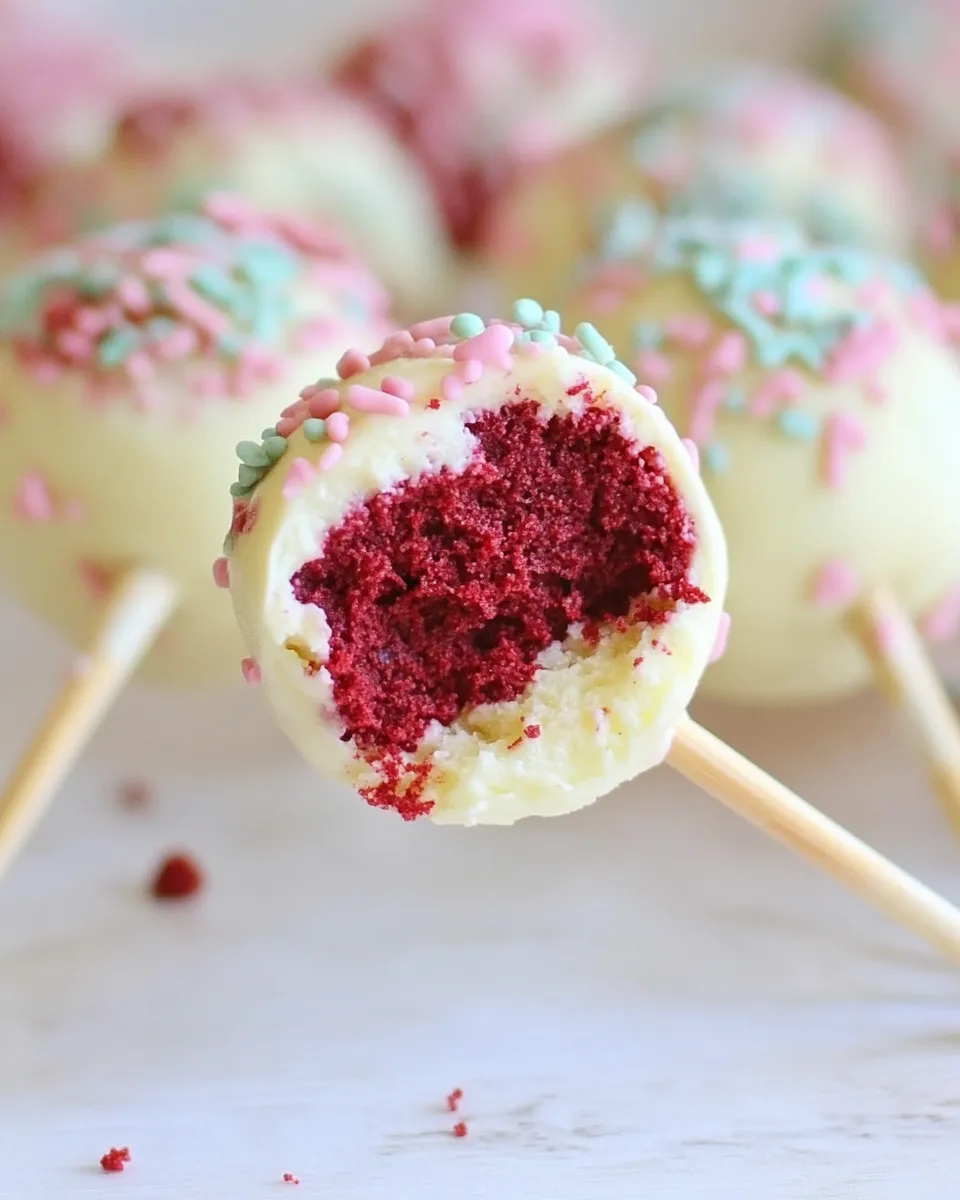
Take a small amount of the cake mixture and shape it around each cheesecake piece, forming a ball. Ensure the cheesecake is fully encased in the red velvet cake mixture.
Step 6: Insert Sticks
Dip one end of a candy/cookie stick into the melted candy melts, then insert it into the center of each pop. This will help secure the stick and prevent it from falling out.
Step 7: Chill the Pops
Place the pops on a cookie sheet covered in foil and refrigerate for about 30 minutes, or until firm.
Step 8: Melt the Candy Coating
In a microwave-safe bowl, melt the candy melts according to package instructions. Stir in vegetable oil until you achieve a smooth, pourable consistency.
Step 9: Dip the Pops
Once the pops are firm, dip each one into the melted candy coating, allowing any excess to drip off. You can also roll them in graham cracker crumbs for added texture.
Step 10: Set the Pops
Place the dipped pops upright in a rectangular foam block or on a cookie sheet lined with parchment paper. Allow them to set until the coating hardens.
Seasonal Flavor Boosts
- Chocolate Drizzle: Drizzle some melted dark chocolate over the pops for a rich contrast.
- Sprinkles: Add festive sprinkles on top of the candy coating to match any holiday theme.
- Flavored Candy Coating: Use mint or vanilla-flavored candy melts for a unique twist.
- Fruit Zest: Add a hint of orange or lemon zest to the cheesecake for a refreshing flavor boost.
Testing Timeline
- Preparation time: Approximately 30 minutes.
- Chilling time: 30 minutes.
- Assembly and dipping time: 20 minutes.
- Total time: About 1 hour and 20 minutes (plus additional cooling time if necessary).
Make-Ahead & Storage
You can make these Red Velvet Cheesecake Pops up to two days in advance. Store them in an airtight container in the refrigerator. For longer storage, you can freeze the pops for up to a month. Just make sure to wrap them individually in plastic wrap before placing them in a freezer-safe container.
Top Questions & Answers
Can I use homemade cheesecake for this recipe?
Absolutely! If you have a favorite homemade cheesecake recipe, feel free to use it instead of store-bought. Just make sure it is firm enough to hold its shape when cut into squares.
What can I substitute for candy melts?
If you can’t find candy melts, you can use chocolate chips or chocolate bars. Just melt them down and add a bit of vegetable oil to achieve a smooth consistency.
How do I keep the pops from falling off the sticks?
Dipping the sticks in the melted candy coating before inserting them into the pops will help secure them. Also, allowing the pops to chill before dipping helps them hold their shape better.
Can I add different flavors to the cake mixture?
Yes! You can experiment by adding different extracts, like vanilla or almond, to the cake mixture for added flavor. Just be cautious not to overdo it!
The Takeaway
Red Velvet Cheesecake Pops are not just a treat; they are an experience. With their stunning appearance and delightful flavors, they are bound to be a hit at any gathering. Easy to make, fun to decorate, and delicious to eat, these pops are a perfect way to indulge your sweet tooth. Whether you’re celebrating a special occasion or simply want to enjoy a bite of something sweet, these pops will surely satisfy your cravings. So gather your ingredients, roll up your sleeves, and get ready to create these delightful Red Velvet Cheesecake Pops that everyone will love!
Red Velvet Cheesecake Pops
Ingredients
Equipment
Method
- Prepare the red velvet cake mix according to the package instructions. Bake in a 9x13 inch pan until a toothpick comes out clean. Allow it to cool completely.
- Once cooled, crumble the red velvet cake into a large bowl, ensuring there are no large chunks. The texture should be fine and crumbly.
- Add the 1/2 cup of buttercream or cream cheese frosting to the crumbled cake. Mix until fully combined. The mixture should be moist but not overly sticky.
- Take your 7-inch plain cheesecake and cut it into small squares. Take each square and flatten it slightly in your hand.
- Take a small amount of the cake mixture and shape it around each cheesecake piece, forming a ball. Ensure the cheesecake is fully encased in the red velvet cake mixture.
- Dip one end of a candy/cookie stick into the melted candy melts, then insert it into the center of each pop. This will help secure the stick and prevent it from falling out.
- Place the pops on a cookie sheet covered in foil and refrigerate for about 30 minutes, or until firm.
- In a microwave-safe bowl, melt the candy melts according to package instructions. Stir in vegetable oil until you achieve a smooth, pourable consistency.
- Once the pops are firm, dip each one into the melted candy coating, allowing any excess to drip off. You can also roll them in graham cracker crumbs for added texture.
- Place the dipped pops upright in a rectangular foam block or on a cookie sheet lined with parchment paper. Allow them to set until the coating hardens.
Notes
- These pops can be made up to two days in advance.
- Store in an airtight container in the refrigerator.
- For longer storage, freeze the pops for up to a month.