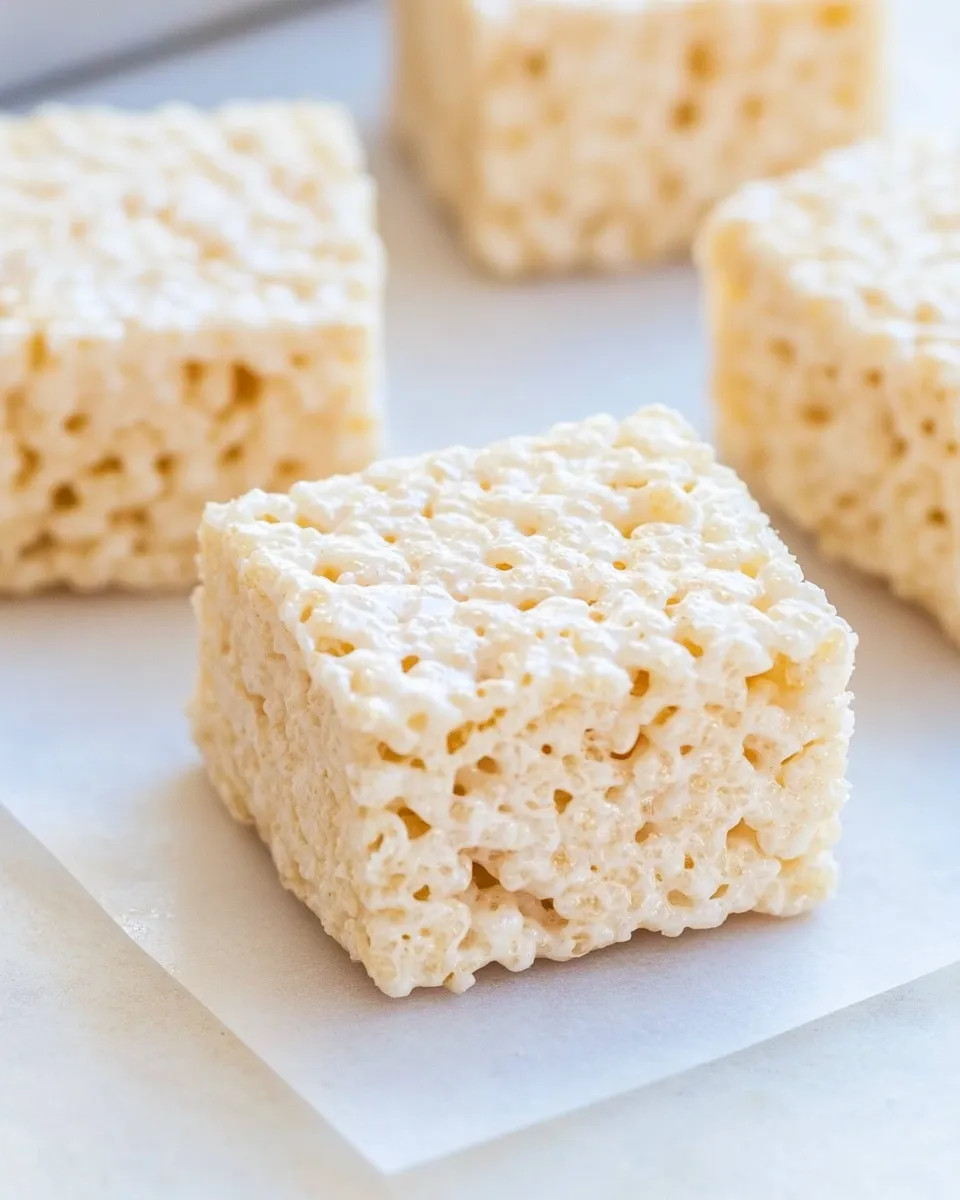
Browned Butter Rice Krispies Treats
There’s something undeniably nostalgic about Rice Krispies Treats. These gooey, sweet squares bring back memories of childhood, school bake sales, and family gatherings. But what if we told you that you could take this classic treat to a whole new level? Enter Browned Butter Rice Krispies Treats—a delightful twist that infuses the traditional recipe with the rich, nutty flavor of browned butter. This recipe is simple, quick, and absolutely scrumptious, making it perfect for any occasion or just a cozy night at home.
Why This Recipe Is Reliable
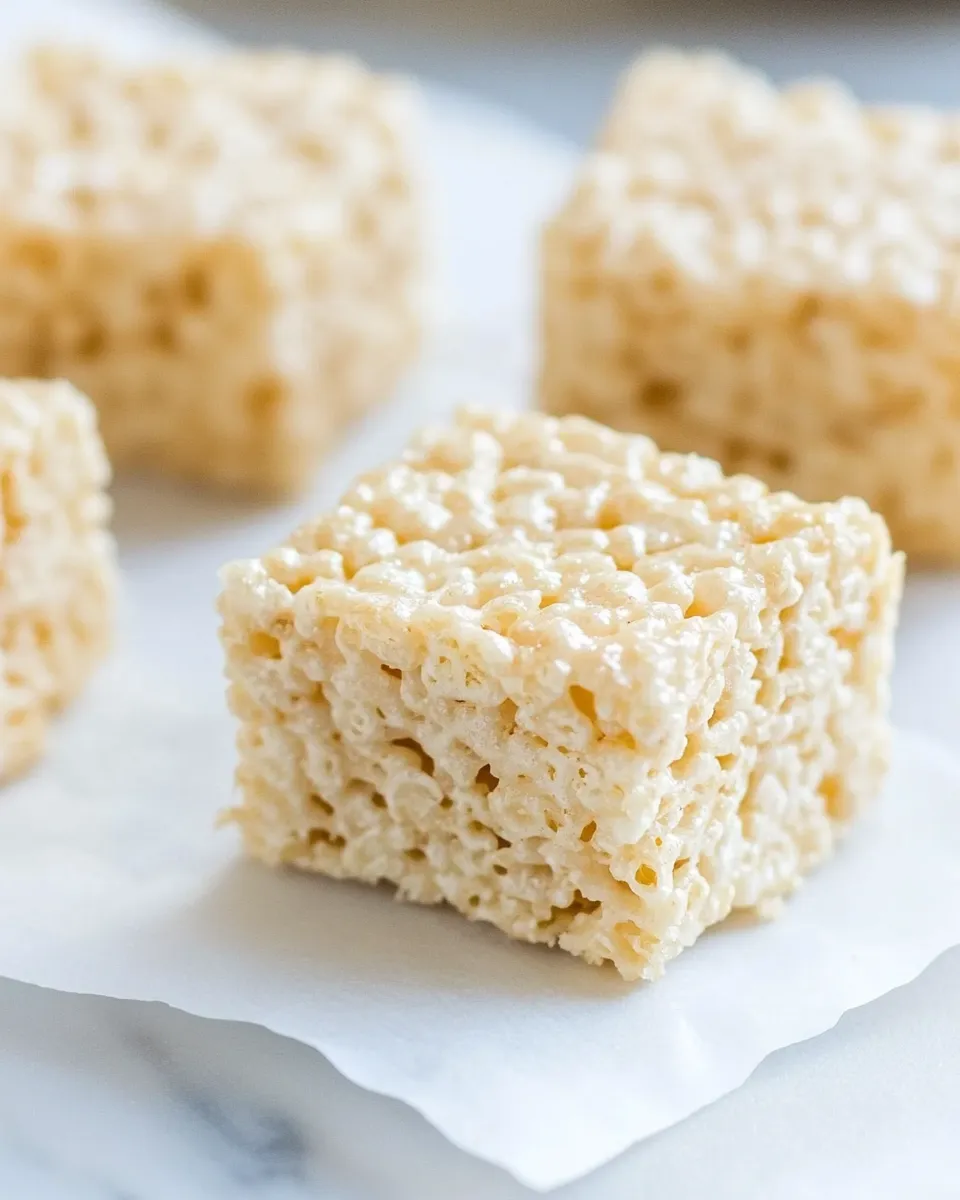
This recipe for Browned Butter Rice Krispies Treats is not only easy to follow but also delivers consistently delicious results. The key lies in the process of browning the butter, which adds a depth of flavor that elevates the regular Rice Krispies Treats to something truly special. With only a handful of ingredients, you’ll find this recipe to be both forgiving and adaptable, allowing even the novice baker to create a delightful batch of treats.
Gather These Ingredients
To whip up your Browned Butter Rice Krispies Treats, you’ll need the following ingredients:
- 5 cups Rice Krispies Cereal
- 1 cup unsalted butter, browned
- 10-ounce bag miniature or large marshmallows (do not use stale marshmallows for best results)
- 2 teaspoons salt (optional, but recommended for balancing sweetness)
Gear Checklist
Before you dive into making these treats, make sure you have the following gear on hand:
- Large saucepan: For browning the butter and melting the marshmallows.
- Spatula: A silicone spatula works best for mixing and scraping.
- 9×13-inch baking pan: A classic size for Rice Krispies Treats; line it with parchment paper for easy removal.
- Measuring cups and spoons: Accurate measurements are key to the perfect treat.
How to Prepare Browned Butter Rice Krispies Treats

Follow these steps for a batch of perfectly gooey and flavorful Browned Butter Rice Krispies Treats:
Step 1: Brown the Butter
In a large saucepan over medium heat, add the unsalted butter. Allow it to melt completely, then continue to cook, swirling the pan occasionally. Watch closely as the butter foams and begins to turn a golden brown. You’ll notice a nutty aroma—this is when you want to remove it from the heat to prevent burning.
Step 2: Add Marshmallows
Once the butter is browned, add the entire 10-ounce bag of marshmallows to the saucepan. Stir continuously until the marshmallows are fully melted and combined with the browned butter. This should take about 2-3 minutes.
Step 3: Incorporate Rice Krispies Cereal
Remove the saucepan from the heat and quickly add the 5 cups of Rice Krispies cereal. If you’re using salt, sprinkle it in now. Stir gently but thoroughly until all the cereal is coated with the marshmallow mixture.
Step 4: Press into the Pan
Transfer the mixture to your lined 9×13-inch baking pan. Using a spatula, press the mixture down evenly into the pan. For best results, dampen your hands or the spatula with a little water to prevent sticking.
Step 5: Let It Set
Allow the treats to cool for at least 30 minutes before cutting them into squares. This helps them firm up, making it easier to slice and serve.
Flavor-Forward Alternatives

Feel free to get creative with your Browned Butter Rice Krispies Treats! Here are some fun variations to consider:
- Add 1/2 cup of chocolate chips or peanut butter chips for a sweet twist.
- Incorporate 1/2 cup of crushed Oreos for a cookies and cream flavor.
- Mix in 1/2 cup of toasted nuts for added crunch.
- Drizzle melted chocolate over the top for an indulgent finish.
Problems & Prevention
Making Browned Butter Rice Krispies Treats is relatively straightforward, but here are some common issues you might encounter and how to prevent them:
- Too sticky: If your treats are overly sticky, they may not have enough Rice Krispies or may not have cooled enough before cutting. Ensure you measure accurately and allow ample time to set.
- Burnt butter: Keep a close eye on the butter as it browns. It can go from perfectly brown to burnt in a matter of seconds.
- Hard treats: If your treats are hard, it may be due to overcooking the marshmallows. Melt them just until they are fully melted but not too long.
- Uneven texture: Make sure to press the mixture evenly into the pan to avoid uneven texture when cutting.
Storing Tips & Timelines
Once you’ve made your Browned Butter Rice Krispies Treats, you’ll want to keep them fresh. Here’s how:
Store them in an airtight container at room temperature for up to 3 days. If you want to keep them longer, you can refrigerate them for up to a week. However, refrigeration may change their texture slightly, making them a bit firmer. For longer storage, consider freezing them. Wrap individual squares in plastic wrap, then place them in a freezer-safe bag. They can last in the freezer for up to 2 months.
Ask the Chef
Can I use margarine instead of butter?
While you can use margarine, the unique flavor of browned butter really elevates these treats. For the best results, stick with unsalted butter.
Can I make these treats vegan?
Yes, you can substitute the butter with a vegan alternative and use vegan marshmallows. Just be sure to check the packaging to ensure all ingredients meet your dietary needs.
What can I do with leftovers?
If you have leftovers, you can crumble them over ice cream, use them as a topping for yogurt, or even incorporate them into a dessert charcuterie board for a fun snack option.
Can I double this recipe?
Absolutely! Just double all the ingredients and use a larger pan, such as a 12×18-inch baking sheet. Keep an eye on the setting time, as it may take a little longer to cool.
The Last Word
Browned Butter Rice Krispies Treats are a delightful twist on a beloved classic. With their rich, nutty flavor and gooey texture, these treats are sure to become a favorite in your household. Whether you’re preparing them for a special occasion or simply enjoying a cozy night in, they are quick to make and even quicker to disappear. So gather your ingredients, follow the steps, and indulge in the deliciousness of these irresistible treats. You won’t regret it!
Browned Butter Rice Krispies Treats
Ingredients
Equipment
Method
- In a large saucepan over medium heat, add the unsalted butter. Allow it to melt completely, then continue to cook, swirling the pan occasionally. Watch closely as the butter foams and begins to turn a golden brown. You'll notice a nutty aroma—this is when you want to remove it from the heat to prevent burning.
- Once the butter is browned, add the entire 10-ounce bag of marshmallows to the saucepan. Stir continuously until the marshmallows are fully melted and combined with the browned butter. This should take about 2-3 minutes.
- Remove the saucepan from the heat and quickly add the 5 cups of Rice Krispies cereal. If you're using salt, sprinkle it in now. Stir gently but thoroughly until all the cereal is coated with the marshmallow mixture.
- Transfer the mixture to your lined 9x13-inch baking pan. Using a spatula, press the mixture down evenly into the pan. For best results, dampen your hands or the spatula with a little water to prevent sticking.
- Allow the treats to cool for at least 30 minutes before cutting them into squares. This helps them firm up, making it easier to slice and serve.
Notes
- Store treats in an airtight container at room temperature for up to 3 days.
- Refrigerate for up to a week, but expect a firmer texture.
- For longer storage, wrap individual squares and freeze for up to 2 months.