Homemade Chicken Chimichangas (Baked or Pan Fried!)
If you’re looking for a deliciously satisfying meal that’s perfect for any occasion, look no further than these Homemade Chicken Chimichangas (Baked or Pan Fried!). Bursting with flavor and packed with wholesome ingredients, these crispy wraps are sure to become a household favorite. Whether you choose to bake them for a healthier option or pan-fry them for that authentic crunch, you’ll be delighted with the result. Let’s dive into the magic of making these tasty treats!
What Makes This Recipe Special
This recipe stands out for many reasons. First and foremost, the combination of tender shredded chicken, zesty spices, and creamy cheese creates a flavor explosion in every bite. The use of refried beans adds a delightful creaminess, while the option to bake or pan-fry means you can customize the cooking method to suit your preferences. Plus, they’re incredibly easy to prepare, making them perfect for a weeknight dinner or a festive gathering. Once you try these Homemade Chicken Chimichangas (Baked or Pan Fried!), you’ll wonder how you ever lived without them!
What Goes Into Homemade Chicken Chimichangas (Baked or Pan Fried!)
To make these mouthwatering chimichangas, you’ll need the following ingredients:
- 2 cups shredded cooked chicken – The star of the dish! Use leftover rotisserie chicken or any cooked chicken you have on hand.
- 1 tablespoon chili powder – Adds a warm, spicy flavor.
- 1 teaspoon cumin – Brings a smoky depth.
- 1 teaspoon paprika – For a touch of sweetness and color.
- 1 teaspoon salt – Enhances all the flavors.
- 1 cup salsa – A zesty ingredient that ties everything together.
- 2 cups shredded Colby Jack cheese – Offers a perfect melt and flavor.
- 2 ounces softened cream cheese – Adds richness and creaminess.
- 2 tablespoons chopped green onions – For a fresh, crunchy bite.
- 1 (15-ounce) can refried beans – Creamy and filling.
- 4 burrito-sized tortillas – The perfect vessel for our filling.
- 1 tablespoon olive oil – For cooking if you choose the pan-fried method.
What’s in the Gear List
Before you get started, make sure you have the following tools on hand:
- Mixing Bowl – For combining your filling ingredients.
- Spatula – To help you mix and fold.
- Sheet Pan – If you’re baking the chimichangas.
- Skillet – For pan-frying, if you choose that method.
- Cooking Spray or Parchment Paper – To prevent sticking.
- Measuring Cups and Spoons – For precise ingredient measurements.
Homemade Chicken Chimichangas (Baked or Pan Fried!) — Do This Next
Now that you’ve gathered all your ingredients and tools, it’s time to create your delicious chimichangas! Follow these simple steps:
Step 1: Prepare the Filling
In a mixing bowl, combine the shredded cooked chicken, chili powder, cumin, paprika, salt, salsa, shredded Colby Jack cheese, softened cream cheese, and chopped green onions. Mix everything until well combined and creamy.
Step 2: Assemble the Chimichangas
Take a burrito-sized tortilla and place a generous scoop of the chicken mixture in the center. Spread it slightly to form a rectangle. Fold the sides of the tortilla in and then roll it up tightly from the bottom. Repeat this process for all tortillas.
Step 3: Choose Your Cooking Method
You can either bake or pan-fry your chimichangas based on your preference:
Baking:
Preheat your oven to 400°F (200°C). Place the chimichangas seam-side down on a greased baking sheet. Lightly spray the tops with cooking spray for extra crispness. Bake for 20-25 minutes or until golden brown and crispy.
Pan-Frying:
Heat the olive oil in a skillet over medium heat. Add the chimichangas seam-side down and cook for about 3-4 minutes on each side, or until they are golden brown and crispy.
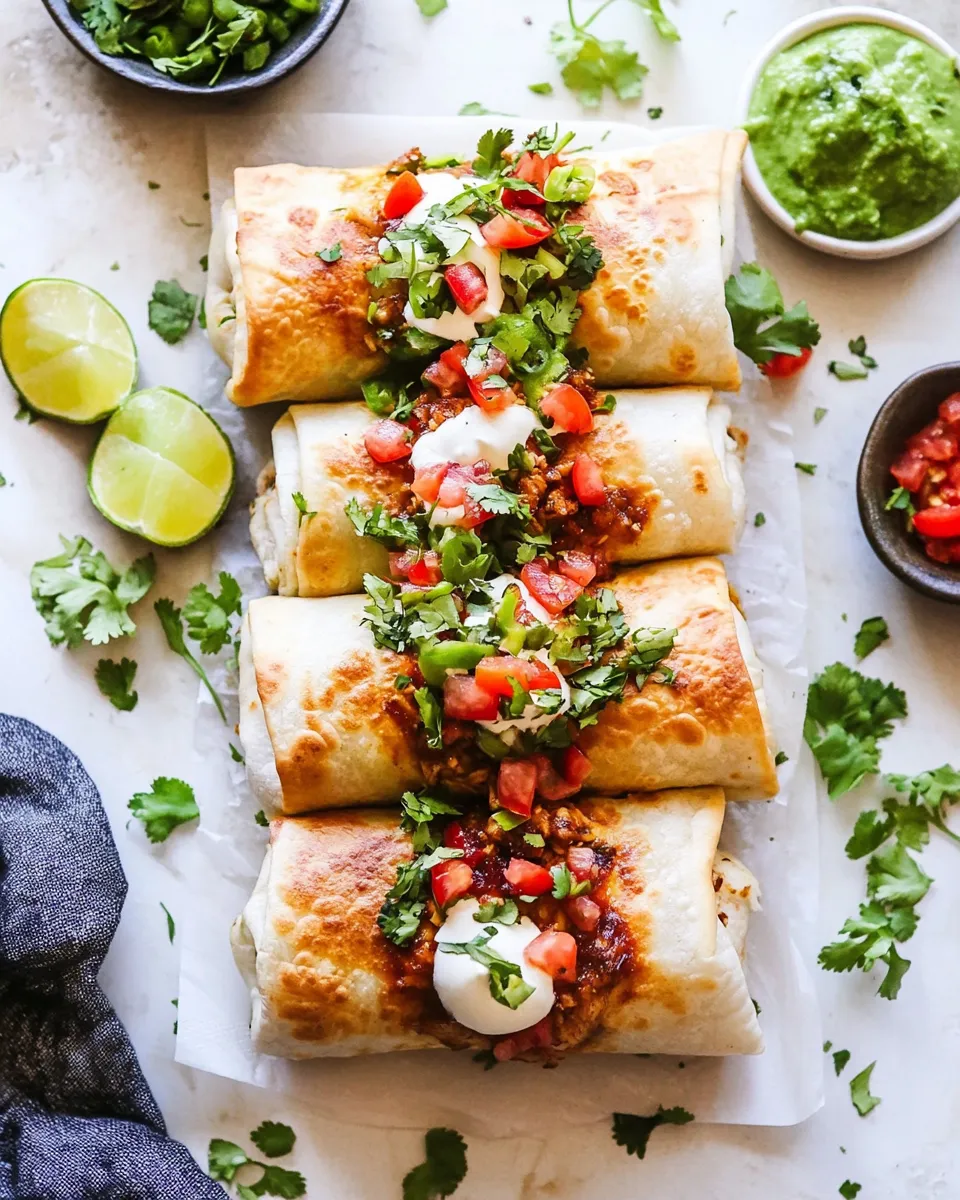
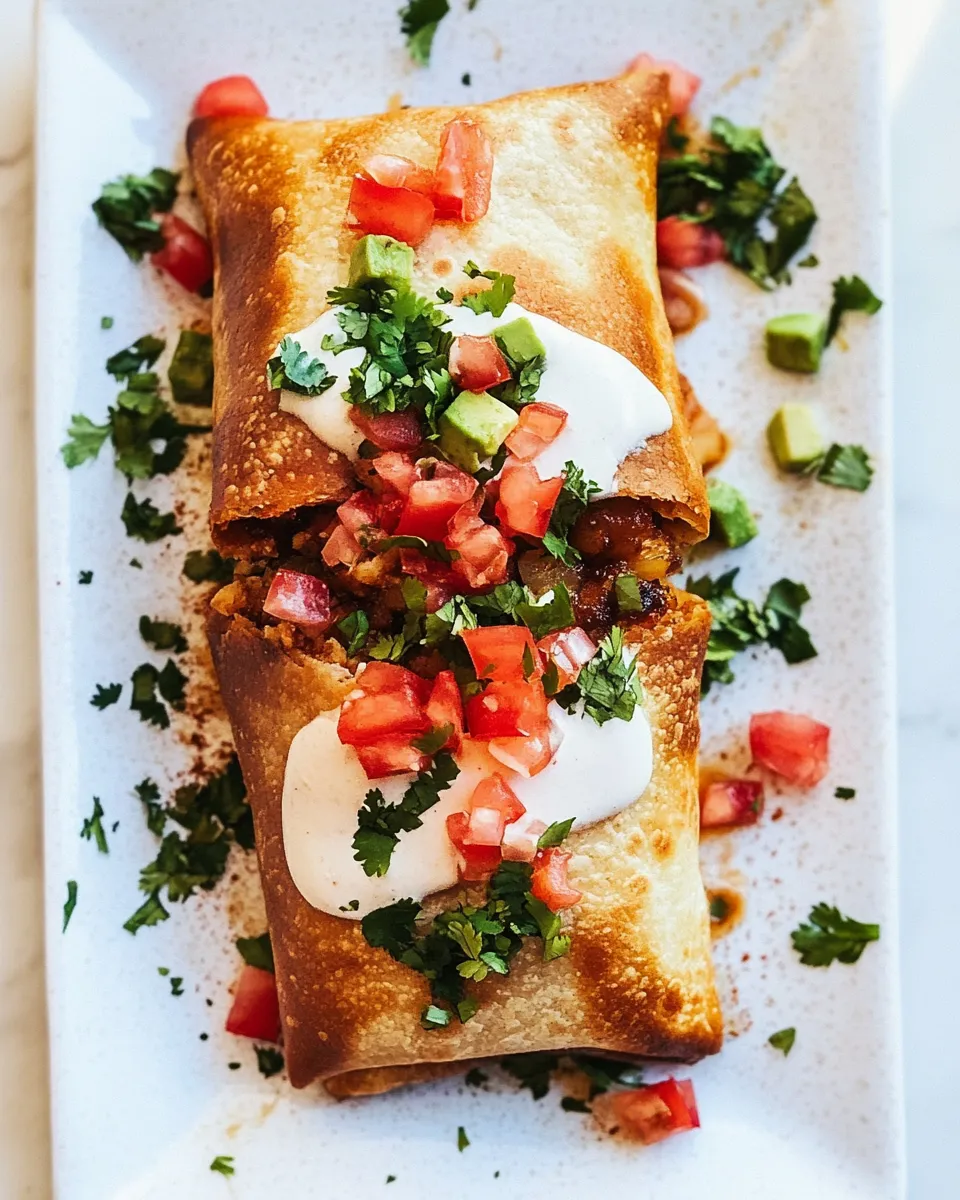
Step 4: Serve and Enjoy!
Once cooked, remove the chimichangas from the oven or skillet. Let them cool for a minute before serving. Enjoy with your favorite toppings like sour cream, guacamole, or more salsa!
Dairy-Free/Gluten-Free Swaps
If you have dietary restrictions or preferences, here are some easy swaps to make these Homemade Chicken Chimichangas (Baked or Pan Fried!) fit your needs:
- Dairy-Free: Substitute the cream cheese with a dairy-free cream cheese alternative and use dairy-free cheese.
- Gluten-Free: Opt for gluten-free tortillas to make the dish suitable for a gluten-free diet.
Common Errors (and Fixes)
Even the best cooks can make mistakes! Here are some common issues you might encounter while making your chimichangas, along with fixes:
- Chimichangas Are Soggy: Make sure to bake or fry them until they’re golden brown. If baking, spray them with oil for added crispiness.
- Filling Leaks Out: Ensure you’re rolling the chimichangas tightly and sealing the edges well.
- Too Much Filling: Don’t overstuff the tortillas. Use just enough filling to close them securely.
- Tortillas Tear: If using corn tortillas, warm them slightly before filling to make them more pliable.
Save It for Later
These Homemade Chicken Chimichangas (Baked or Pan Fried!) are perfect for meal prep! Here are some tips for saving them for later:
- Store Leftovers: Place any leftover chimichangas in an airtight container in the refrigerator for up to 3 days.
- Freezing: You can freeze uncooked, assembled chimichangas. Wrap them tightly and store them in the freezer for up to 3 months.
- Reheating: To reheat, bake from frozen at 375°F (190°C) for about 30-35 minutes, or until heated through.
Handy Q&A
Can I use different meats for this recipe?
Absolutely! Feel free to substitute the chicken with shredded beef, turkey, or even a vegetarian filling like black beans or roasted vegetables for a delicious twist.
What dipping sauces go well with chimichangas?
Chimichangas pair well with a variety of dipping sauces, including salsa, guacamole, sour cream, or a creamy cilantro-lime dressing.
Can I prepare the filling ahead of time?
Yes! You can prepare the filling a day in advance and store it in the refrigerator. Just assemble the chimichangas when you’re ready to cook.
How do I ensure my chimichangas are crispy?
To achieve maximum crispiness, make sure to bake or fry until golden brown and consider lightly spraying them with oil before cooking.
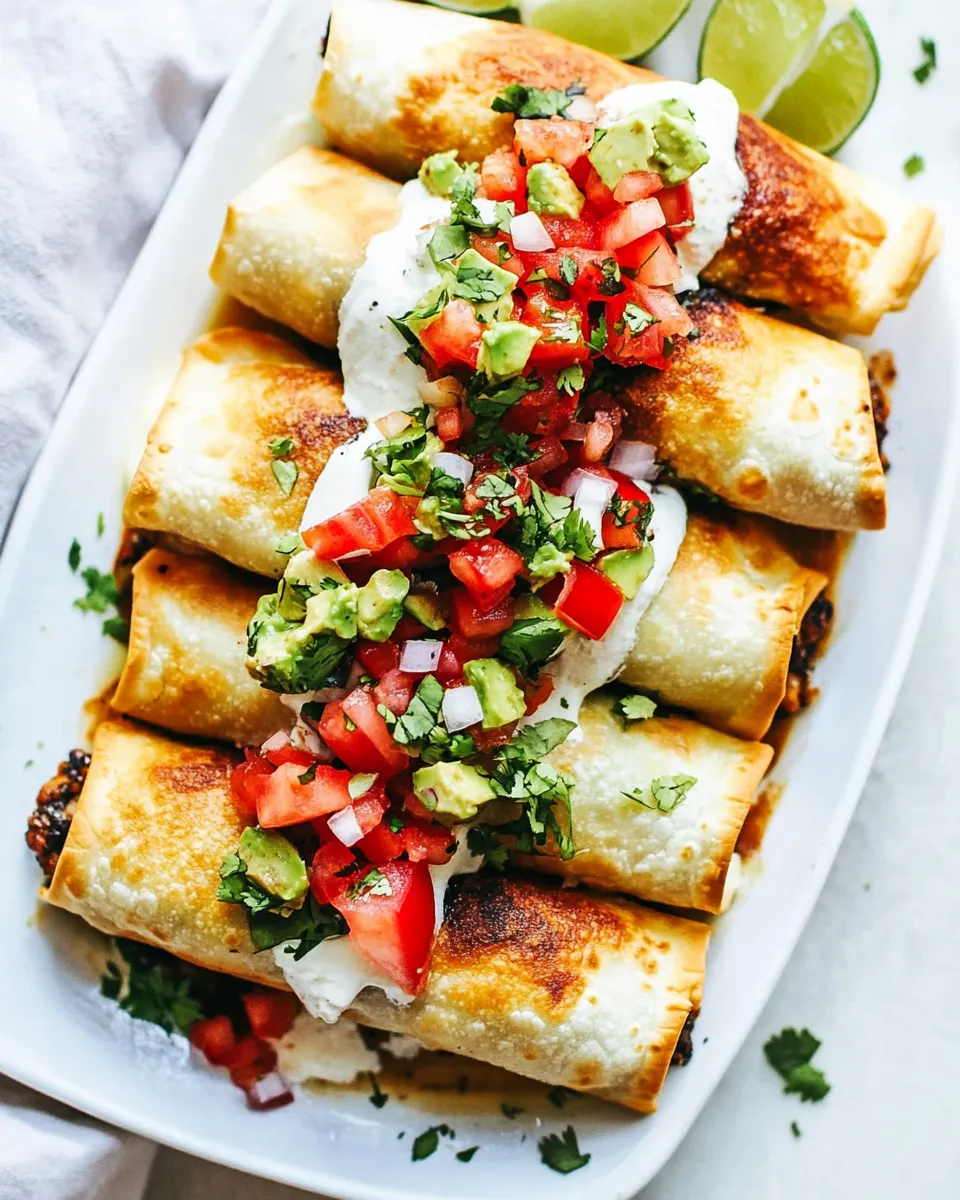
Bring It to the Table
Now that you’ve mastered the art of making Homemade Chicken Chimichangas (Baked or Pan Fried!), it’s time to gather your loved ones around the table. Serve these delicious creations with a side of fresh salad, some spicy salsa, and maybe a refreshing drink to wash it all down. Get ready for compliments and requests for seconds, because these chimichangas are sure to impress! Enjoy every flavorful bite and the joy of sharing a homemade meal with those you love.
Homemade Chicken Chimichangas (Baked or Pan Fried!)
Ingredients
Equipment
Method
- In a mixing bowl, combine the shredded cooked chicken, chili powder, cumin, paprika, salt, salsa, shredded Colby Jack cheese, softened cream cheese, and chopped green onions. Mix everything until well combined and creamy.
- Take a burrito-sized tortilla and place a generous scoop of the chicken mixture in the center. Spread it slightly to form a rectangle. Fold the sides of the tortilla in and then roll it up tightly from the bottom. Repeat this process for all tortillas.
- Preheat your oven to 400°F (200°C). Place the chimichangas seam-side down on a greased baking sheet. Lightly spray the tops with cooking spray for extra crispness. Bake for 20-25 minutes or until golden brown and crispy.
- Heat the olive oil in a skillet over medium heat. Add the chimichangas seam-side down and cook for about 3-4 minutes on each side, or until they are golden brown and crispy.
- Once cooked, remove the chimichangas from the oven or skillet. Let them cool for a minute before serving. Enjoy with your favorite toppings like sour cream, guacamole, or more salsa!
Notes
- Store leftovers in an airtight container in the refrigerator for up to 3 days.
- You can freeze uncooked, assembled chimichangas for up to 3 months.
- To reheat from frozen, bake at 375°F (190°C) for about 30-35 minutes.