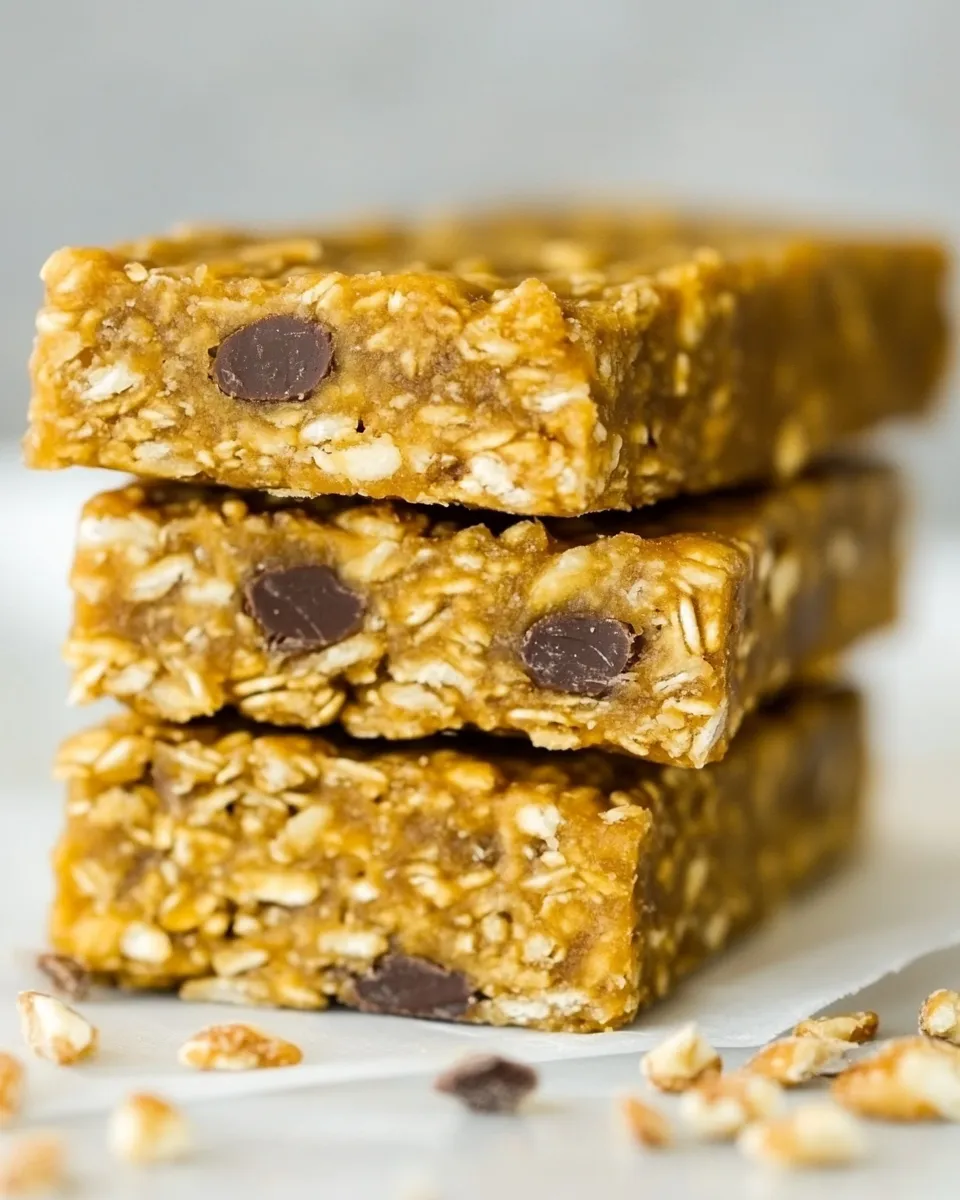
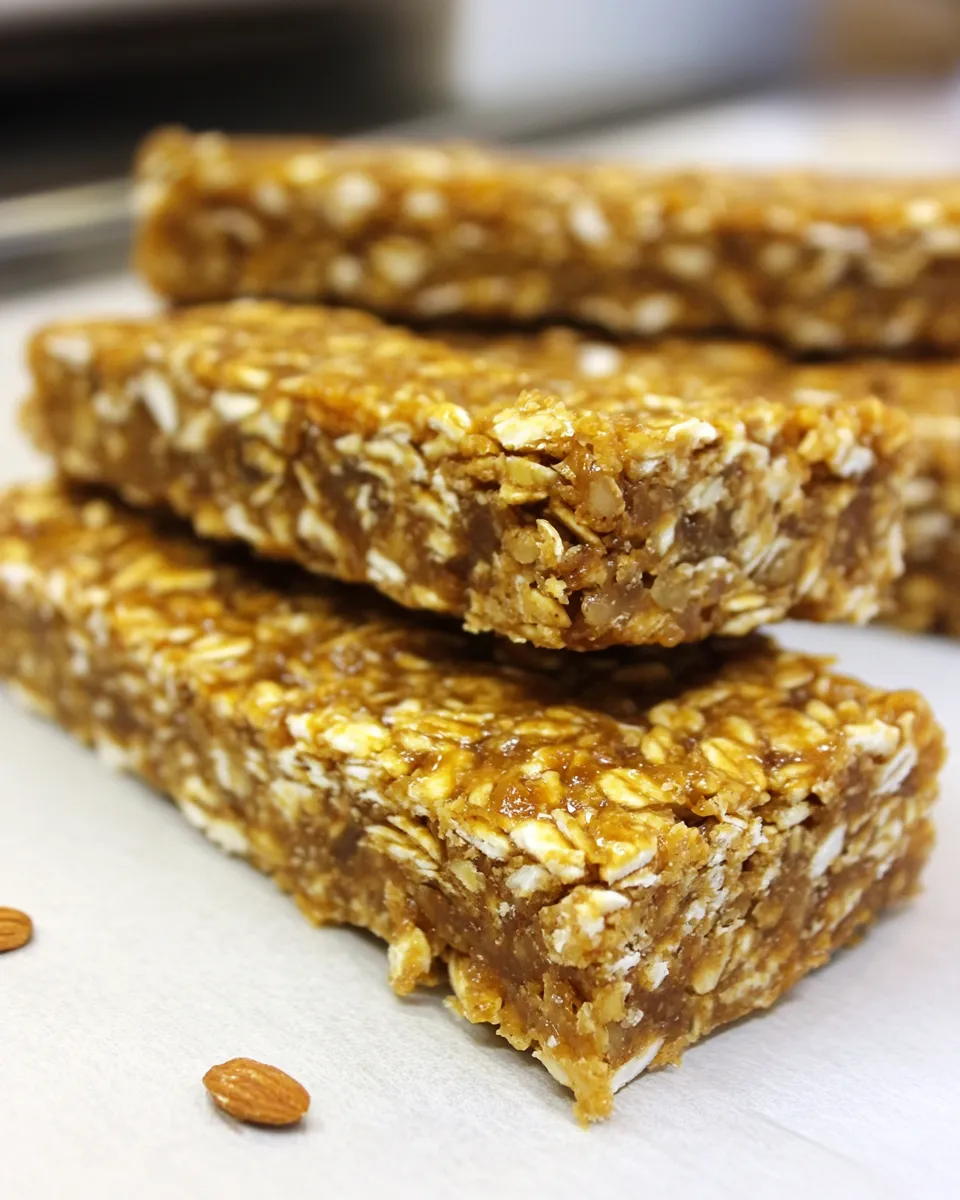
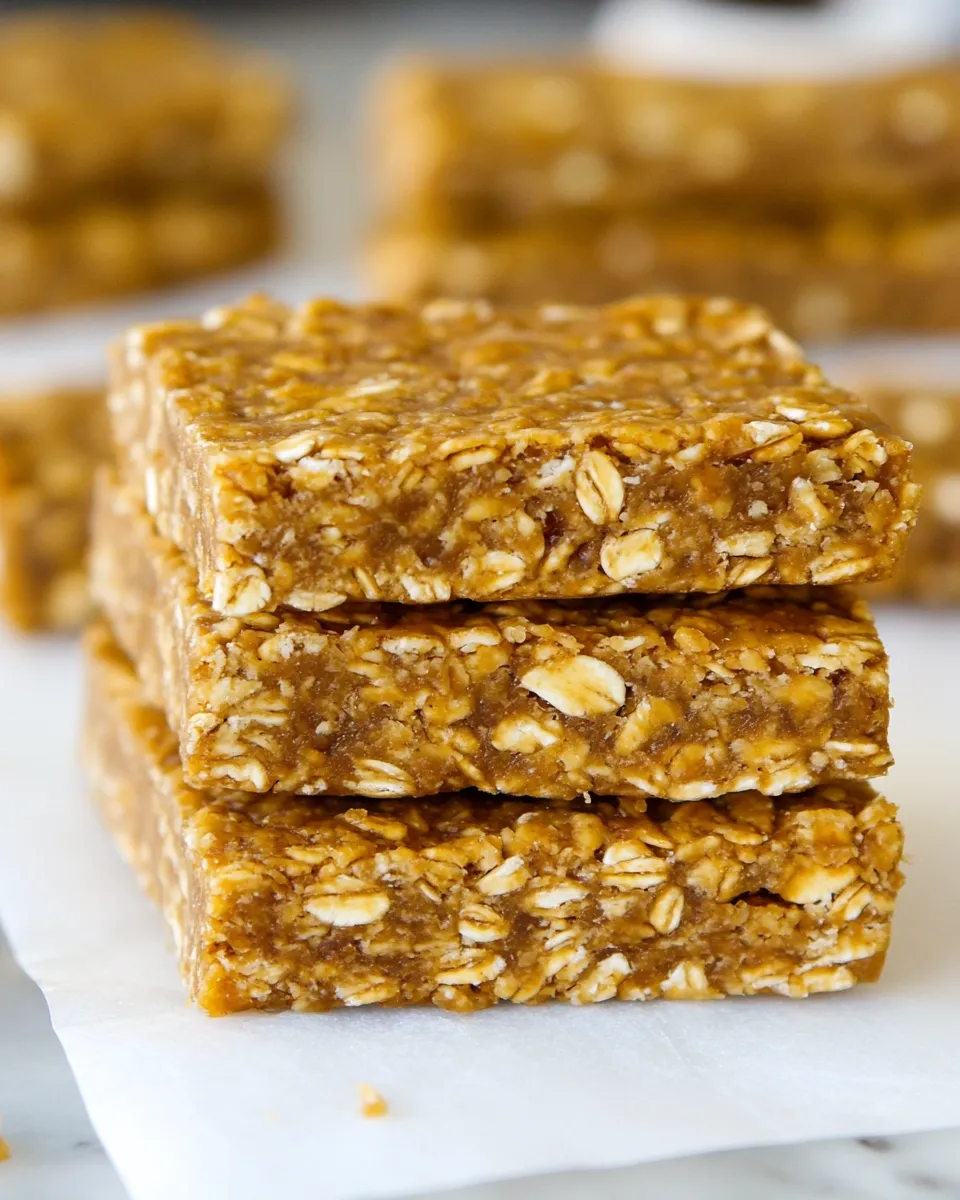
Homemade Clif Bars (No-Bake!)
If you’re looking for a delicious and nutritious snack that you can whip up in no time, then these Homemade Clif Bars (No-Bake!) are just what you need. Packed with wholesome ingredients and a delightful mix of flavors, these bars are perfect for a quick breakfast on the go, a mid-afternoon pick-me-up, or a post-workout treat. Plus, they come together without the need for any baking, making them as easy as they are tasty. Let’s dive into how you can create your own batch of these energy-boosting bars right at home!
Why This Recipe Works
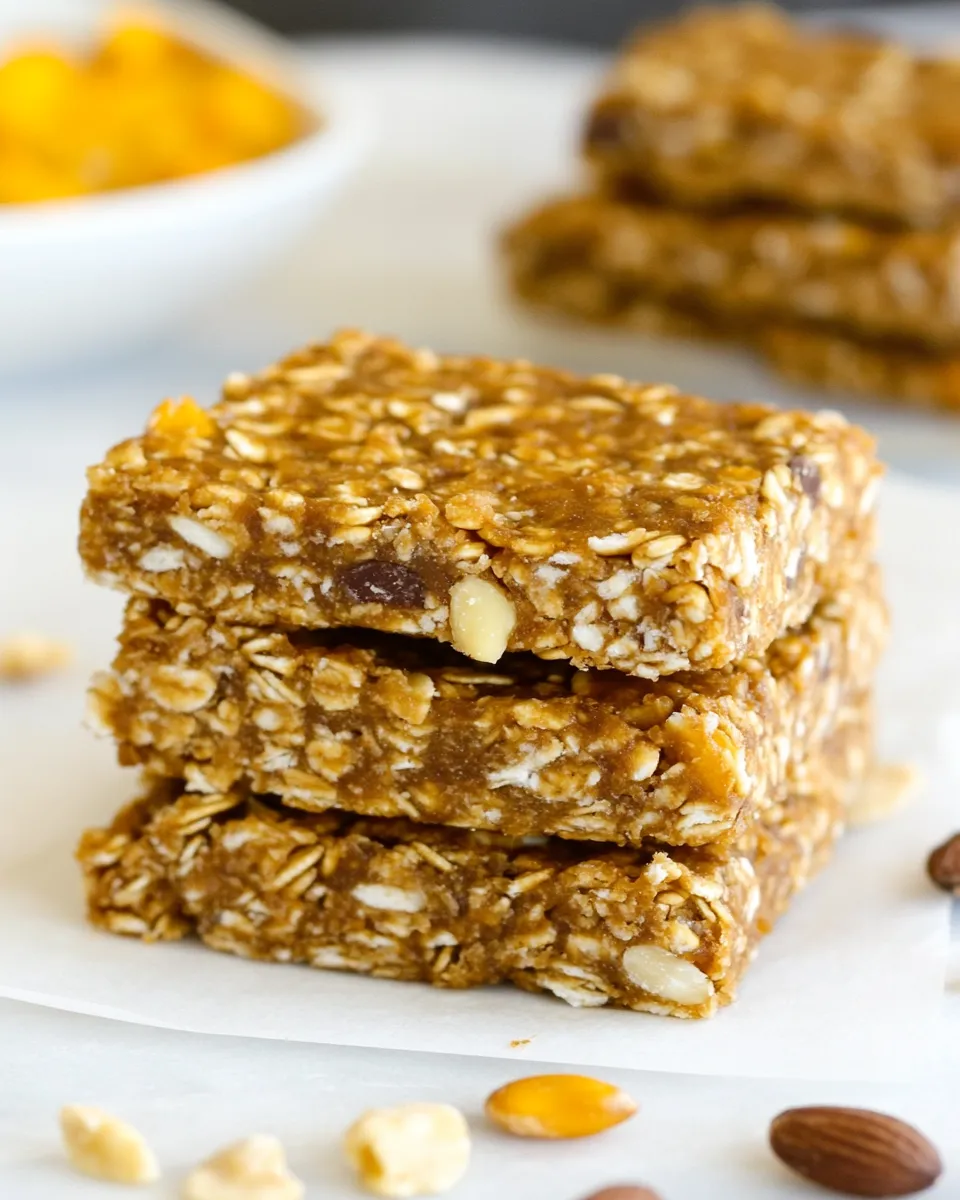
These Homemade Clif Bars (No-Bake!) are incredibly versatile and can be customized to fit your taste preferences. The combination of dates, oats, and peanut butter not only provides a satisfying chew but also offers a perfect balance of carbohydrates and healthy fats. By using quick-cooking oats and crisp rice cereal, you achieve a delightful texture that mimics the classic Clif Bar experience. The addition of ground flaxseed boosts the nutritional value with omega-3 fatty acids, while a touch of cinnamon enhances the flavor profile. With mini semisweet chocolate chips sprinkled in, these bars are bound to satisfy your sweet tooth without any guilt.
Your Shopping Guide
When preparing to make your Homemade Clif Bars (No-Bake!), gather the following ingredients:
- 1 cup (147g) dates, pitted: These serve as a natural sweetener and binder for the bars.
- 1 cup (23.33g) crisp rice cereal: Adds a light crunch to the texture.
- 1 cup (81g) quick-cooking oats: Provides a hearty base and helps to keep you full.
- ½ cup (36.5g) coarsely chopped peanuts: For added protein and a nutty flavor.
- 2 tablespoons ground flaxseed: A healthy source of fiber and omega-3 fatty acids.
- ½ teaspoon ground cinnamon: Enhances the flavor and adds warmth.
- Pinch of salt: Balances the sweetness of the dates.
- ½ cup (129g) peanut butter: Acts as a binding agent and adds creaminess.
- ½ cup (113.67ml) brown rice syrup: A natural sweetener that helps hold the bars together.
- 1 teaspoon vanilla extract: Adds a lovely aroma and depth of flavor.
- ½ cup (45g) mini semisweet chocolate chips: For a touch of indulgence.
What You’ll Need (Gear)
Before you get started, make sure you have the following kitchen tools on hand:
- Food processor: For blending the dates and mixing the ingredients.
- Mixing bowl: To combine all the ingredients.
- Spatula or wooden spoon: For mixing and pressing the mixture into the pan.
- 9×9-inch baking dish or pan: To shape the bars (even though no baking is required).
- Parchement paper: Optional, but helpful for easy removal of the bars from the pan.
Homemade Clif Bars (No-Bake!): Step-by-Step Guide
Making your own Homemade Clif Bars (No-Bake!) is a simple and rewarding process. Follow these easy steps:
Step 1: Prepare Your Ingredients
Start by gathering all your ingredients. Make sure your dates are pitted and chopped for easier blending.
Step 2: Blend the Dates
In your food processor, add the pitted dates. Pulse until they form a sticky paste. This will act as the base of your bars.
Step 3: Mix Dry Ingredients
In a large mixing bowl, combine the crisp rice cereal, quick-cooking oats, coarsely chopped peanuts, ground flaxseed, ground cinnamon, and a pinch of salt. Stir together until well mixed.
Step 4: Combine Wet Ingredients
In a separate bowl, mix together the peanut butter, brown rice syrup, and vanilla extract. Stir until smooth and well combined.
Step 5: Combine All Ingredients
Add the date paste to the dry mixture, followed by the peanut butter mixture. Using a spatula or wooden spoon, mix everything together until fully combined. The mixture should be sticky but hold together well.
Step 6: Add Chocolate Chips
Gently fold in the mini semisweet chocolate chips, ensuring they are evenly distributed throughout the mixture.
Step 7: Press into a Pan
Line your baking dish with parchment paper for easy removal. Transfer the mixture to the dish and press it down firmly into an even layer. The more compact it is, the better it will hold together.
Step 8: Refrigerate
Place the pan in the refrigerator for at least 1-2 hours to allow the bars to firm up. This step is crucial for achieving the right texture.
Step 9: Cut and Serve
Once set, remove the bars from the pan using the parchment paper. Cut them into squares or rectangles, depending on your preference. Enjoy your Homemade Clif Bars (No-Bake!) as a quick snack or on-the-go breakfast!
Seasonal Flavor Boosts
Feel free to customize your Homemade Clif Bars (No-Bake!) with these seasonal flavor boosts:
- Dried Fruits: Add chopped dried cranberries or apricots for a fruity twist.
- Spices: Experiment with nutmeg or ginger for a warm, cozy flavor.
- Nut Butters: Substitute almond butter or cashew butter for a different nutty taste.
- Seeds: Incorporate sunflower seeds or pumpkin seeds for extra crunch and nutrition.
Notes on Ingredients
Choosing high-quality ingredients is key to the success of your Homemade Clif Bars (No-Bake!). Here are some notes to keep in mind:
- Storage of Dates: Make sure to use fresh, soft dates for the best flavor and texture.
- Gluten-Free Options: Ensure your oats and crisp rice cereal are labeled gluten-free if necessary.
- Natural Sweeteners: Feel free to substitute honey or maple syrup for brown rice syrup, but keep in mind that it may alter the texture slightly.
- Nut Allergies: If you have nut allergies, consider using sunflower butter and sunflower seeds instead of peanut butter and peanuts.
Shelf Life & Storage
These Homemade Clif Bars (No-Bake!) are best stored in an airtight container in the refrigerator, where they will stay fresh for up to two weeks. You can also freeze them for longer storage; simply wrap each bar individually in plastic wrap and place them in a freezer-safe bag. They can be enjoyed straight from the freezer or thawed for a few minutes before serving.
Common Qs About Homemade Clif Bars (No-Bake!)
Can I use other types of nut butters?
Absolutely! Feel free to substitute almond butter, cashew butter, or sunflower seed butter to suit your taste preferences or dietary needs.
Are these bars suitable for kids?
Yes! These bars are a great snack for kids, as they are packed with nutrients and can be customized to include their favorite flavors.
How do I know if my mixture is too dry or too wet?
The mixture should be sticky and hold together when pressed. If it’s too dry, add a little more peanut butter or brown rice syrup. If it’s too wet, add a few more quick oats or crisp rice cereal to achieve the right consistency.
Can I make these bars vegan?
Yes! This recipe is naturally vegan-friendly. Just ensure the ingredients you choose, like the chocolate chips, are dairy-free.
Bring It Home
Now that you have the recipe for Homemade Clif Bars (No-Bake!), it’s time to get in the kitchen and start creating your own delicious batch. Not only will you save money, but you’ll also have a better understanding of what goes into your snacks. Plus, you can customize them to your heart’s content! Whether you are fueling up for a workout or need a quick snack during a busy day, these bars are the perfect solution.
With just a few simple ingredients and a little bit of time, you can enjoy a tasty, homemade alternative to store-bought energy bars that are full of flavor and nutrition. So roll up your sleeves, gather your ingredients, and get ready to enjoy some homemade goodness!
Enjoy your Homemade Clif Bars (No-Bake!) and feel the energy boost they provide!
Homemade Clif Bars (No-Bake!)
Ingredients
Equipment
Method
- Start by gathering all your ingredients. Make sure your dates are pitted and chopped for easier blending.
- In your food processor, add the pitted dates. Pulse until they form a sticky paste. This will act as the base of your bars.
- In a large mixing bowl, combine the crisp rice cereal, quick-cooking oats, coarsely chopped peanuts, ground flaxseed, ground cinnamon, and a pinch of salt. Stir together until well mixed.
- In a separate bowl, mix together the peanut butter, brown rice syrup, and vanilla extract. Stir until smooth and well combined.
- Add the date paste to the dry mixture, followed by the peanut butter mixture. Using a spatula or wooden spoon, mix everything together until fully combined.
- Gently fold in the mini semisweet chocolate chips, ensuring they are evenly distributed throughout the mixture.
- Line your baking dish with parchment paper for easy removal. Transfer the mixture to the dish and press it down firmly into an even layer.
- Place the pan in the refrigerator for at least 1-2 hours to allow the bars to firm up.
- Once set, remove the bars from the pan using the parchment paper. Cut them into squares or rectangles, depending on your preference.
Notes
- Use fresh, soft dates for the best flavor.
- Ensure oats and crisp rice cereal are gluten-free if needed.
- You can freeze the bars wrapped individually for longer storage.