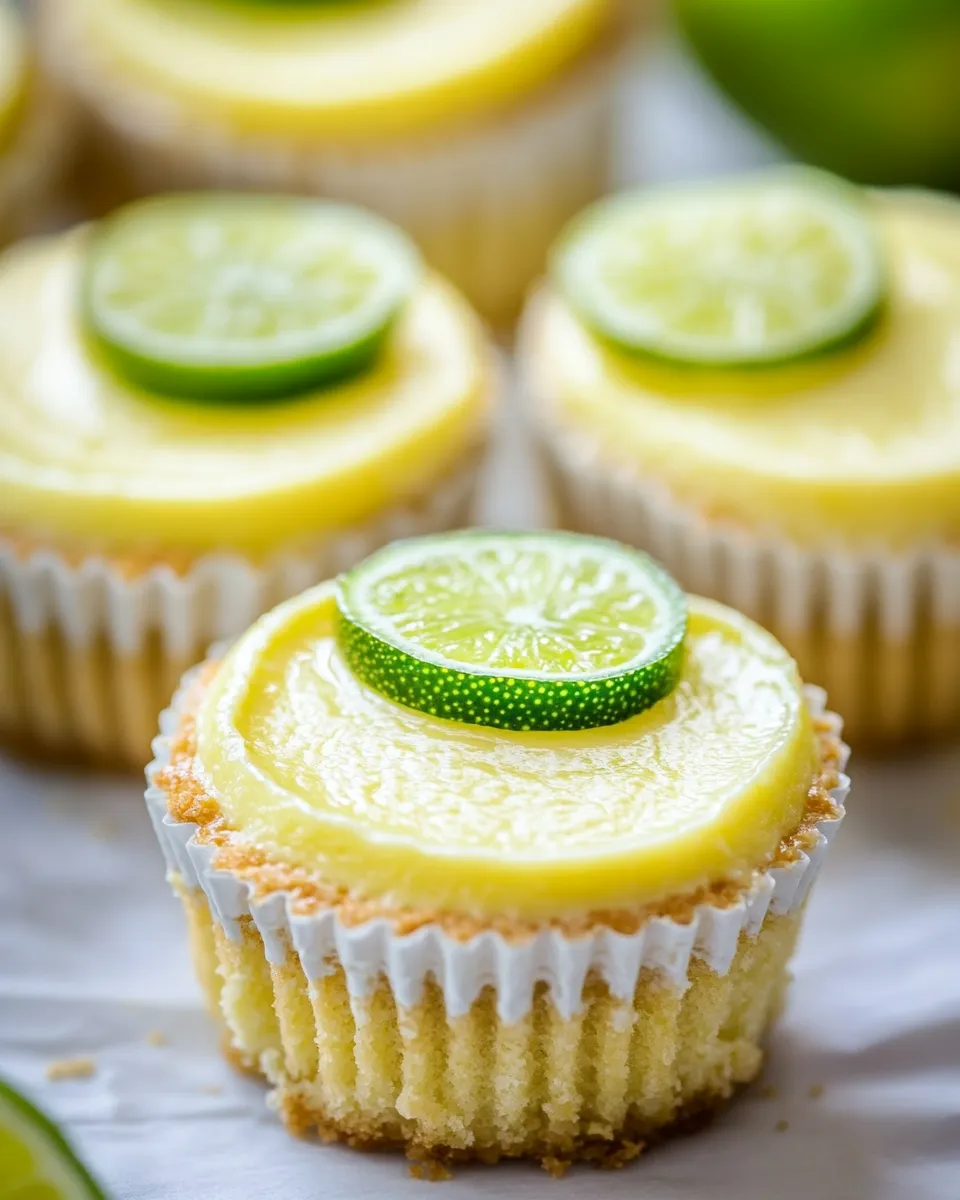
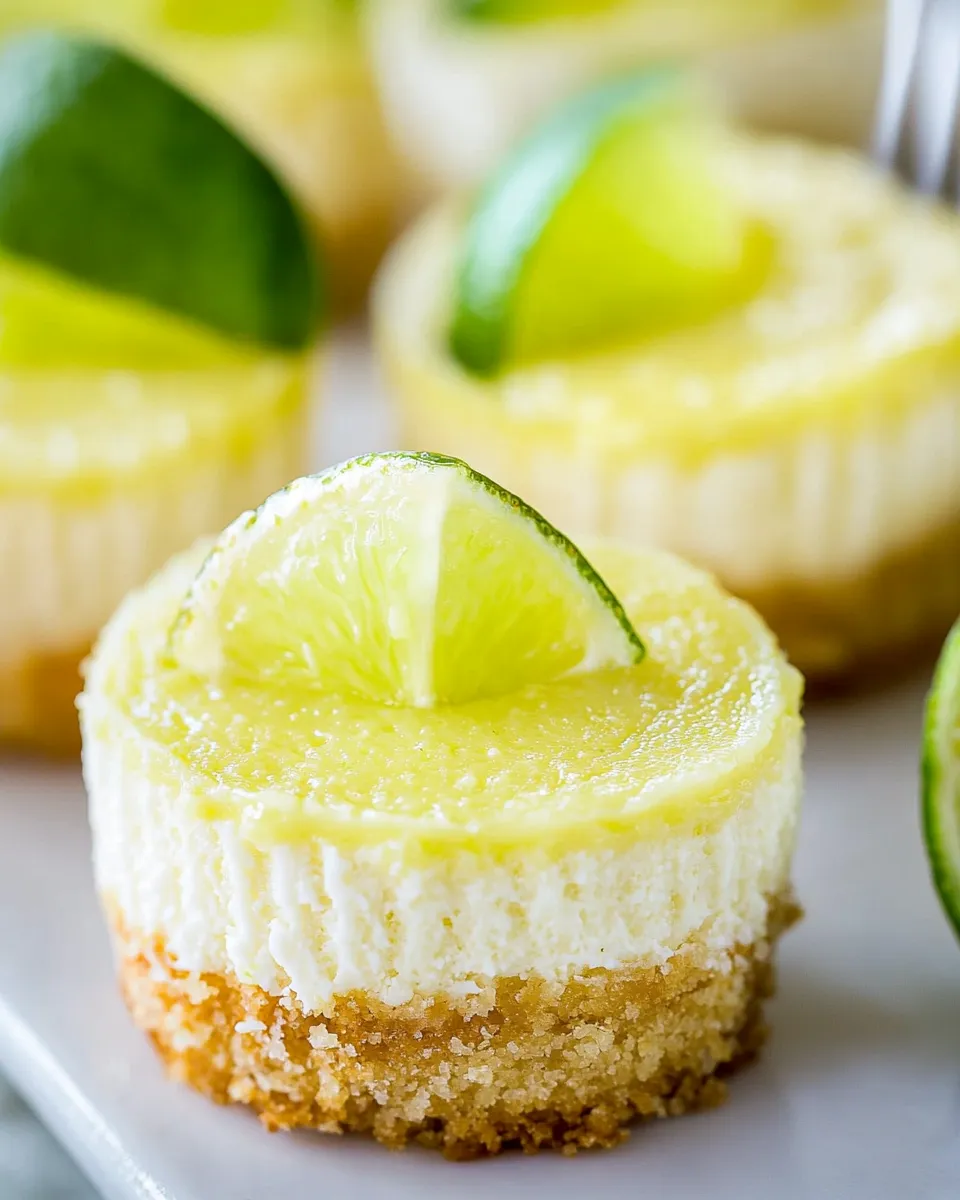
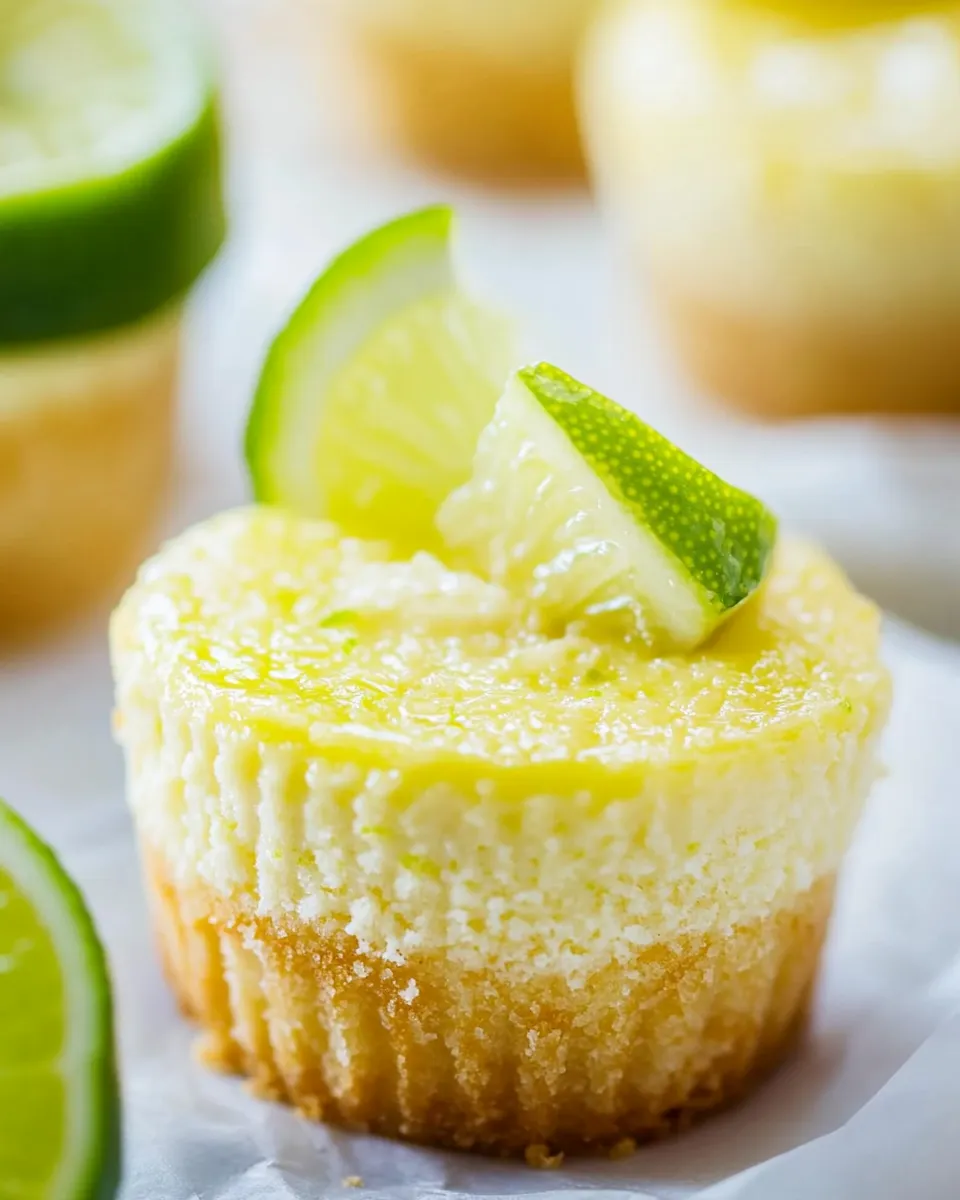
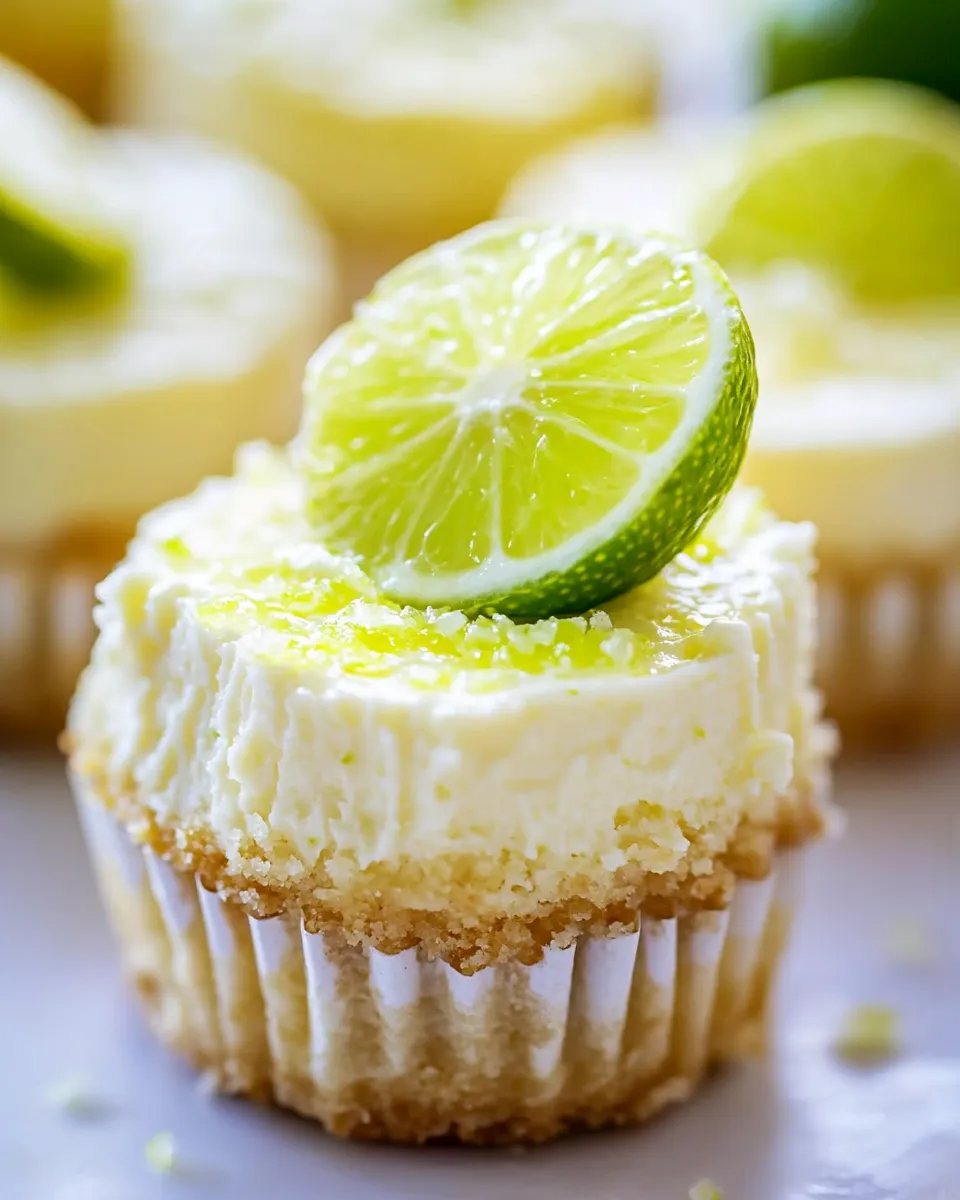
Mini Key Lime Cheesecakes
These Mini Key Lime Cheesecakes are the perfect balance of creamy, tangy, and sweet, all nestled in a buttery graham cracker crust. They’re an excellent option for any gathering or simply for satisfying a sweet tooth at home. With a zesty key lime flavor and a silky-smooth texture, these mini delights are sure to impress your family and friends. Plus, they are easy to make, which means you can whip them up in a snap and enjoy the delightful taste of summer any time of the year.
Why This Recipe is a Keeper
There are so many reasons to love this recipe for Mini Key Lime Cheesecakes. For starters, they are incredibly versatile. Whether you’re hosting a summer barbecue, celebrating a birthday, or just indulging in a cozy night at home, these mini cheesecakes are the perfect sweet treat. The combination of creamy cheesecake with the bright, tart flavor of key limes makes each bite refreshing and satisfying. Not to mention, they’re portioned perfectly, making them a guilt-free indulgence.
What Goes Into Mini Key Lime Cheesecakes
Creating these tasty Mini Key Lime Cheesecakes requires a handful of simple ingredients. Here’s what you’ll need:
- 1 cup Graham Crackers, pulsed into crumbs
- 3 tablespoons Granulated Sugar
- 1/4 teaspoon Kosher Salt
- 3 and 1/2 tablespoons Unsalted Butter, melted
- 12 ounces Full-Fat Cream Cheese, very soft
- 1/2 cup Sour Cream, at room temperature
- 3/4 cup Granulated Sugar
- 1 teaspoon Pure Vanilla Extract
- 1/2 teaspoon Key Lime Extract
- 2 large Eggs plus 1 Egg Yolk, at room temperature
- 1 and 1/2 tablespoons All-purpose Flour
- 1/3 cup Key Lime Juice
- 1 teaspoon Key Lime Zest
- 1/2 cup Heavy Cream
- 1 tablespoon Confectioners’ Sugar
What You’ll Need (Gear)
Before diving into the cooking process, gather these essential tools:
- Food Processor – For pulsing graham crackers into crumbs.
- Mixing Bowls – For combining ingredients.
- Whisk – For mixing the cheesecake batter until smooth.
- Measuring Cups and Spoons – To ensure accurate measurements.
- Mini Muffin Tin – For baking the cheesecakes.
- Parchment Paper – Optional, for easy removal of cheesecakes.
- Stand Mixer or Hand Mixer – To blend the cream cheese mixture smoothly.
Mini Key Lime Cheesecakes Cooking Guide
Follow these simple steps to create your own delightful Mini Key Lime Cheesecakes:
Step 1: Prepare the Crust
Preheat your oven to 325°F (163°C). In a food processor, pulse the graham crackers until finely crushed. In a mixing bowl, combine the graham cracker crumbs, granulated sugar, kosher salt, and melted butter. Stir until the mixture resembles wet sand.
Step 2: Form the Crust
Line a mini muffin tin with paper liners or grease it lightly. Spoon about a tablespoon of the crust mixture into each muffin cup, pressing it down firmly with the back of a spoon to create an even layer. Bake the crusts for 5-7 minutes until slightly golden. Remove from the oven and let cool while you prepare the filling.
Step 3: Make the Cheesecake Filling
In a large mixing bowl, beat the softened cream cheese until smooth and creamy. Add the sour cream, granulated sugar, vanilla extract, and key lime extract, mixing until well combined. Next, add in the eggs and egg yolk one at a time, mixing well after each addition. Don’t forget to scrape down the sides of the bowl!
Step 4: Incorporate Dry Ingredients
Sift the all-purpose flour into the cheesecake batter and gently fold it in. Finally, stir in the key lime juice and zest, blending until the mixture is smooth and creamy.
Step 5: Fill the Muffin Tin
Spoon the cheesecake filling over the cooled crusts in the mini muffin tin, filling each cup about 3/4 full. This allows room for the cheesecakes to rise slightly while baking.
Step 6: Bake the Cheesecakes
Bake the cheesecakes in the preheated oven for 18-20 minutes. They should be set around the edges but slightly jiggly in the center. Turn off the oven and crack the door, allowing the cheesecakes to cool slowly for about 30 minutes.
Step 7: Chill the Cheesecakes
Remove the cheesecakes from the oven and let them cool to room temperature. Once cooled, refrigerate them for at least 2 hours or overnight to allow them to set completely.
Step 8: Prepare the Whipped Cream Topping
In a mixing bowl, beat the heavy cream until soft peaks form. Gradually add the confectioners’ sugar and continue to beat until stiff peaks form.
Step 9: Serve and Enjoy!
Once the cheesecakes are chilled and set, carefully remove them from the muffin tin. Top each mini cheesecake with a dollop of whipped cream and a sprinkle of lime zest for that extra touch. Enjoy your delicious Mini Key Lime Cheesecakes!
Budget & Availability Swaps
If you’re looking to save a few dollars or can’t find certain ingredients, here are some budget-friendly swaps:
- Use store-brand graham crackers instead of name-brand for a cheaper option.
- Plain yogurt can replace sour cream if you want a lighter option.
- Instead of key lime juice, regular lime juice works, though it will alter the flavor slightly.
- If you don’t have key lime extract, you can skip it or use a bit more vanilla extract for flavor.
What Not to Do
When making these Mini Key Lime Cheesecakes, be sure to avoid these common pitfalls:
- Don’t overmix the batter once you add the eggs; this can lead to cracks in your cheesecakes.
- Make sure your cream cheese is very soft; otherwise, you’ll end up with lumps in your filling.
- Don’t skip the chilling time—this step is crucial for achieving the right texture.
- Be careful not to overbake; the cheesecakes should be slightly jiggly in the middle when you remove them from the oven.
Save It for Later
If you find yourself with leftover Mini Key Lime Cheesecakes, don’t worry! They store beautifully. Here are some tips for keeping them fresh:
- Store in an airtight container in the refrigerator for up to 5 days.
- For longer storage, you can freeze them. Just wrap each cheesecake in plastic wrap and then place them in a freezer-safe container. They’ll last for up to 2 months.
- Thaw frozen cheesecakes in the refrigerator overnight before serving.
Ask & Learn
Can I use a different type of crust?
Absolutely! You can try using Oreo crumbs, vanilla wafer crumbs, or even a nut-based crust for a gluten-free option.
What if I can’t find key limes?
If key limes aren’t available, regular limes will work just fine. You may want to adjust the amount of sugar slightly to account for the difference in tartness.
Can I make these cheesecakes dairy-free?
Yes, you can use dairy-free cream cheese and coconut cream in place of heavy cream for a dairy-free version of Mini Key Lime Cheesecakes.
How do I know when they’re done baking?
The cheesecakes should be set around the edges but still slightly jiggly in the center. They will continue to firm up as they cool.
Make It Tonight
Now that you have all the details, it’s time to gather your ingredients and get started on your own batch of Mini Key Lime Cheesecakes. With their bright flavor and creamy texture, they’re bound to be a hit with anyone who tries them. So why wait? Treat yourself and your loved ones to these delightful mini desserts that are sure to brighten up any occasion. You won’t regret it!
Mini Key Lime Cheesecakes
Ingredients
Equipment
Method
- Step 1: Prepare the Crust - Preheat your oven to 325°F (163°C). In a food processor, pulse the graham crackers until finely crushed. In a mixing bowl, combine the graham cracker crumbs, granulated sugar, kosher salt, and melted butter. Stir until the mixture resembles wet sand.
- Step 2: Form the Crust - Line a mini muffin tin with paper liners or grease it lightly. Spoon about a tablespoon of the crust mixture into each muffin cup, pressing it down firmly with the back of a spoon to create an even layer. Bake the crusts for 5-7 minutes until slightly golden. Remove from the oven and let cool while you prepare the filling.
- Step 3: Make the Cheesecake Filling - In a large mixing bowl, beat the softened cream cheese until smooth and creamy. Add the sour cream, granulated sugar, vanilla extract, and key lime extract, mixing until well combined. Add in the eggs and egg yolk one at a time, mixing well after each addition. Scrape down the sides of the bowl!
- Step 4: Incorporate Dry Ingredients - Sift the all-purpose flour into the cheesecake batter and gently fold it in. Stir in the key lime juice and zest, blending until smooth and creamy.
- Step 5: Fill the Muffin Tin - Spoon the cheesecake filling over the cooled crusts in the mini muffin tin, filling each cup about 3/4 full.
- Step 6: Bake the Cheesecakes - Bake the cheesecakes in the preheated oven for 18-20 minutes. They should be set around the edges but slightly jiggly in the center. Turn off the oven and crack the door, allowing the cheesecakes to cool slowly for about 30 minutes.
- Step 7: Chill the Cheesecakes - Remove the cheesecakes from the oven and let them cool to room temperature. Once cooled, refrigerate them for at least 2 hours or overnight to allow them to set completely.
- Step 8: Prepare the Whipped Cream Topping - In a mixing bowl, beat the heavy cream until soft peaks form. Gradually add the confectioners' sugar and continue to beat until stiff peaks form.
- Step 9: Serve and Enjoy! - Once the cheesecakes are chilled and set, carefully remove them from the muffin tin. Top each mini cheesecake with a dollop of whipped cream and a sprinkle of lime zest. Enjoy!
Notes
- Store in an airtight container in the refrigerator for up to 5 days.
- For longer storage, you can freeze them for up to 2 months.
- Thaw frozen cheesecakes in the refrigerator overnight before serving.