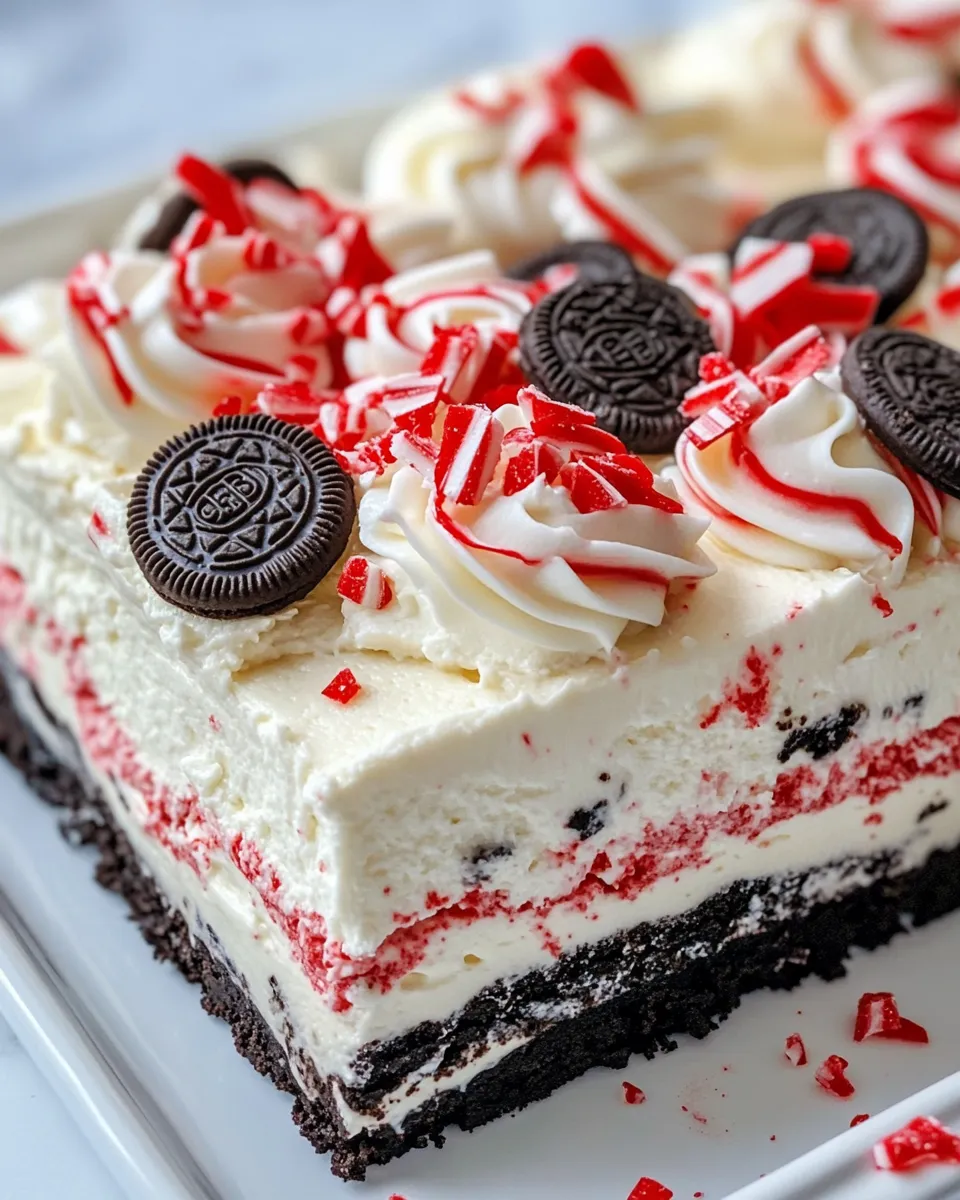
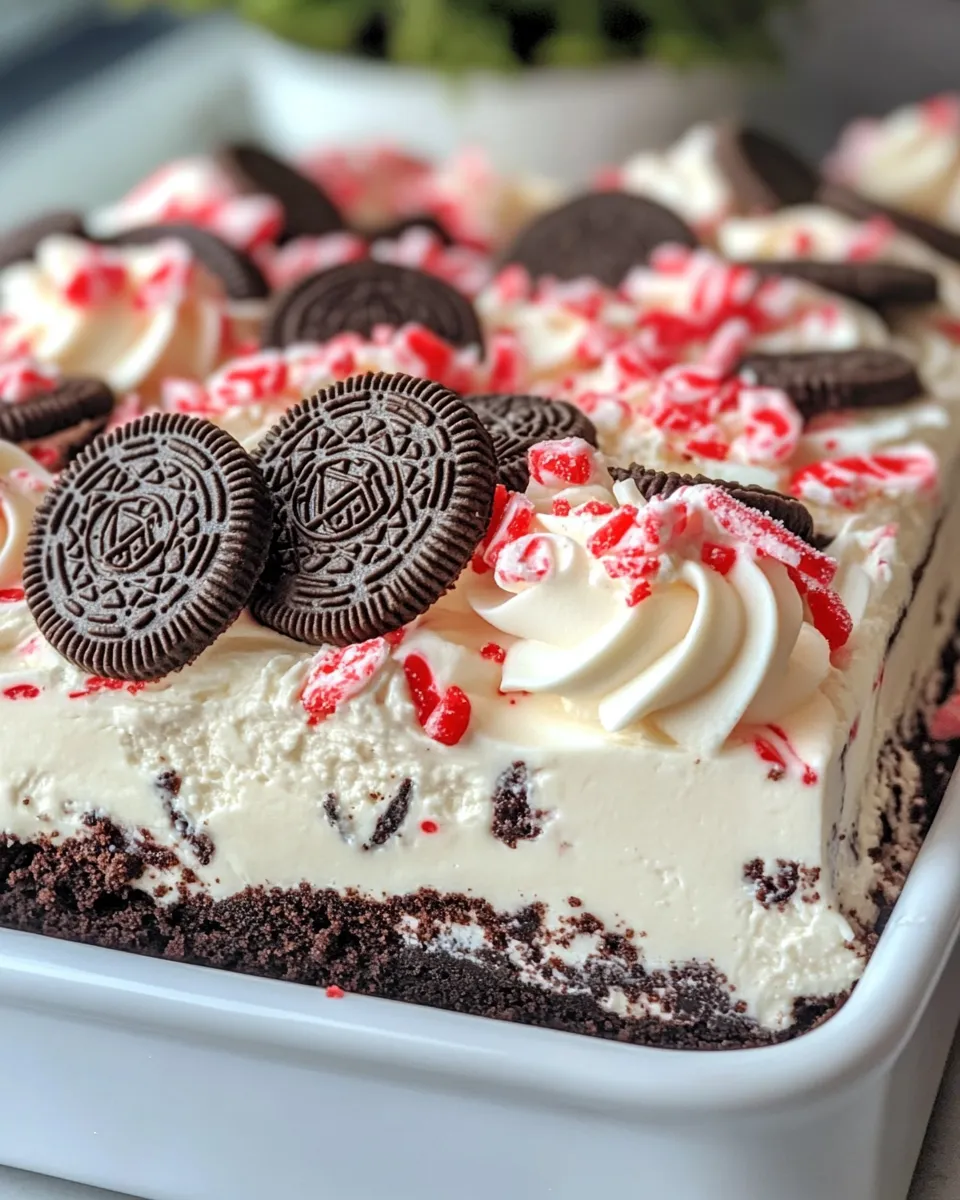
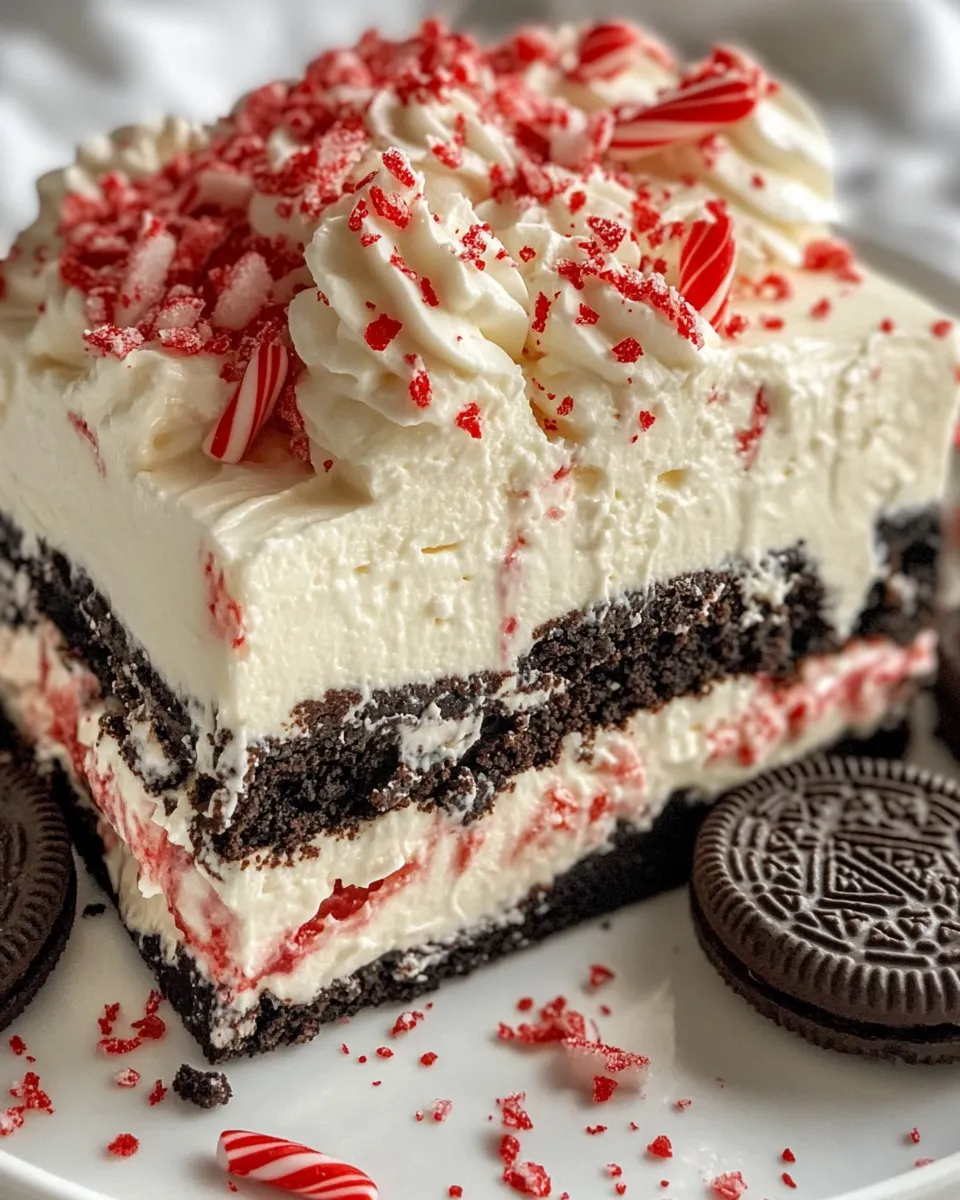
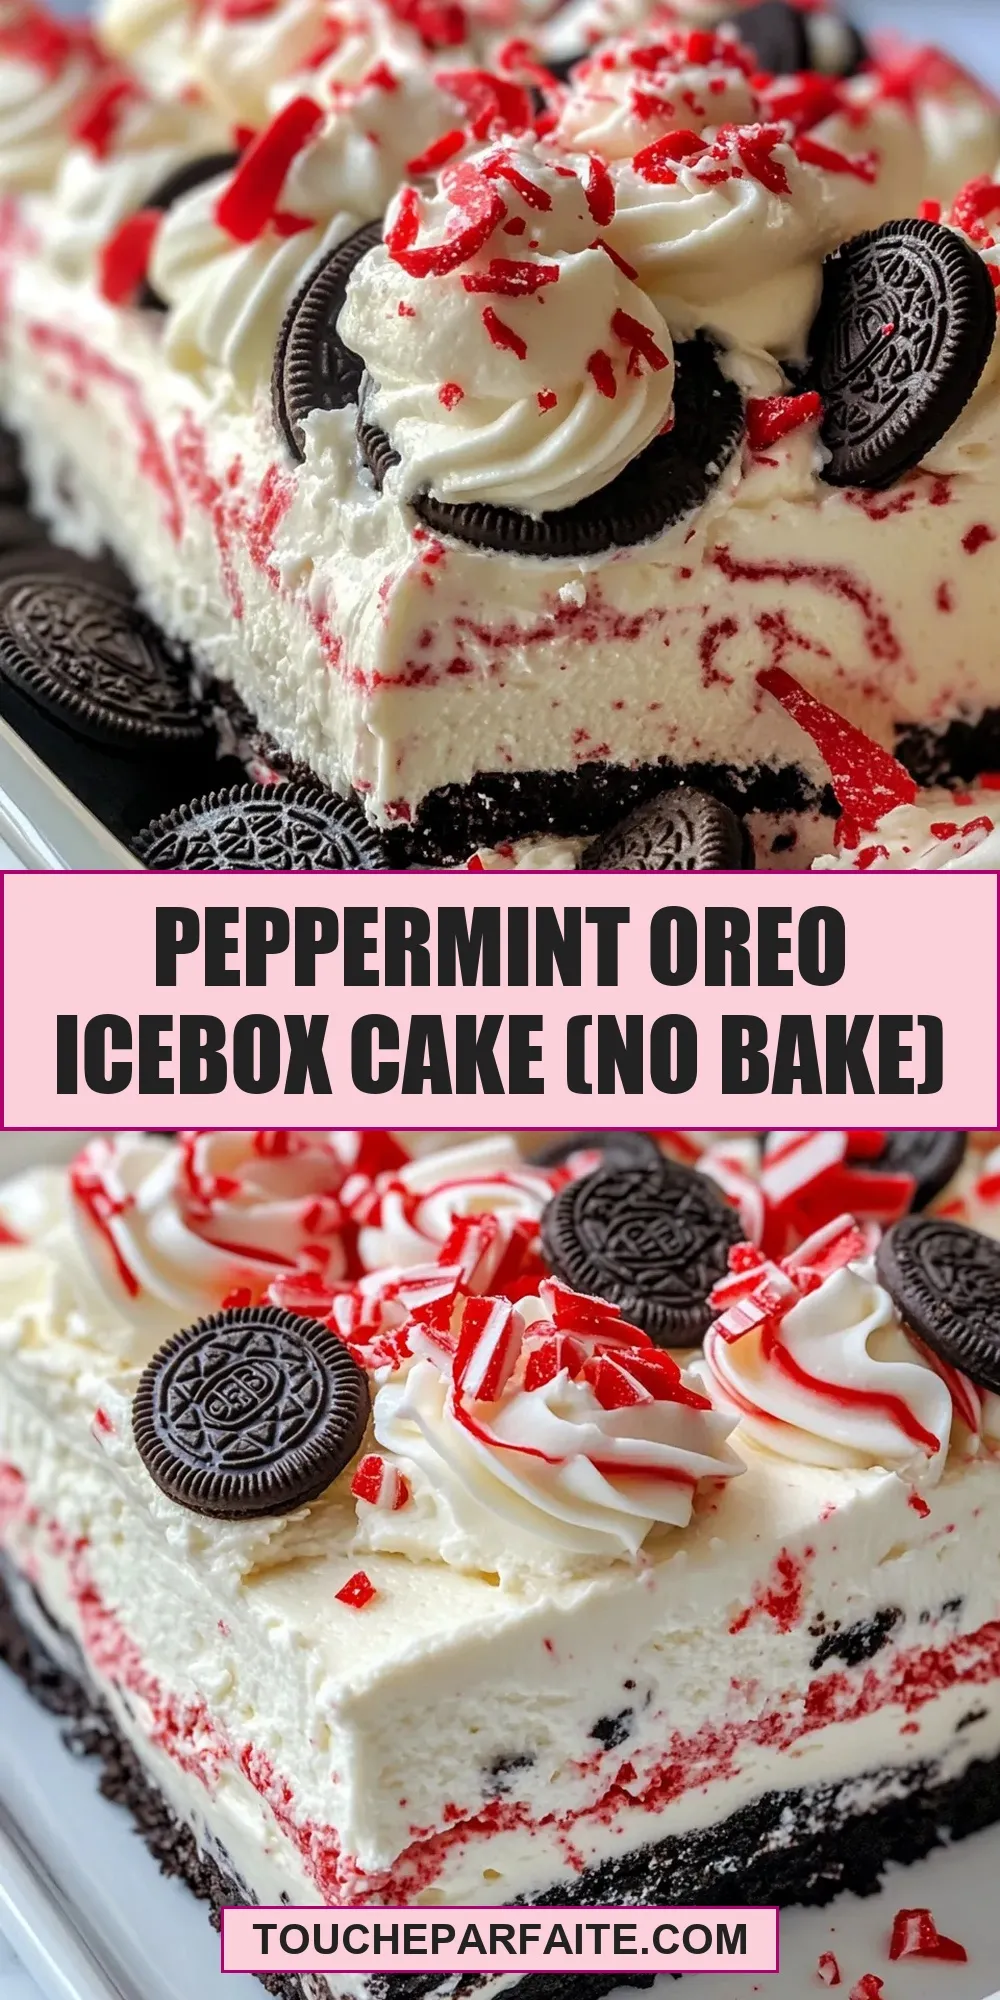
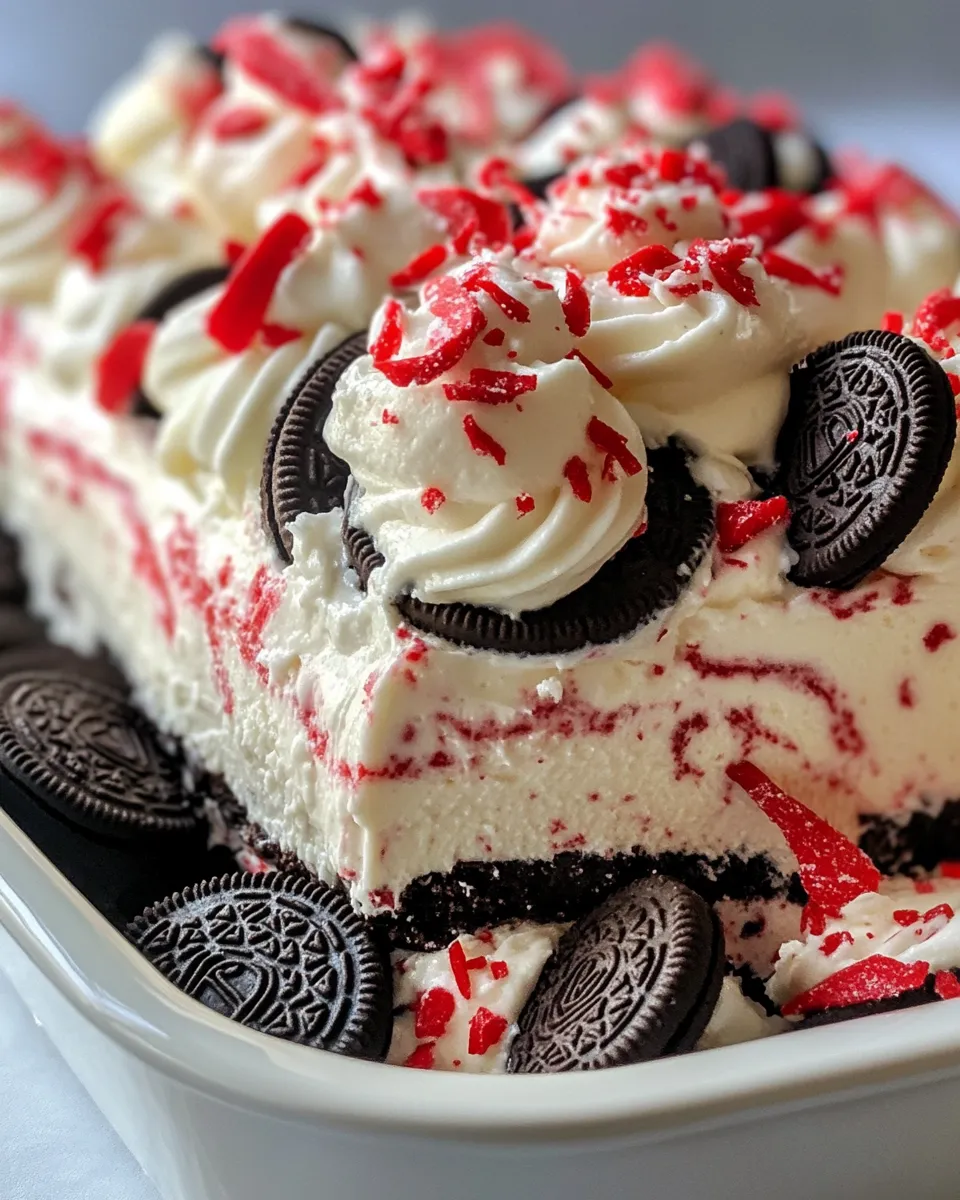
Peppermint Oreo Icebox Cake (No Bake)
If you’re looking for a festive, crowd-pleasing dessert that’s incredibly easy to make, Peppermint Oreo Icebox Cake (No Bake) is your new go-to. This delightful treat layers crunchy Oreo cookies with a light, fluffy peppermint cream filling, all chilled to perfection. It’s a luscious, minty twist on the classic icebox cake that requires no oven time, making it perfect for busy days or last-minute celebrations. The cool, creamy texture combined with the bold mint and chocolate flavors will have everyone asking for seconds (or thirds!). Let’s dive into why this recipe deserves a spot in your dessert rotation!
Why This Recipe is a Keeper
This Peppermint Oreo Icebox Cake (No Bake) is a winner for so many reasons. First, it’s incredibly simple—no baking means less fuss and fewer dishes. It’s also incredibly versatile, perfect as a holiday dessert or a refreshing treat any time of year. The peppermint extract adds a festive, bright flavor that pairs beautifully with the rich chocolate Oreos. Plus, the texture contrast between the creamy filling and the crisp cookie layers is nothing short of heavenly. It’s a no-fail recipe that can be made ahead, which means less stress on the day you want to serve it. Whether you’re hosting friends, bringing a dessert to a potluck, or just craving something sweet and minty, this icebox cake fits the bill.
Ingredient Notes
- Oreo Cookies (24 cookies): Use the classic Oreo cookies for the best chocolate-to-cream balance. They soak up the filling nicely without getting too soggy.
- Heavy Whipping Cream (2 cups): This is the base for your fluffy filling. Make sure it is cold for best whipping results.
- Cream Cheese (8 oz, softened): Adds a slight tang and richness to the filling. Softening it makes mixing smooth and easy.
- Powdered Sugar (1 cup): Sweetens the cream cheese mixture and helps stabilize the whipped cream.
- Vanilla Extract (1 tsp): Enhances the overall flavor with a warm, aromatic note.
- Peppermint Extract (1/4 cup): The star of the show! Adds that unmistakable minty freshness that complements the Oreos perfectly.
- Crushed Peppermint Candies (1/2 cup, optional): Adds a festive crunch on top and extra peppermint flavor. You can skip or substitute with crushed candy canes.
Tools & Equipment Needed
- Mixing Bowls: For whipping cream and mixing cream cheese filling.
- Electric Mixer or Stand Mixer: Essential for whipping the heavy cream to soft peaks.
- Spatula: For folding and spreading the filling evenly.
- 9×13-inch Baking Dish or Pan: Ideal size for layering the cookies and filling.
- Measuring Cups and Spoons: Accurate measurements ensure perfect flavor balance.
- Plastic Wrap or Lid: To cover the cake while chilling.
Stepwise Method: Peppermint Oreo Icebox Cake (No Bake)
Step 1: Prepare the Filling
In a large bowl, beat the softened cream cheese until smooth and creamy. Gradually add the powdered sugar, vanilla extract, and peppermint extract. Mix until fully combined.
Step 2: Whip the Heavy Cream
Using a cold mixing bowl and beaters, whip the heavy cream until soft peaks form. This means the cream holds shape but curls over slightly when the beaters are lifted.
Step 3: Combine the Mixtures
Gently fold the whipped cream into the cream cheese mixture using a spatula. Be careful not to deflate the whipped cream; the goal is a light, fluffy filling.
Step 4: Assemble the Cake
Spread a thin layer of the peppermint cream mixture on the bottom of your baking dish. Place 6 Oreo cookies in a single layer over the cream. Spread a generous layer of the peppermint filling over the cookies. Repeat layers two more times, ending with a layer of filling on top.
Step 5: Garnish
Sprinkle crushed peppermint candies over the top layer of filling for a festive, crunchy finish.
Step 6: Chill Overnight
Cover the dish with plastic wrap and refrigerate for at least 8 hours, preferably overnight. This allows the Oreos to soften and absorb the creamy filling, creating that perfect icebox cake texture.
Step 7: Serve and Enjoy
Slice into squares and serve chilled. This dessert is rich, creamy, and bursting with minty chocolate goodness.
Texture-Safe Substitutions
- Oreos: If you prefer, substitute with any chocolate sandwich cookie that holds up well to moisture.
- Heavy Cream: For a lighter option, use whipping cream, but the texture will be less stable.
- Cream Cheese: Greek yogurt can be used for a tangier, lighter filling, though texture will differ slightly.
- Powdered Sugar: Substitute with a natural sweetener like powdered coconut sugar for a different flavor profile.
- Peppermint Extract: Vanilla extract or almond extract can be swapped if you want a different flavor twist.
Troubles You Can Avoid
- Runny Filling: Make sure the cream cheese is well softened but not melted. Overwhipping the cream can also cause it to separate.
- Soggy Cookies: Use sturdy sandwich cookies. Don’t add any liquid directly to the cookies; the filling moisture is enough to soften them properly.
- Flavor Too Strong or Weak: Measure peppermint extract carefully—too much can be overpowering, too little might be bland.
- Filling Not Set: Chill the cake long enough—overnight is best for ideal texture.
Save It for Later
This Peppermint Oreo Icebox Cake (No Bake) keeps beautifully in the refrigerator for up to 3 days. Cover tightly with plastic wrap or an airtight lid to prevent it from absorbing other fridge odors. You can also freeze slices individually wrapped in plastic and foil for up to a month. Thaw overnight in the fridge before serving to maintain the best texture and flavor.
Troubleshooting Q&A
Can I use reduced-fat cream cheese or whipped topping?
Reduced-fat cream cheese can be used but may result in a less creamy, slightly tangier filling. Whipped topping (like Cool Whip) can replace heavy cream but won’t provide the same richness or stability.
What if my peppermint extract is too strong?
If your peppermint extract is very potent, start with less—try 2 tablespoons instead of 1/4 cup and adjust to taste. You can also balance with extra vanilla extract or powdered sugar.
Can I make this icebox cake without an electric mixer?
While an electric mixer makes whipping cream easier and faster, you can whip cream by hand with a whisk—just be prepared for a workout and slower results.
How do I prevent the cookies from becoming too soggy?
Use sturdy sandwich cookies like Oreos and avoid adding any extra liquid. The filling’s moisture softens the cookies just enough during refrigeration to create a tender but not mushy texture.
Save & Share
Love this Peppermint Oreo Icebox Cake (No Bake)? Save it to your favorite recipe collection or pin it on Pinterest for easy access. Share it with friends and family on social media to spread the joy of this creamy, minty delight. Don’t forget to tag your photos with #PeppermintOreoIceboxCake so everyone can see your festive creation!
This Peppermint Oreo Icebox Cake (No Bake) is a showstopper that’s as simple as it is stunning. It takes just a handful of ingredients and minimal effort to create a dessert that’s creamy, crunchy, and bursting with peppermint-chocolate flavor. Whether for a holiday gathering or a special treat any day, it’s guaranteed to impress and satisfy. Give it a try, and you’ll have a new favorite dessert that’s easy to make, easy to love, and impossible to resist. Happy chilling and indulging!
Share on Pinterest
Peppermint Oreo Icebox Cake (No Bake)
Ingredients
Equipment
Method
- In a large bowl, beat the softened cream cheese until smooth and creamy. Gradually add the powdered sugar, vanilla extract, and peppermint extract. Mix until fully combined.
- Using a cold mixing bowl and beaters, whip the heavy cream until soft peaks form. This means the cream holds shape but curls over slightly when the beaters are lifted.
- Gently fold the whipped cream into the cream cheese mixture using a spatula. Be careful not to deflate the whipped cream; the goal is a light, fluffy filling.
- Spread a thin layer of the peppermint cream mixture on the bottom of your baking dish. Place 6 Oreo cookies in a single layer over the cream. Spread a generous layer of the peppermint filling over the cookies. Repeat layers two more times, ending with a layer of filling on top.
- Sprinkle crushed peppermint candies over the top layer of filling for a festive, crunchy finish.
- Cover the dish with plastic wrap and refrigerate for at least 8 hours, preferably overnight. This allows the Oreos to soften and absorb the creamy filling, creating that perfect icebox cake texture.
- Slice into squares and serve chilled. This dessert is rich, creamy, and bursting with minty chocolate goodness.
Notes
- Make sure to use cold heavy cream for best whipping results.
- Chill the cake overnight to allow the cookies to soften properly for the ideal texture.
- Crushed peppermint candies on top add a festive crunch but can be omitted or substituted.
- Use sturdy sandwich cookies like Oreos to avoid soggy layers.
- Adjust peppermint extract quantity to taste to avoid overpowering the dessert.