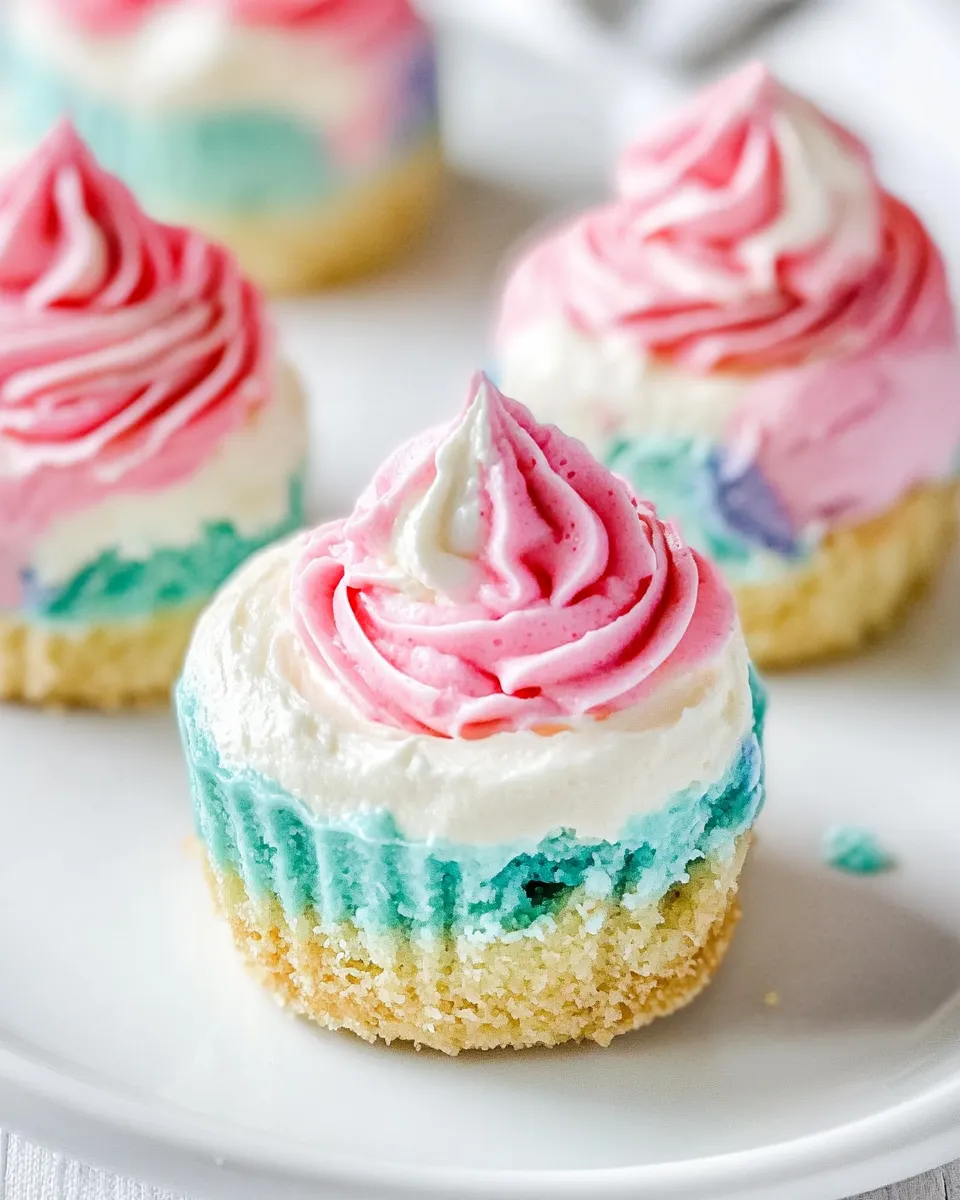
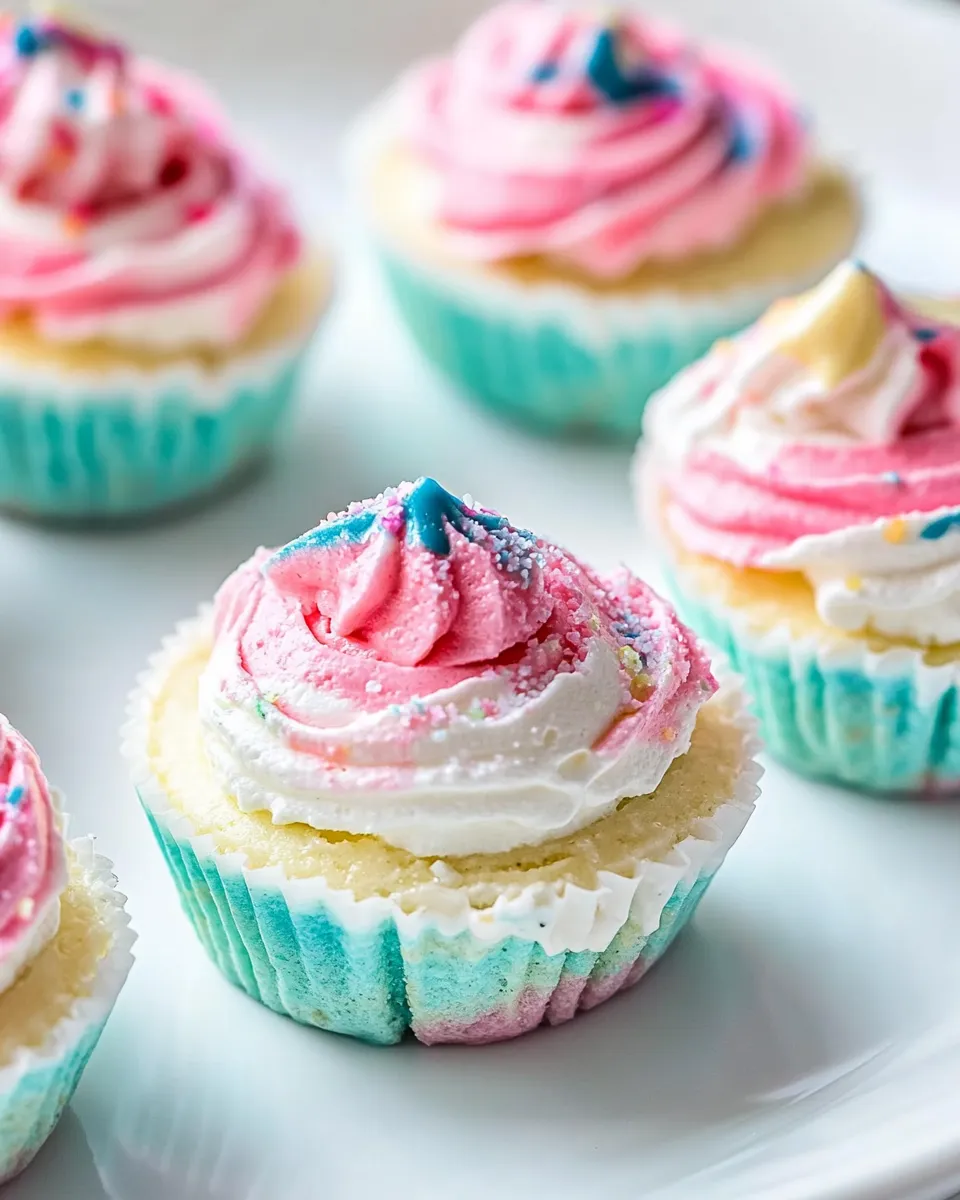
Small-batch No-bake Unicorn Cheesecakes
Imagine a dessert that captures the magic of rainbows and whimsy, all while being easy to whip up in your kitchen. These Small-batch No-bake Unicorn Cheesecakes are not just a feast for the eyes; they’re a delightful treat that’ll please your taste buds too. Whether it’s for a birthday party, a whimsical brunch, or just because you deserve a little sweetness, this recipe is here to add a splash of color to your dessert table. Plus, the no-bake aspect means you can skip the oven and dive straight into creamy, dreamy goodness.
Why This Recipe Belongs in Your Rotation
If you’re like me, you appreciate recipes that are not only delicious but also visually stunning. These Small-batch No-bake Unicorn Cheesecakes check all the boxes. They’re quick to make, require minimal ingredients, and are perfect for portion control. You won’t have to worry about leftovers — unless you want to, of course! With their vibrant colors and fun toppings, these cheesecakes are perfect for any occasion, from casual get-togethers to festive celebrations. What’s more, they cater to all ages, making them a hit with kids and adults alike.
The Essentials
To bring your Small-batch No-bake Unicorn Cheesecakes to life, gather the following ingredients:
- 4 foil cupcake liners: These will hold your cheesecakes perfectly and make for easy serving.
- 1/2 cup graham cracker crumbs: This serves as the base for your crust. You can easily crush 3 full graham cracker sheets.
- 1 heaping tablespoon (16g) brown sugar: Adds a rich sweetness to your crust.
- 3 tablespoons (1.5oz) butter, melted: This binds the crust together and gives it a rich flavor.
- 1/4 cup heavy cream: Whipped to perfection, it adds lightness to your cheesecake filling.
- 5 ounces cream cheese, softened: The star ingredient for a creamy texture.
- 3 heaping tablespoons (42g) granulated sugar: Sweetens the cheesecake filling.
- 1/2 teaspoon vanilla extract: Enhances the overall flavor.
- Blue food coloring: To create the magical blue layer.
- Red food coloring: For that beautiful pink layer.
- Whipped cream: For topping and added indulgence.
- Sprinkles: Because who doesn’t love a little sparkle?
Gear Checklist
Before you dive into this colorful adventure, make sure you have the right tools:
- Handheld electric mixer: This makes whipping your cream and blending the cheesecake a breeze.
- Mixing bowls: You’ll need at least two for the crust and the filling.
- Measuring cups and spoons: Precision is key in baking!
- Spoon or spatula: For mixing and layering your cheesecake.
- Refrigerator: Essential for setting your no-bake cheesecakes.
Build Small-batch No-bake Unicorn Cheesecakes Step by Step
Creating these Small-batch No-bake Unicorn Cheesecakes is simple and fun. Follow these steps:
Step 1: Prepare the Crust
In a mixing bowl, combine the graham cracker crumbs, brown sugar, and melted butter. Mix until the mixture resembles wet sand.
Step 2: Form the Base
Evenly distribute the crust mixture into the 4 foil cupcake liners, pressing down firmly to form a solid base. Set aside.
Step 3: Make the Cheesecake Filling
In another bowl, use your handheld electric mixer to beat the softened cream cheese until smooth. Gradually add the granulated sugar and continue to mix until fully combined.
Step 4: Whip the Cream
In a separate bowl, whip the heavy cream until stiff peaks form. Gently fold the whipped cream into the cream cheese mixture, taking care not to deflate the airiness.
Step 5: Color the Cheesecake
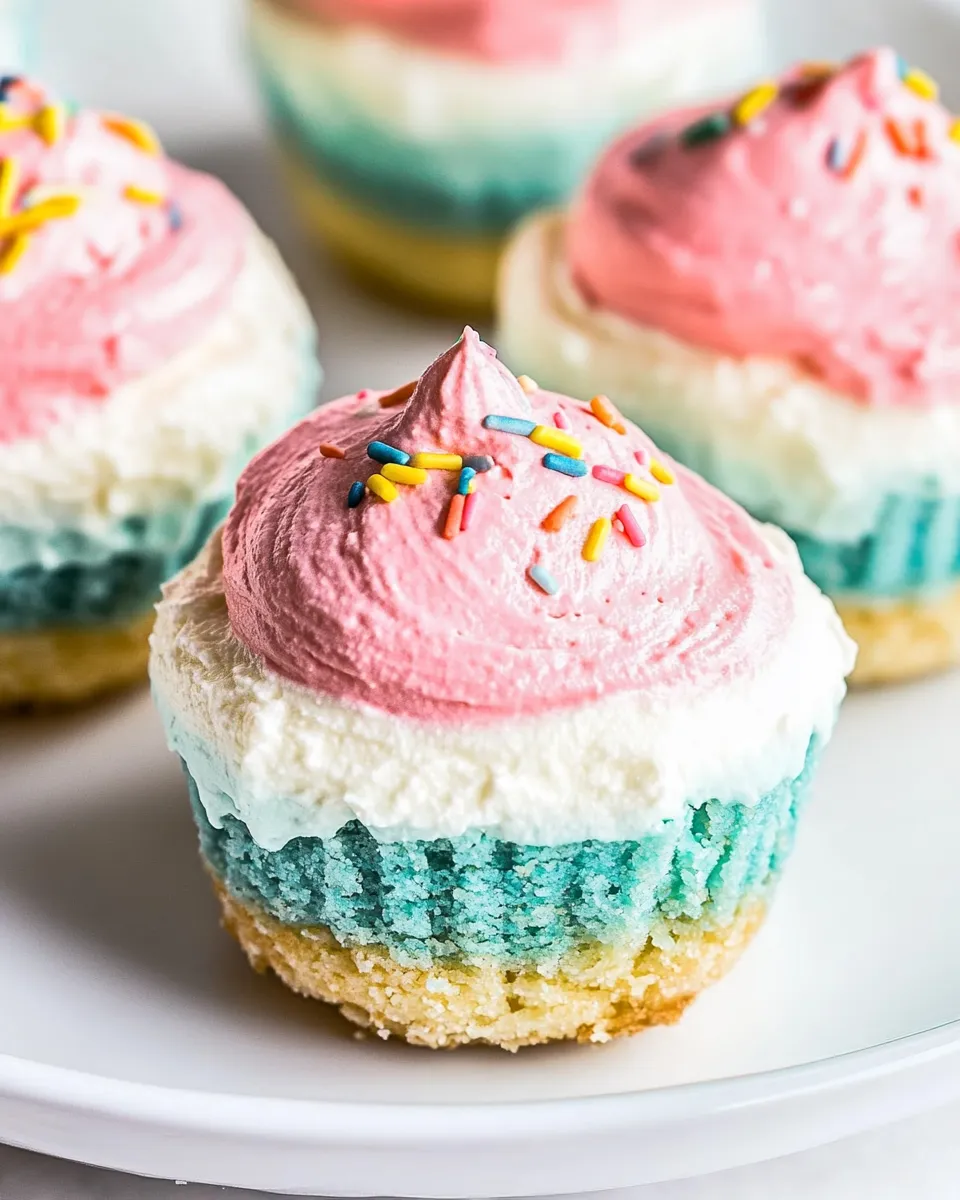
Divide the cheesecake mixture into two bowls. In one bowl, add a few drops of blue food coloring and mix until you reach your desired shade. In the other bowl, add red food coloring and mix to achieve a lovely pink hue.
Step 6: Layer the Cheesecakes
Spoon the blue cheesecake mixture into the prepared crusts, filling them about halfway. Next, layer the pink cheesecake mixture on top, filling each liner to the top.
Step 7: Chill
Place the cheesecakes in the refrigerator for at least 4 hours, or until set.
Step 8: Serve with Toppings
Once set, top each cheesecake with a dollop of whipped cream and a sprinkle of your favorite colorful sprinkles.
Flavor-Forward Alternatives
If you’re looking to switch things up, consider these fun alternatives:
- Chocolate Chip: Fold in mini chocolate chips into the cheesecake mixture for a fun crunch.
- Fruit Swirl: Add a layer of fruit puree, like strawberry or blueberry, for a fruity twist.
- Coconut: Mix in shredded coconut for a tropical flavor.
- Mint Chocolate: Add mint extract and chocolate chips for a refreshing minty cheesecake.
Missteps & Fixes
Even the best cooks can hit a snag. Here are some common missteps and how to fix them:
- Too runny filling: Make sure your cream cheese is softened properly and not too warm. Chill the mixture longer if needed.
- Crust falling apart: If your crust is not holding together, add a little more melted butter and press it down more firmly.
- Color not vibrant enough: Add more food coloring gradually until you achieve your desired hue.
How to Store & Reheat
To keep your Small-batch No-bake Unicorn Cheesecakes fresh:
Store them in an airtight container in the refrigerator for up to 3 days. These cheesecakes are best served cold. If you need to reheat them, it’s best to let them sit at room temperature for about 15 minutes before serving, as they are meant to be enjoyed chilled.
Handy Q&A
Can I use a different type of crust?
Absolutely! You can use Oreo crumbs, vanilla wafer crumbs, or even a gluten-free alternative if you prefer. Just be sure to mix it with melted butter to hold it together.
How can I make these cheesecakes dairy-free?
Substitute cream cheese with a dairy-free alternative and use coconut cream in place of heavy cream. Adjust the sugar if necessary to suit your taste.
Can I freeze these cheesecakes?
Yes! You can freeze the cheesecakes for up to a month. Just wrap them tightly in plastic wrap and then foil before placing them in the freezer. Thaw them in the refrigerator before serving.
What can I use instead of food coloring?
You can use natural alternatives like beet juice for red and spirulina powder for blue, though the colors may not be as vibrant.
The Last Word
These Small-batch No-bake Unicorn Cheesecakes are not just a dessert; they’re an experience. With their colorful layers and creamy texture, they bring joy to any occasion. Their simplicity and adaptability make them a staple in any home baker’s repertoire. So why not treat yourself and your loved ones? It’s time to embrace the magic of these delightful cheesecakes and add a sprinkle of whimsy to your next gathering. Happy baking!
Small-batch No-bake Unicorn Cheesecakes
Ingredients
Equipment
Method
- Step 1: Prepare the Crust - In a mixing bowl, combine the graham cracker crumbs, brown sugar, and melted butter. Mix until the mixture resembles wet sand.
- Step 2: Form the Base - Evenly distribute the crust mixture into the 4 foil cupcake liners, pressing down firmly to form a solid base. Set aside.
- Step 3: Make the Cheesecake Filling - In another bowl, use your handheld electric mixer to beat the softened cream cheese until smooth. Gradually add the granulated sugar and continue to mix until fully combined.
- Step 4: Whip the Cream - In a separate bowl, whip the heavy cream until stiff peaks form. Gently fold the whipped cream into the cream cheese mixture, taking care not to deflate the airiness.
- Step 5: Color the Cheesecake - Divide the cheesecake mixture into two bowls. In one bowl, add a few drops of blue food coloring and mix until you reach your desired shade. In the other bowl, add red food coloring and mix to achieve a lovely pink hue.
- Step 6: Layer the Cheesecakes - Spoon the blue cheesecake mixture into the prepared crusts, filling them about halfway. Next, layer the pink cheesecake mixture on top, filling each liner to the top.
- Step 7: Chill - Place the cheesecakes in the refrigerator for at least 4 hours, or until set.
- Step 8: Serve with Toppings - Once set, top each cheesecake with a dollop of whipped cream and a sprinkle of your favorite colorful sprinkles.
Notes
- Store in an airtight container in the refrigerator for up to 3 days.
- For a chocolate twist, fold in mini chocolate chips.
- Can be frozen for up to a month, wrap tightly before freezing.