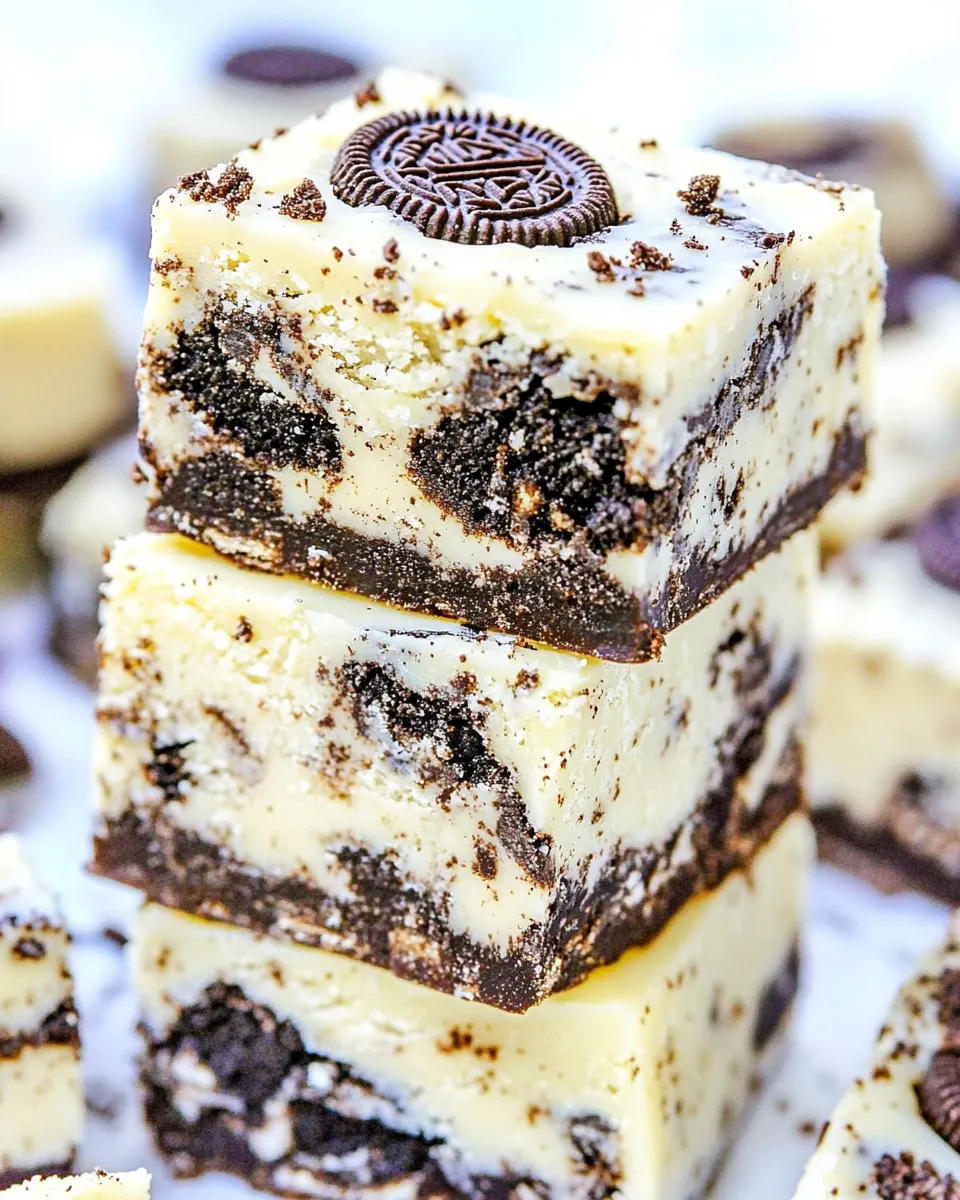
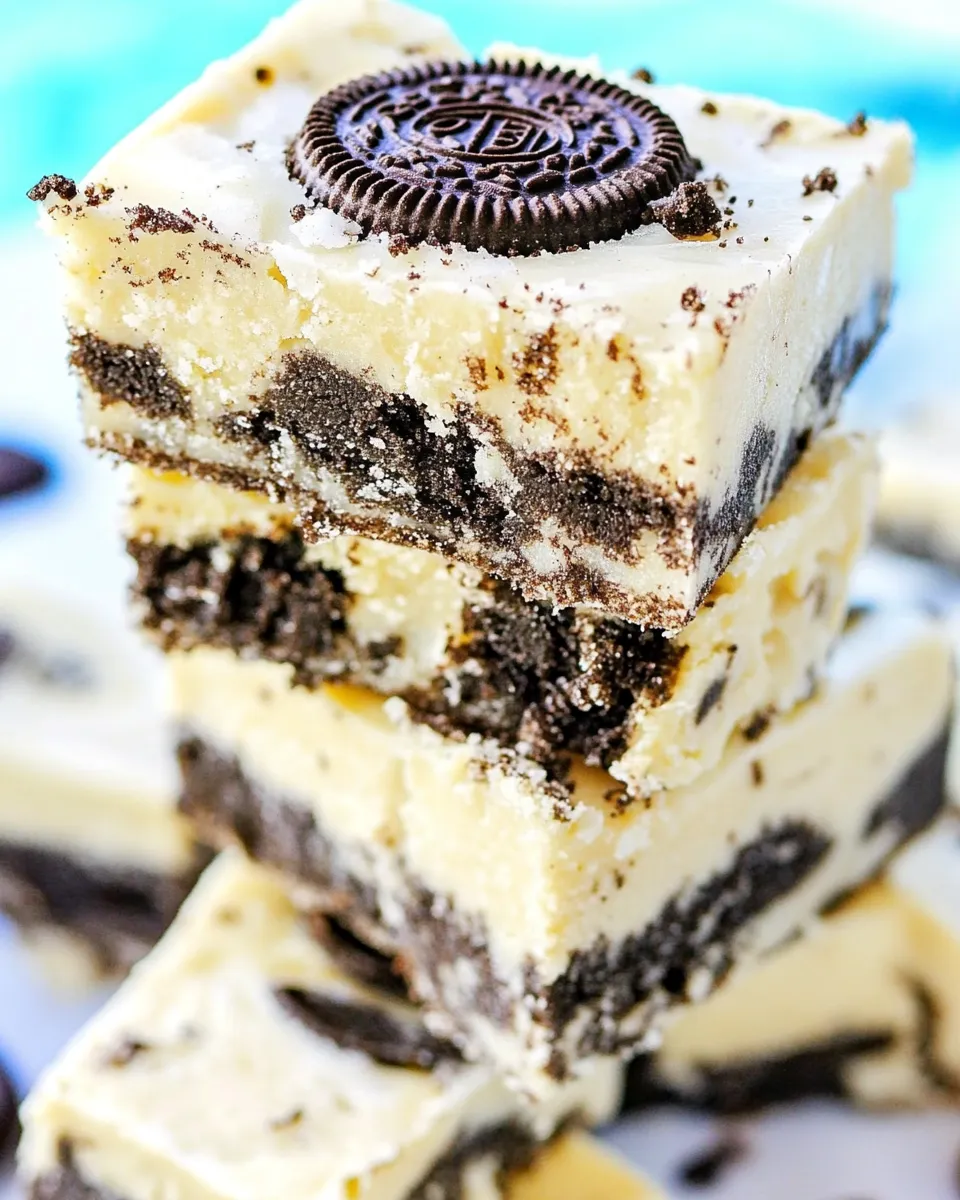
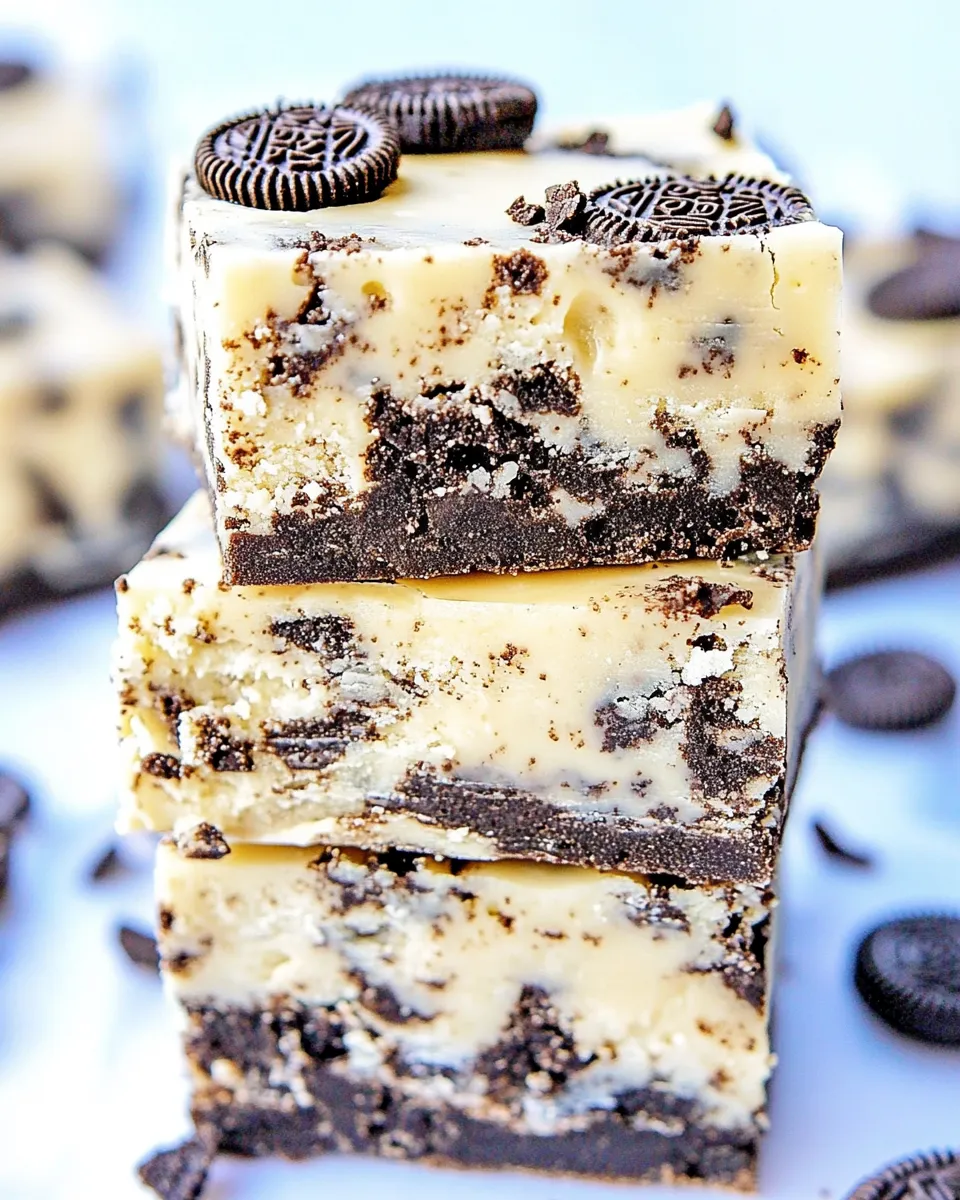
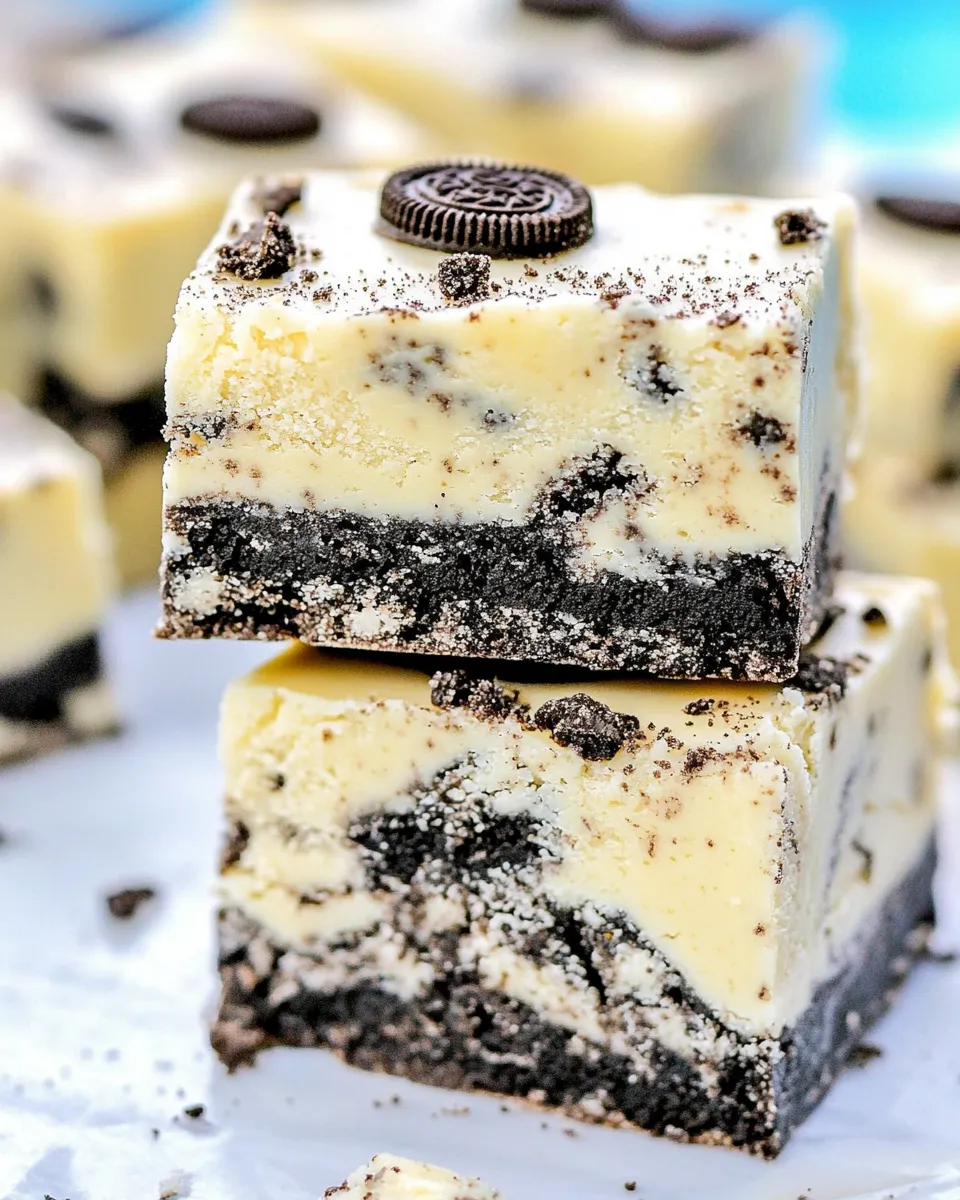
Easy Oreo Fudge
If you’re on the hunt for a quick, delicious treat that’s bound to impress, look no further than this Easy Oreo Fudge. With a creamy texture and rich chocolate flavor, this fudge is a delightful combination of sweetened condensed milk, white chocolate, and everyone’s favorite cookies—Oreo! Perfect for any occasion, whether it’s a cozy night in or a festive gathering, this recipe is as fun to make as it is to eat. Get ready to indulge in a dessert that’s simple, satisfying, and oh-so-delicious!
Why You’ll Love This Recipe
This Easy Oreo Fudge is an absolute game-changer for dessert lovers everywhere! Here’s why you’ll be head over heels:
- Quick and Simple: With just a handful of ingredients and minimal prep time, you can whip up this fudge in no time.
- Decadent Flavors: The combination of creamy white chocolate and crunchy Oreo cookies creates a heavenly flavor explosion.
- Perfect for Sharing: Whether you’re hosting a party or need a sweet gift, this fudge is sure to please everyone.
- Versatile Treat: You can customize it with different mix-ins or toppings to suit your taste!
What to Buy
Gathering the right ingredients is essential for the perfect Easy Oreo Fudge. Here’s what you’ll need:
- 1 – 14 oz can of sweetened condensed milk
- 18 oz of white chocolate or white chocolate chips, chopped
- 24 Oreo cookies, crushed
- Optional: Additional Oreos for topping
- Optional: Sea salt or sprinkles for decoration
Gear Up: What to Grab
Before diving into the recipe, make sure you have the necessary tools at hand:
- Microwave-safe bowl: For melting the chocolate and mixing the ingredients.
- Spatula: To help stir and combine everything smoothly.
- 9×9 inch baking pan: Ideal for setting the fudge; line it with parchment paper for easy removal.
- Knife: For cutting the fudge into squares once it’s set.
Easy Oreo Fudge: How It’s Done
Now that you have everything you need, let’s get into the steps for creating this mouthwatering Easy Oreo Fudge!
Step 1: Prepare Your Pan
Start by lining a 9×9 inch baking pan with parchment paper. This will make it much easier to lift the fudge out once it’s set.
Step 2: Melt the White Chocolate
In a microwave-safe bowl, add the chopped white chocolate or white chocolate chips. Pour the sweetened condensed milk over the chocolate. Microwave in 30-second intervals, stirring in between, until the chocolate is fully melted and the mixture is smooth.
Step 3: Mix in the Oreos
Once the chocolate and condensed milk are combined, fold in the crushed Oreo cookies. Make sure they are evenly distributed throughout the mixture for that perfect Oreo flavor in every bite!
Step 4: Pour into the Pan
Pour the fudge mixture into the prepared baking pan. Use your spatula to spread it evenly, smoothing out the top.
Step 5: Add Toppings (Optional)
If you want to take your Easy Oreo Fudge to the next level, sprinkle some extra crushed Oreos on top. You can also add a pinch of sea salt or colorful sprinkles for a fun touch.
Step 6: Chill and Set
Place the pan in the refrigerator for at least 2 hours or until the fudge is firm. This is the hardest part—waiting for the fudge to set!
Step 7: Cut and Serve
Once the fudge is set, lift it out of the pan using the parchment paper. Cut it into squares and serve. Enjoy the smiles you’ll get from your friends and family when they take a bite!
Make It Your Way
There’s always room for creativity in the kitchen! Here are a few ideas to customize your Easy Oreo Fudge:
- Different Chocolates: Swap out white chocolate for milk chocolate or dark chocolate for a richer flavor.
- Nutty Addition: Stir in some chopped nuts like almonds or walnuts for added crunch.
- Flavored Extracts: Add a teaspoon of vanilla or mint extract to enhance the flavor profile.
- Swirls: Drizzle caramel or chocolate sauce on top before chilling for a decadent finish.
Things That Go Wrong
Even though this Easy Oreo Fudge is simple, sometimes things can go awry. Here are a few common pitfalls to watch out for:
- Chocolate Seizing: If you overheat the chocolate, it can seize up and become grainy. Always melt it in short bursts and stir well.
- Not Setting Properly: If your fudge doesn’t set, it may need more time in the fridge or you may have used too much liquid.
- Cracked Surface: If your fudge has cracks on top, it may be due to overheating. Be gentle while melting.
- Uneven Mixing: Ensure all ingredients are well combined for consistent flavor throughout the fudge.
Shelf Life & Storage
Once you’ve made your Easy Oreo Fudge, you’ll want to store it properly to keep it fresh.
- Refrigerate: Store the fudge in an airtight container in the refrigerator for up to 2 weeks.
- Freezing: If you want to keep it longer, you can freeze the fudge for up to 3 months. Just be sure to wrap it tightly in plastic wrap and then foil.
- Thawing: When ready to enjoy, thaw in the refrigerator overnight before serving.
Ask & Learn
Can I use other types of cookies instead of Oreos?
Absolutely! You can swap Oreos for any sandwich cookie or even use chocolate chip cookies for a different flavor profile.
How do I know when the fudge is set?
The fudge should be firm to the touch and not sticky. It may take a couple of hours in the fridge to achieve the right consistency.
Can I make this vegan?
Yes! You can use vegan white chocolate chips and plant-based sweetened condensed milk to make this fudge vegan-friendly.
What’s the best way to cut the fudge?
For clean cuts, use a sharp knife that’s been warmed slightly in hot water. Wipe it clean between cuts for neat squares!
Hungry for More?
If you can’t get enough of sweet treats, be sure to check out more delicious recipes on our blog! From classic brownies to creamy cheesecakes, there’s something to satisfy every sweet tooth. Don’t forget to experiment and make each recipe your own!
With its delightful combination of flavors and ease of preparation, this Easy Oreo Fudge will quickly become a staple in your dessert repertoire. Gather your ingredients, invite some friends over, and indulge in this treat that’s sure to bring joy to any occasion. Happy cooking!
Easy Oreo Fudge
Ingredients
Equipment
Method
- Start by lining a 9x9 inch baking pan with parchment paper.
- In a microwave-safe bowl, add the chopped white chocolate or white chocolate chips. Pour the sweetened condensed milk over the chocolate. Microwave in 30-second intervals, stirring in between, until the chocolate is fully melted and the mixture is smooth.
- Once the chocolate and condensed milk are combined, fold in the crushed Oreo cookies until evenly distributed.
- Pour the fudge mixture into the prepared baking pan, spreading it evenly with a spatula.
- Optionally, sprinkle some extra crushed Oreos on top and add sea salt or colorful sprinkles.
- Place the pan in the refrigerator for at least 2 hours or until the fudge is firm.
- Once set, lift the fudge out of the pan using the parchment paper and cut it into squares.
Notes
- Store the fudge in an airtight container in the refrigerator for up to 2 weeks.
- You can freeze the fudge for up to 3 months; wrap it tightly in plastic wrap and then foil.
- Use a sharp knife warmed in hot water for clean cuts.