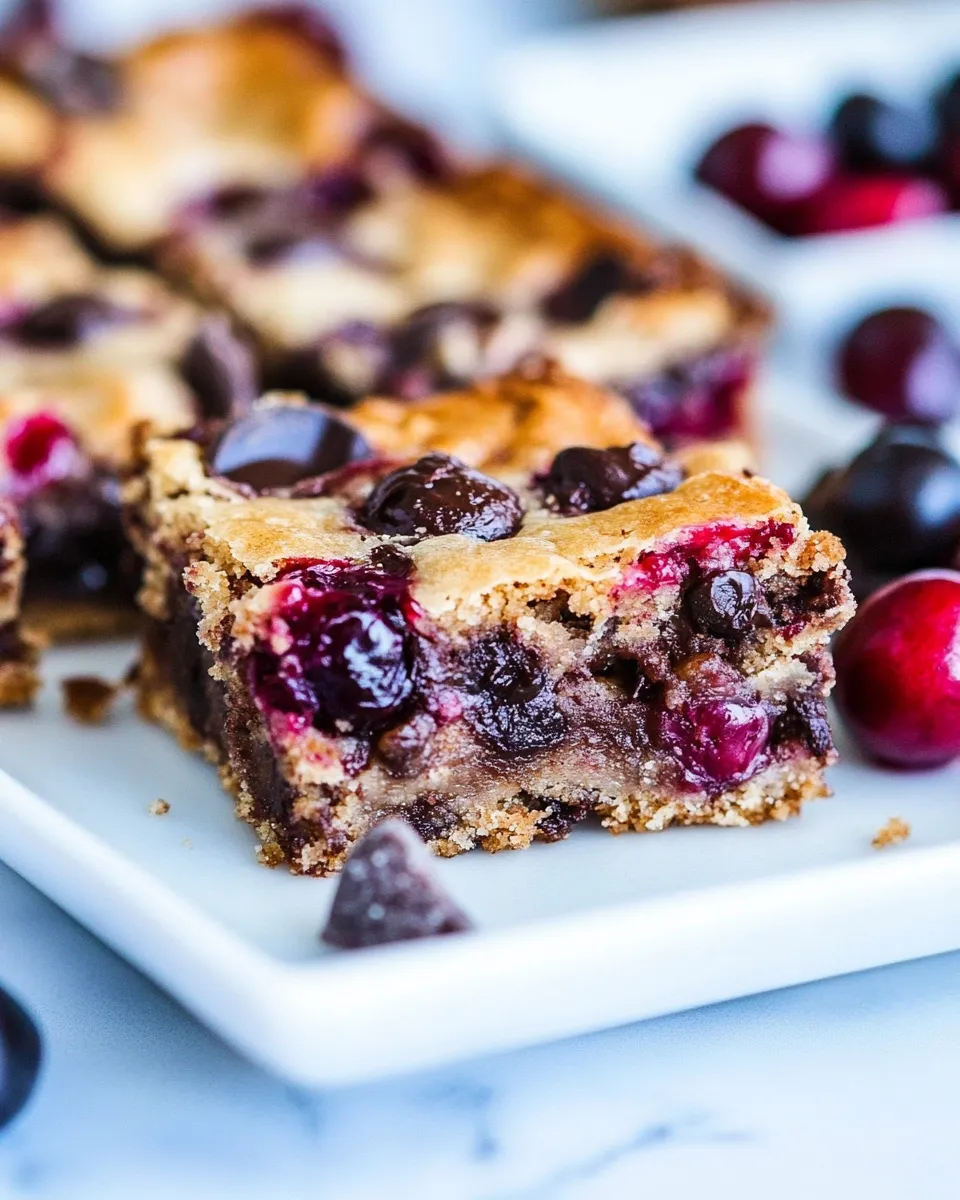
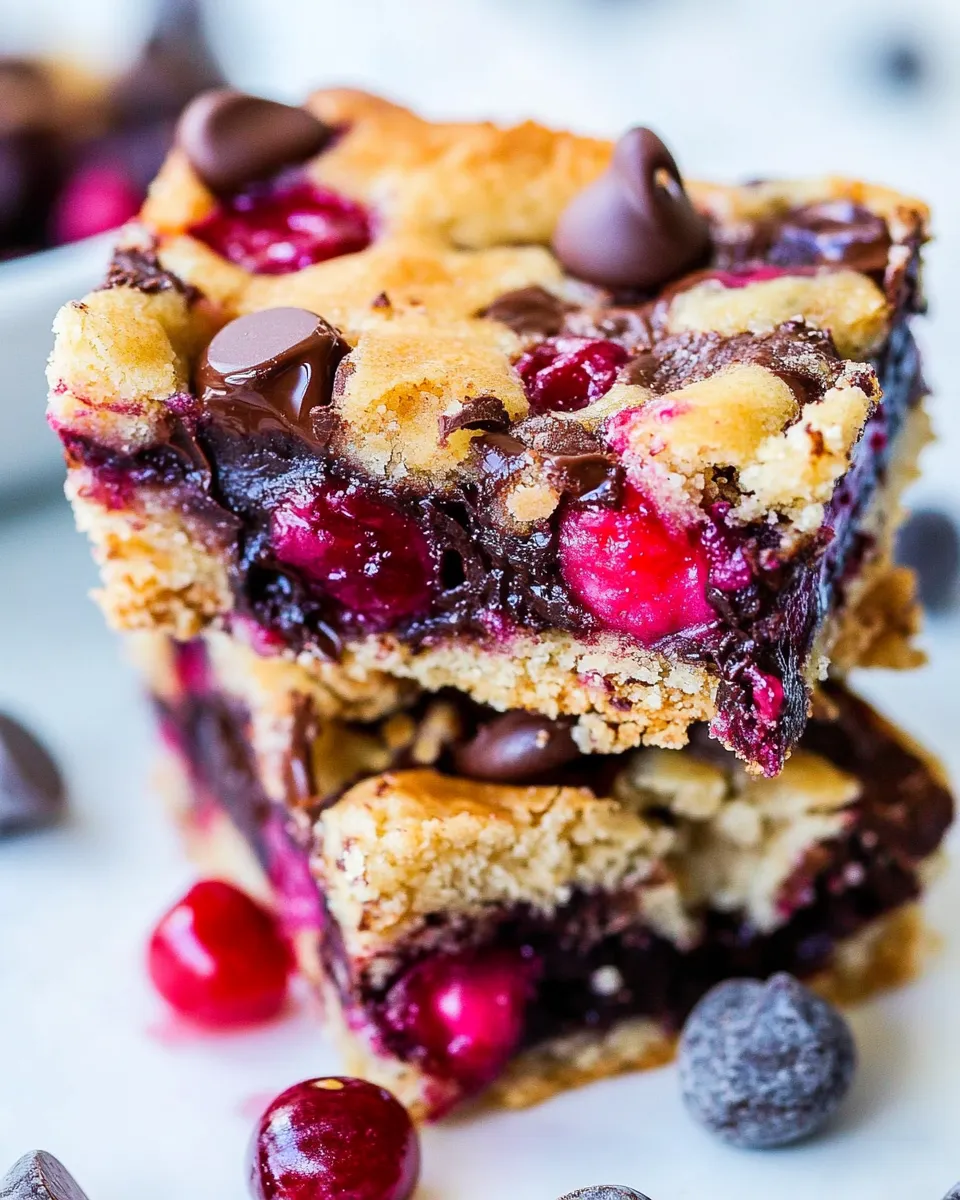
Chocolate Chip Cherry Bars
When it comes to delightful desserts that strike the perfect balance between sweet and tart, Chocolate Chip Cherry Bars take the cake—quite literally! These bars are an indulgent treat, perfect for sharing at gatherings or simply enjoying with a cup of coffee or tea at home. With the luscious combination of semi-sweet chocolate chips and juicy cherries, every bite is a burst of flavor. Let’s dive into why you’ll love these bars and how to make them!
Reasons to Love Chocolate Chip Cherry Bars
There are countless reasons to adore Chocolate Chip Cherry Bars. Here are just a few:
- Easy to Make: This recipe comes together quickly, requiring minimal effort and ingredients.
- Versatile: You can use either fresh or frozen cherries, making it a year-round treat.
- Perfect for Any Occasion: Whether it’s a picnic, potluck, or just a sweet craving, these bars fit right in.
- Rich Flavor: The combination of chocolate and cherries creates a decadent dessert that satisfies all taste buds.
- Great Texture: The chewy texture of the bars is complemented by the juicy cherries and melting chocolate.
Shopping List
To create these scrumptious Chocolate Chip Cherry Bars, you’ll need the following ingredients:
- 1 cup unsalted butter, melted (1 stick)
- 1 cup light brown sugar, packed
- 1 large egg
- 2 teaspoons vanilla extract
- 1 cup all-purpose flour
- 1/2 teaspoon salt (optional)
- 3/4 to 1 cup semi-sweet chocolate chips
- 1 cup cherries, fresh or frozen
Make sure to check your pantry for these staples before heading to the grocery store!
Equipment Breakdown
Having the right tools makes baking a breeze. Here’s what you’ll need for your Chocolate Chip Cherry Bars:
- Mixing Bowl: For combining the wet and dry ingredients.
- Wooden Spoon or Spatula: To mix your batter smoothly.
- 9×9-inch Baking Pan: The perfect size for baking your bars.
- Parchment Paper: Optional, but it makes for easy removal of the bars.
- Measuring Cups and Spoons: For accuracy in your ingredients.
- Oven: For baking those delicious bars to perfection.
Chocolate Chip Cherry Bars in Steps
Now, let’s get down to the nitty-gritty of how to make these delightful bars.
Step 1: Preheat Your Oven
Preheat your oven to 350°F (175°C). This ensures that your Chocolate Chip Cherry Bars bake evenly.
Step 2: Prepare the Baking Pan
Line your 9×9-inch baking pan with parchment paper for easy removal, or simply grease it with a little butter or cooking spray.
Step 3: Mix the Wet Ingredients
In a large mixing bowl, combine the melted butter and light brown sugar. Mix well until the mixture is smooth. Add in the egg and vanilla extract, stirring until fully incorporated.
Step 4: Combine the Dry Ingredients
In a separate bowl, whisk together the all-purpose flour and salt. Gradually add the dry mixture to the wet ingredients, stirring until just combined.
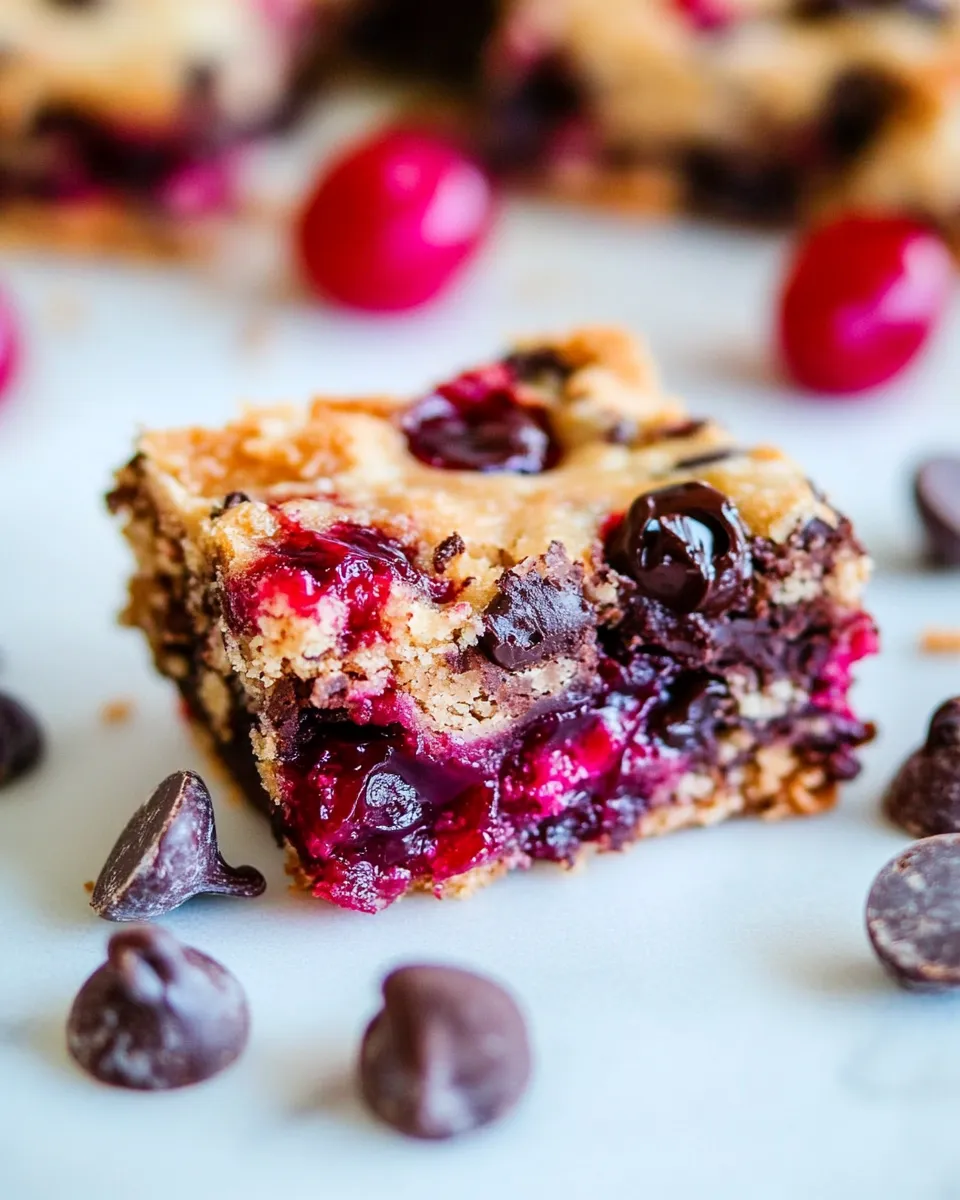
Step 5: Fold in the Chocolate Chips and Cherries
Gently fold in the semi-sweet chocolate chips and cherries. Ensure they are evenly distributed throughout the batter.
Step 6: Bake the Bars
Pour the batter into your prepared baking pan and spread it evenly. Bake in the preheated oven for 25-30 minutes, or until the edges are golden brown and a toothpick inserted in the center comes out clean.
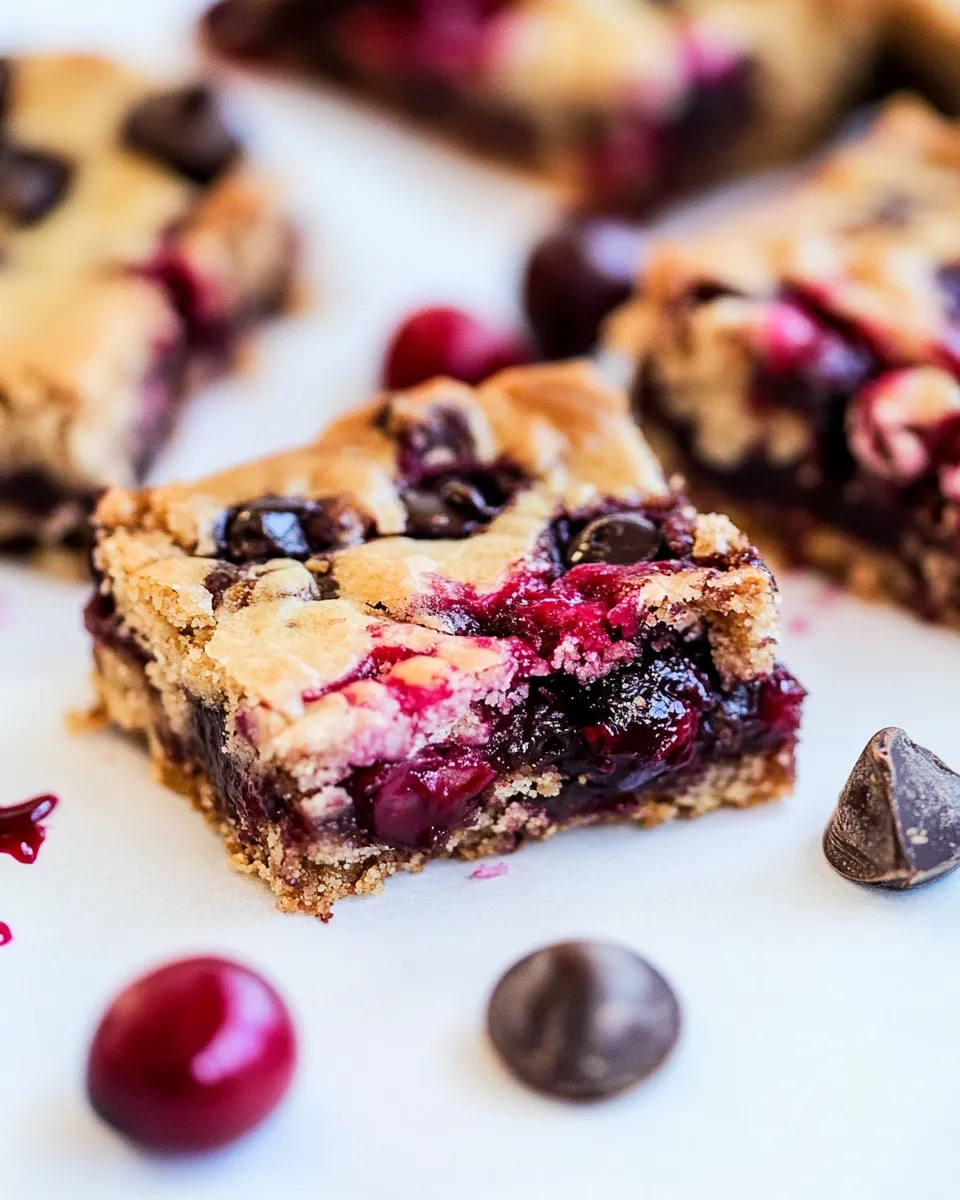
Step 7: Cool and Slice
Once baked, remove from the oven and let the bars cool in the pan for about 10 minutes before transferring them to a wire rack to cool completely. Once cooled, slice into bars and enjoy!
Make It Diet-Friendly
If you’re looking to make your Chocolate Chip Cherry Bars a bit lighter or suitable for specific dietary needs, consider these options:
- Butter Alternatives: Use coconut oil or a vegan butter substitute for a dairy-free option.
- Reduce Sugar: Substitute part of the brown sugar with a natural sweetener like maple syrup or agave nectar.
- Gluten-Free Flour: Use a gluten-free all-purpose flour blend for a gluten-free version.
- Healthier Chocolate Chips: Opt for dark chocolate chips or sugar-free varieties.
Mistakes Even Pros Make
Baking is all about precision, but even seasoned bakers can slip up. Here are common pitfalls to avoid when making Chocolate Chip Cherry Bars:
- Overmixing the Batter: This can lead to tough bars. Mix just until combined.
- Using Cold Ingredients: Ensure your butter is melted and your eggs are at room temperature for better mixing.
- Not Measuring Ingredients Accurately: Use proper measuring tools to avoid discrepancies in your recipe.
- Skipping the Cooling Time: Cutting the bars too soon can result in a messy, crumbly treat.
Shelf Life & Storage
Proper storage can prolong the life of your Chocolate Chip Cherry Bars. Here’s how to keep them fresh:
- Room Temperature: Store in an airtight container for up to 3 days.
- Refrigerator: They can last up to a week if stored in the fridge.
- Freezer: For longer storage, freeze the bars wrapped tightly in plastic wrap and then in foil for up to 3 months. Thaw overnight in the refrigerator before enjoying.
Quick Questions
Can I use frozen cherries in this recipe?
Absolutely! Frozen cherries work perfectly in Chocolate Chip Cherry Bars. Just make sure to thaw and drain them to avoid excess moisture.
What can I substitute for light brown sugar?
You can use dark brown sugar for a richer flavor or granulated sugar mixed with a bit of molasses for a similar taste.
Can I add nuts to the bars?
Yes! Chopped walnuts or pecans would make a great addition to your Chocolate Chip Cherry Bars.
How do I know when the bars are done baking?
The edges should be golden brown, and a toothpick inserted in the center should come out clean or with a few moist crumbs attached.
Serve & Enjoy
Once your Chocolate Chip Cherry Bars have cooled, they’re ready to be served. Cut them into squares and enjoy them as a delightful snack or dessert. Pair them with a scoop of vanilla ice cream for an extra indulgent experience, or enjoy them plain with a glass of milk or cup of coffee. They are sure to impress your family and friends!
These bars are not just a treat; they’re a testament to the joy of baking. With their rich chocolate flavor and the tartness of cherries, each bar is a celebration of taste that’s simple yet sophisticated. Whip up a batch today, and you’ll understand why Chocolate Chip Cherry Bars are a favorite for dessert lovers everywhere!
Chocolate Chip Cherry Bars
Ingredients
Equipment
Method
- Preheat your oven to 350°F (175°C) to ensure even baking.
- Line your 9x9-inch baking pan with parchment paper or grease it with butter.
- In a large mixing bowl, combine the melted butter and light brown sugar until smooth. Add the egg and vanilla extract, stirring until fully incorporated.
- In a separate bowl, whisk together the all-purpose flour and salt. Gradually add the dry mixture to the wet ingredients, stirring until just combined.
- Gently fold in the semi-sweet chocolate chips and cherries until evenly distributed.
- Pour the batter into the prepared baking pan and spread it evenly. Bake for 25-30 minutes, or until the edges are golden brown and a toothpick inserted in the center comes out clean.
- Once baked, let the bars cool in the pan for about 10 minutes before transferring to a wire rack to cool completely. Slice into bars and enjoy!
Notes
- For a dairy-free option, substitute butter with coconut oil or vegan butter.
- Experiment with different types of chocolate chips for varied flavor.
- Store in an airtight container for up to 3 days at room temperature.