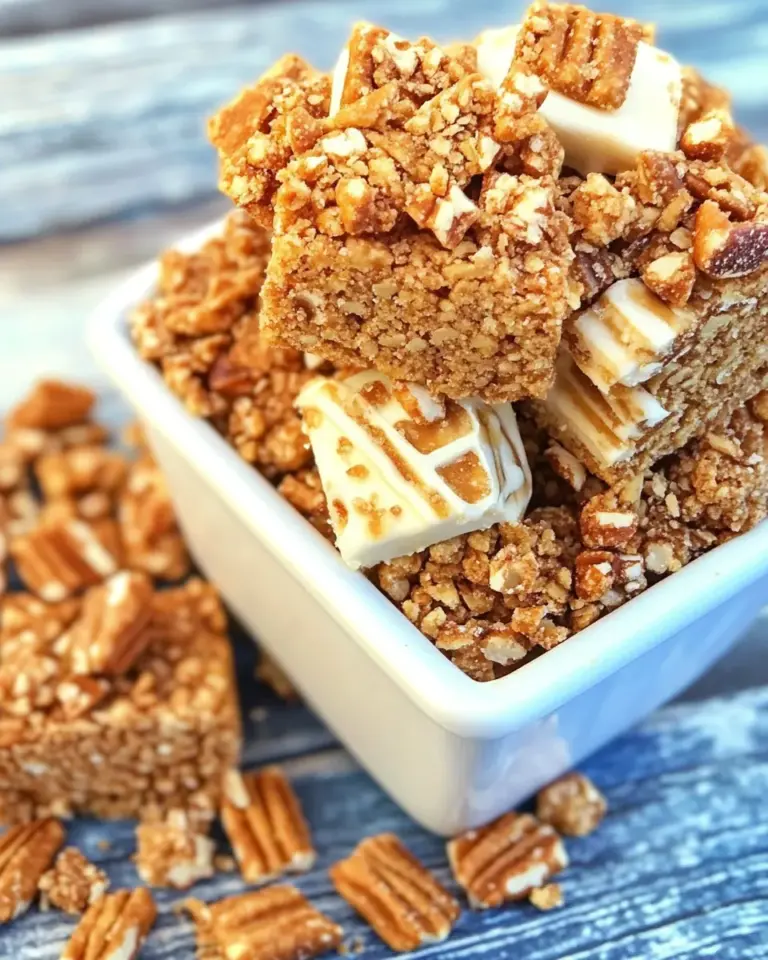
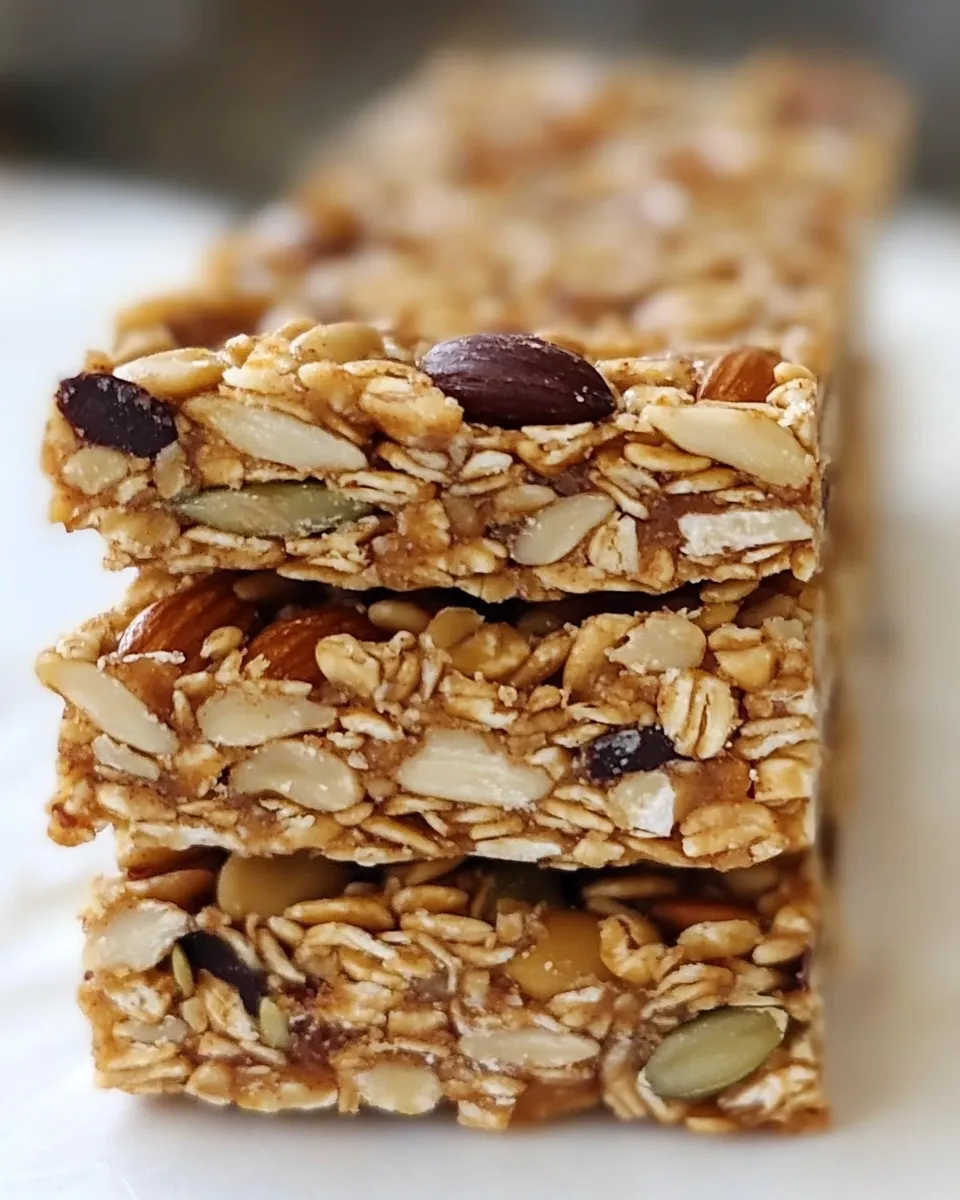
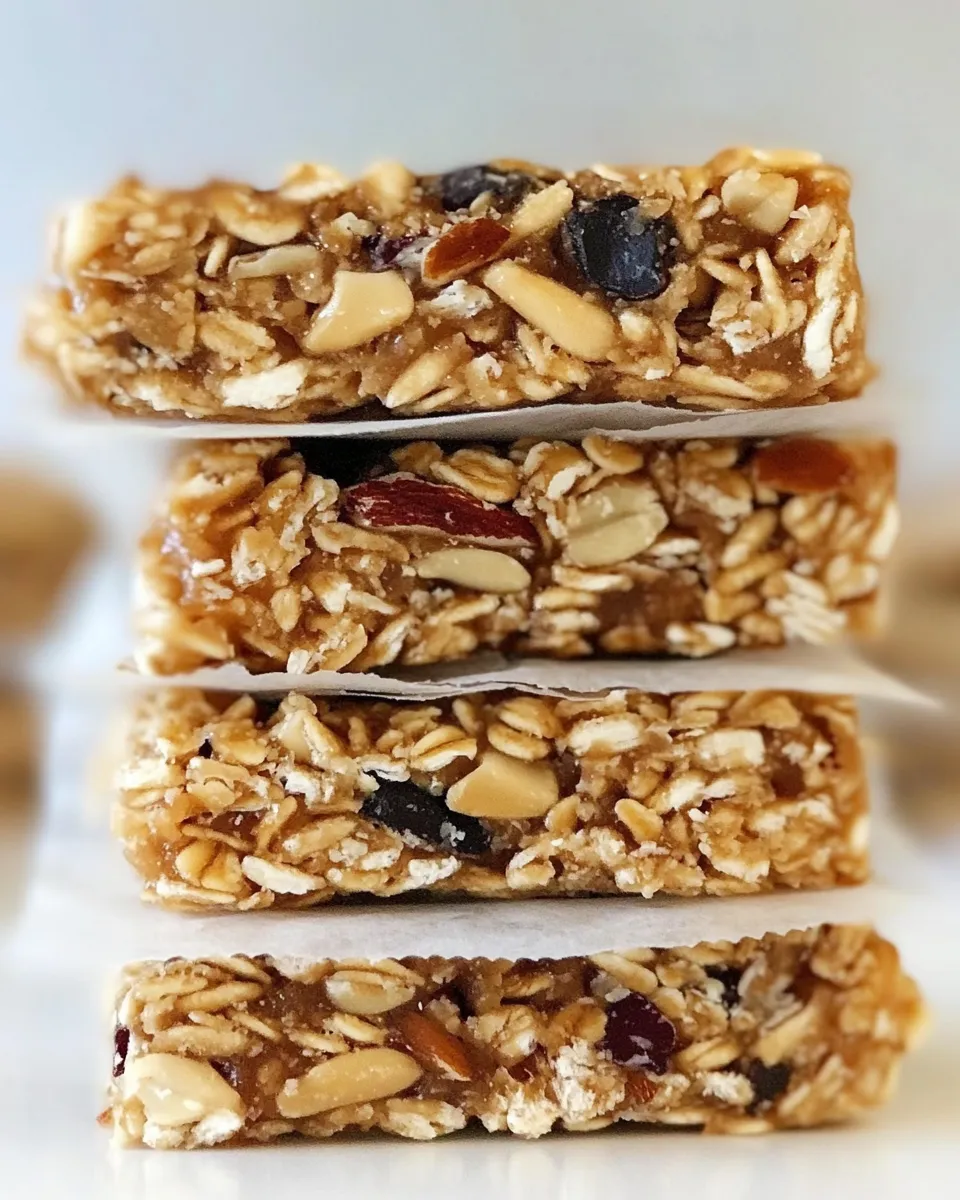
No-Bake Nut and Seed Bars
If you’re on the hunt for a delicious, energy-boosting snack that requires no oven and minimal fuss, look no further than these No-Bake Nut and Seed Bars. Perfect for busy mornings, post-workout fuel, or an afternoon pick-me-up, these bars are packed with wholesome ingredients that not only satisfy your hunger but also provide a delightful crunch. With a blend of nuts, seeds, and oats, they’re both nutritious and satisfying. Plus, they come together in just a few simple steps!
Why It’s Crowd-Pleasing

These No-Bake Nut and Seed Bars are a hit at gatherings, school lunches, or even as a mid-day snack. Their combination of textures—from the chewy oats and crispy rice cereal to the crunchy nuts and seeds—creates a delightful eating experience. The sweetness from the honey and brown sugar balances perfectly with the nutty flavors, making them appealing to both adults and kids alike. Whether you’re preparing a snack for a picnic, a road trip, or just to have on hand at home, these bars are sure to please a crowd!
The Ingredient Lineup
- 1/2 cup butter – Provides richness and helps bind the ingredients.
- 1/2 cup honey – Acts as a natural sweetener and holds everything together.
- 2/3 cup brown sugar – Adds depth and caramel flavor to the bars.
- 1/2 teaspoon ground cinnamon – A warm spice that enhances the overall flavor profile.
- 3 cups rolled oats – The hearty base that adds fiber and texture.
- 1 1/2 cups crispy rice cereal – Introduces a light, crunchy element.
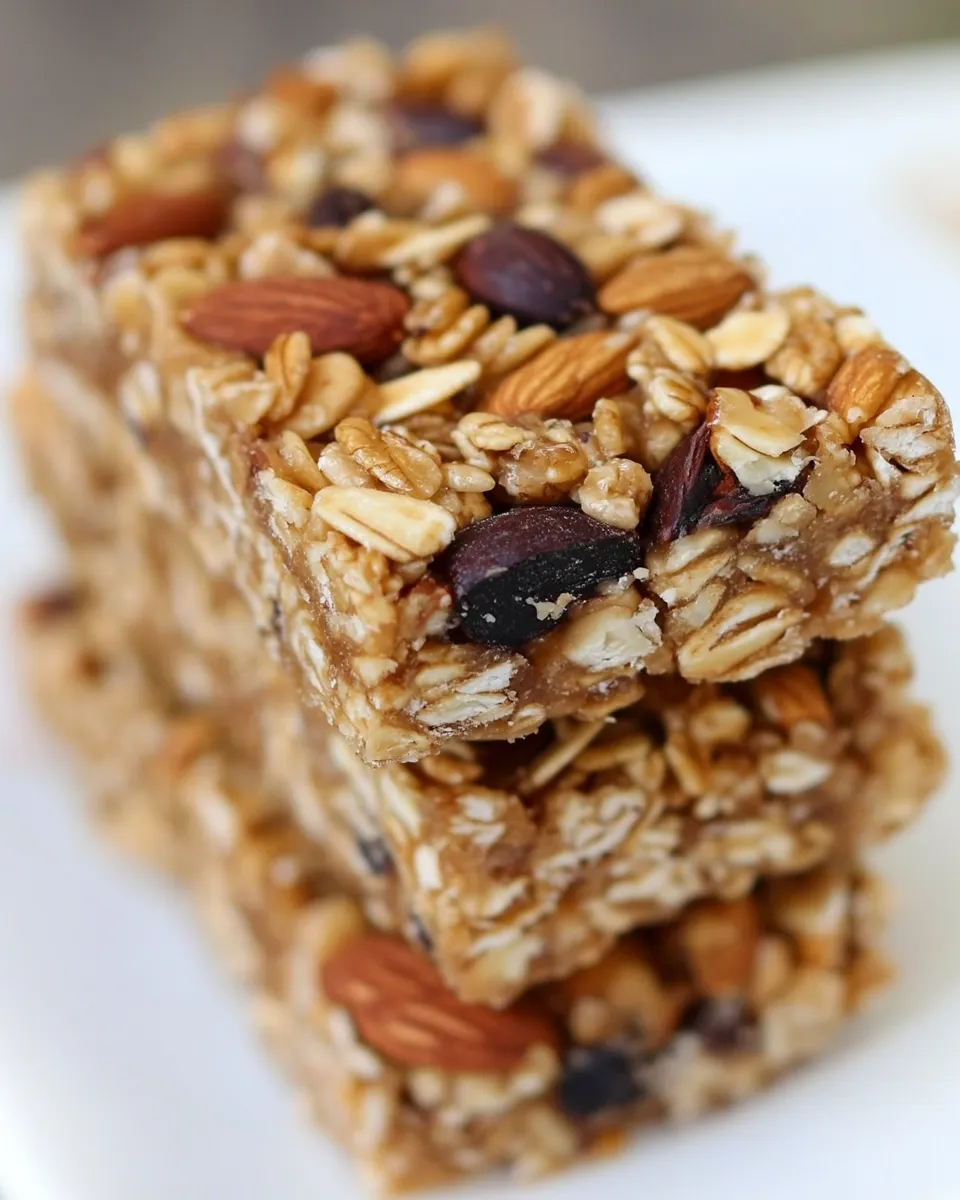
- 1 cup variety of nuts – I used 1/4 cup each of cashews, almonds, peanuts, and walnuts for a delightful mix.
- 1/4 cup seeds – I opted for 3 tablespoons of pepitas and 1 tablespoon of sesame seeds for added nutrition.
- 1/4 cup raisins – For a touch of natural sweetness and chewiness.
Cook’s Kit
- Large mixing bowl – For combining all the ingredients.
- Medium saucepan – To melt the butter, honey, and brown sugar together.
- Measuring cups and spoons – Essential for accurate ingredient quantities.
- Spatula – For mixing and spreading the mixture into the pan.
- Baking dish (9×9 inch) – To set the bars in the fridge.
- Parchment paper – For easy removal of the bars from the dish.
Cooking No-Bake Nut and Seed Bars: The Process
Step 1: Prepare Your Dish
Start by lining a 9×9 inch baking dish with parchment paper, leaving some overhang on the sides. This will make it easier to lift the bars out once they are set.
Step 2: Melt the Mixture
In a medium saucepan over low heat, combine the butter, honey, and brown sugar. Stir continuously until the butter has melted and the sugar has dissolved. This should take about 3-5 minutes. Remove from heat and stir in the ground cinnamon.
Step 3: Mix the Dry Ingredients
In a large mixing bowl, add the rolled oats, crispy rice cereal, nuts, seeds, and raisins. Stir well to combine all the dry ingredients.
Step 4: Combine Wet and Dry Ingredients
Pour the melted butter mixture over the dry ingredients. Using a spatula, mix everything together until all the dry ingredients are evenly coated with the wet mixture.
Step 5: Press into the Dish
Transfer the mixture into the prepared baking dish. Press it down firmly into an even layer using the back of the spatula or your hands. Make sure it’s tightly packed for the best results.
Step 6: Chill and Set
Place the baking dish in the refrigerator for at least 2 hours, or until the bars are firm and set. This will help them hold together when you cut them.
Step 7: Cut into Bars
Once set, lift the bars out of the dish using the parchment paper overhang. Place on a cutting board and cut into desired sizes—whether it’s squares or rectangles, it’s up to you!
Substitutions by Diet
- If you need a vegan option, substitute butter with coconut oil and replace honey with maple syrup.
- For a nut-free version, you can swap the nuts for sunflower seeds or pumpkin seeds.
- If you’re gluten-sensitive, ensure you use gluten-free oats.
- For a lower sugar alternative, reduce the brown sugar or use a sugar substitute like stevia.
Cook’s Notes
- Feel free to customize the nuts and seeds based on your personal preferences.
- These bars can be stored in an airtight container for up to two weeks, making them great for meal prep.
- For added flavor, consider mixing in a teaspoon of vanilla extract into the wet ingredients.
- If you want a little more chewiness, feel free to add in some chopped dried apricots or figs.
Keep-It-Fresh Plan
To keep your No-Bake Nut and Seed Bars fresh, store them in an airtight container in the refrigerator. If you want to keep them for longer, wrap them individually in plastic wrap and freeze them. They can be kept in the freezer for up to three months, allowing you to enjoy a healthy snack whenever you like!
No-Bake Nut and Seed Bars Q&A
Can I make these bars without nuts?
Absolutely! You can replace the nuts with extra seeds or even use puffed quinoa for a different texture. Just make sure to keep the total amount the same for the best results.
How do I know when the bars are set?
The bars should be firm to the touch and hold their shape when you press down on them. If they are still soft, give them more time in the fridge to set properly.
Can I add chocolate to these bars?
Yes! You can fold in some mini chocolate chips or drizzle melted chocolate on top after the bars have set for a delicious twist.
What’s the best way to cut these bars?
Using a sharp knife works best. If the bars are too sticky, try warming the knife under hot water and drying it before cutting. This will help create cleaner edges.
Serve & Enjoy
These No-Bake Nut and Seed Bars are not only a breeze to make but also incredibly versatile and delicious. Whether you’re grabbing one for breakfast on-the-go, enjoying one with your afternoon coffee, or packing them in your kids’ lunchboxes, they are bound to be a hit. Pair them with a piece of fruit or a dollop of yogurt for an even more satisfying snack!
In conclusion, creating No-Bake Nut and Seed Bars at home is simple, enjoyable, and infinitely customizable. With just a handful of ingredients and a little bit of time, you can have a healthy, homemade snack that will keep you energized throughout the day. So gather your ingredients, roll up your sleeves, and get ready to indulge in these delightful bars that are sure to become a staple in your snack repertoire!
No-Bake Nut and Seed Bars
Ingredients
Equipment
Method
- Step 1: Prepare Your Dish - Start by lining a 9x9 inch baking dish with parchment paper, leaving some overhang on the sides. This will make it easier to lift the bars out once they are set.
- Step 2: Melt the Mixture - In a medium saucepan over low heat, combine the butter, honey, and brown sugar. Stir continuously until the butter has melted and the sugar has dissolved. This should take about 3-5 minutes. Remove from heat and stir in the ground cinnamon.
- Step 3: Mix the Dry Ingredients - In a large mixing bowl, add the rolled oats, crispy rice cereal, nuts, seeds, and raisins. Stir well to combine all the dry ingredients.
- Step 4: Combine Wet and Dry Ingredients - Pour the melted butter mixture over the dry ingredients. Using a spatula, mix everything together until all the dry ingredients are evenly coated with the wet mixture.
- Step 5: Press into the Dish - Transfer the mixture into the prepared baking dish. Press it down firmly into an even layer using the back of the spatula or your hands. Make sure it’s tightly packed for the best results.
- Step 6: Chill and Set - Place the baking dish in the refrigerator for at least 2 hours, or until the bars are firm and set. This will help them hold together when you cut them.
- Step 7: Cut into Bars - Once set, lift the bars out of the dish using the parchment paper overhang. Place on a cutting board and cut into desired sizes—whether it's squares or rectangles, it’s up to you!
Notes
- Feel free to customize the nuts and seeds based on your personal preferences.
- These bars can be stored in an airtight container for up to two weeks, making them great for meal prep.
- For added flavor, consider mixing in a teaspoon of vanilla extract into the wet ingredients.