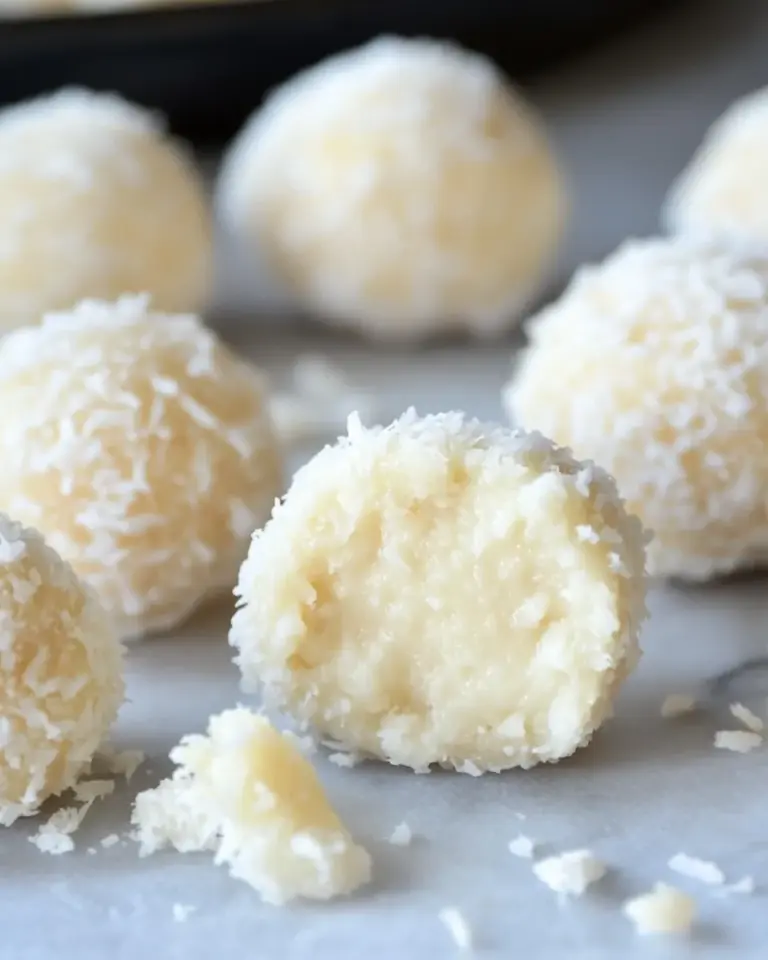
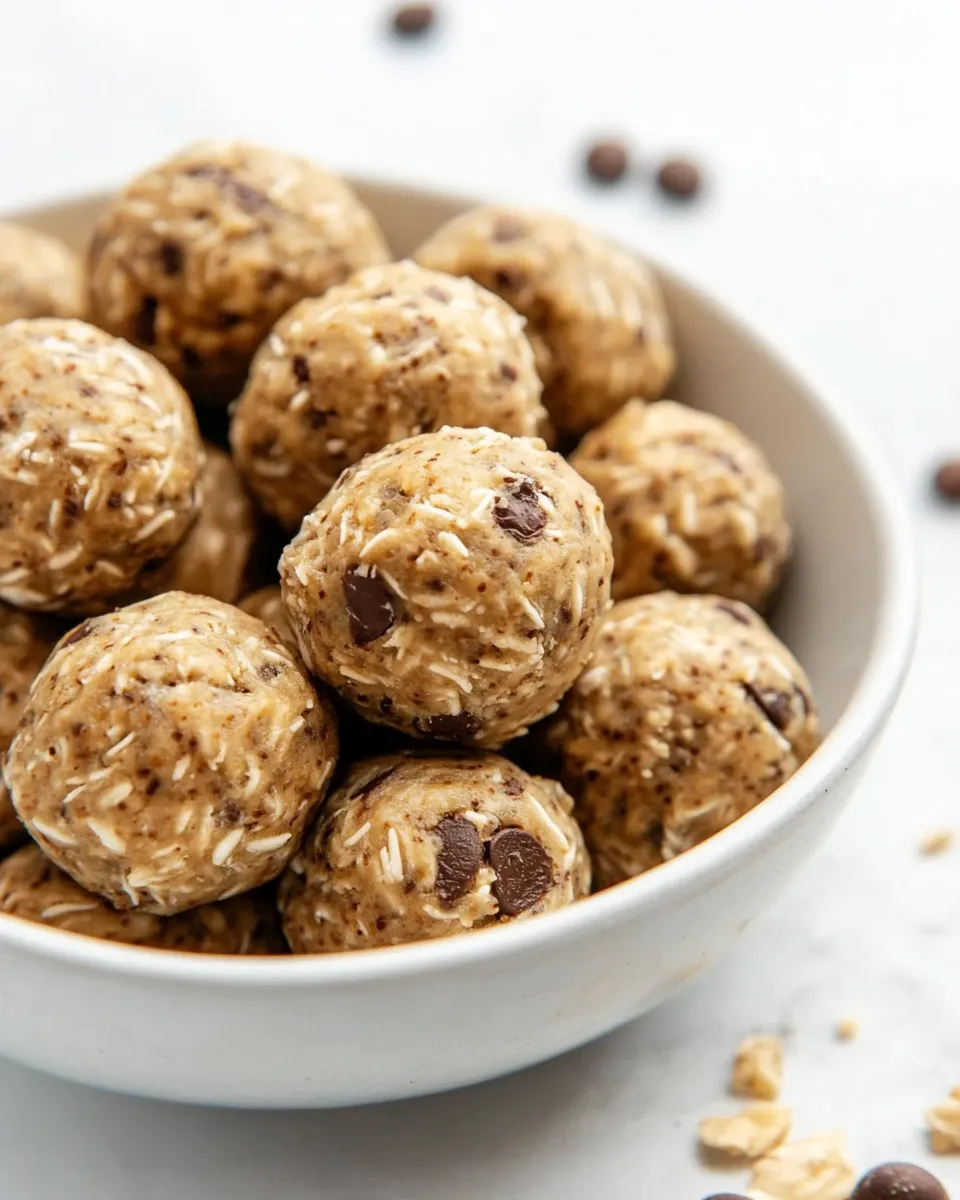
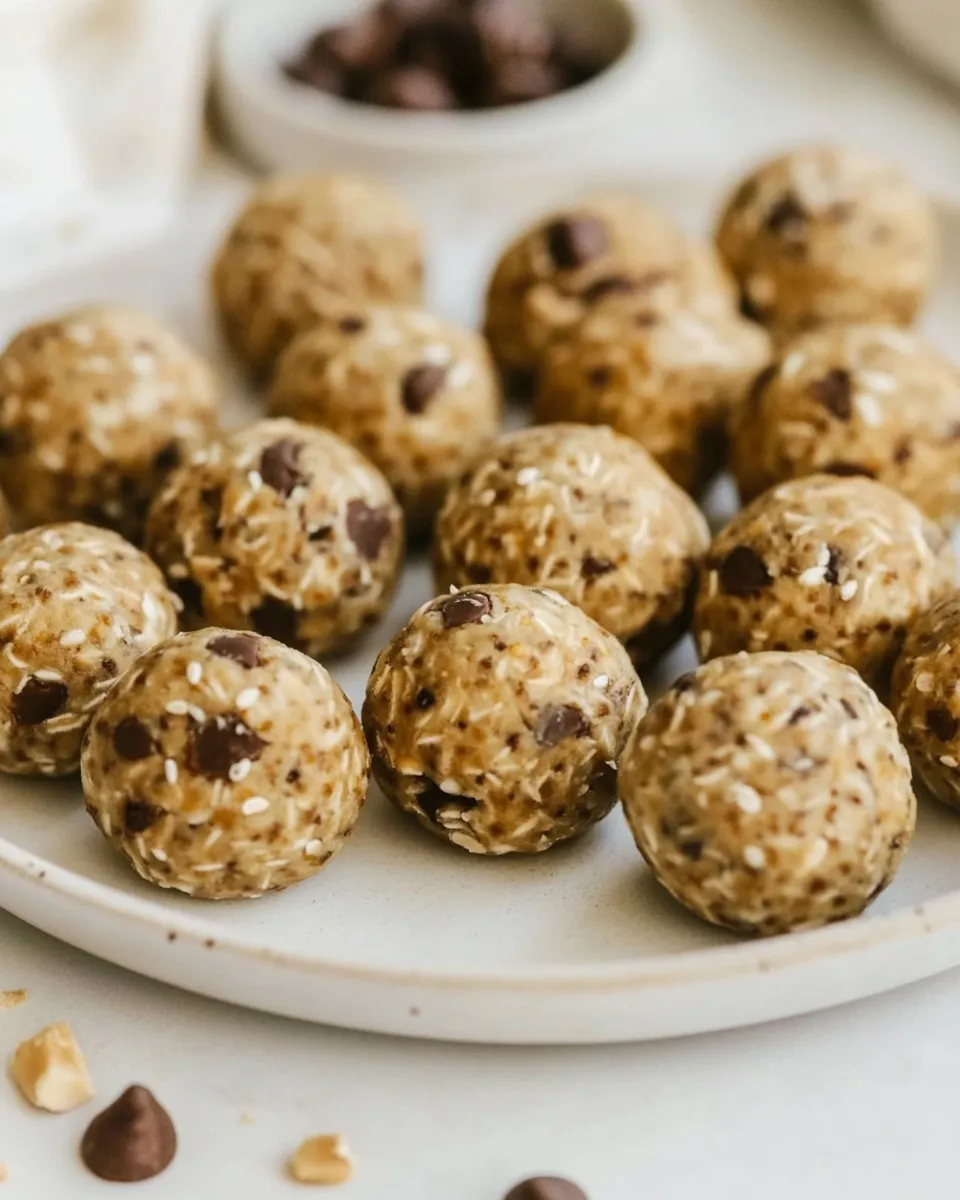
Protein Balls
Are you looking for a quick, nutritious snack that not only satisfies your sweet cravings but also fuels your day? Look no further than these delightful Protein Balls! They are easy to make, packed with wholesome ingredients, and perfect for on-the-go munching. Whether you’re a busy professional, a fitness enthusiast, or just someone who loves a good snack, these Protein Balls will fit perfectly into your lifestyle.
Why It’s Crowd-Pleasing

Protein Balls are more than just a snack; they are a versatile treat that appeals to everyone. They are chewy, sweet, and have just the right amount of crunch from the mini chocolate chips. These little bites of goodness are perfect for after workouts, mid-afternoon slumps, or even as a dessert. The combination of peanut butter and honey offers a deliciously rich flavor that makes it hard to stop at just one. Plus, they are fully customizable, ensuring that there’s a version of these Protein Balls for everyone!
What Goes In
Creating Protein Balls is a simple and enjoyable process. Here’s what you’ll need:
- 1 cup peanut butter: This creamy base provides healthy fats and protein, making it a satisfying foundation.
- 1/3 cup honey: A natural sweetener that binds the ingredients together while adding a touch of sweetness.
- 1 cup oat flour (or blended rolled oats): This adds fiber and helps to create the right texture. Oat flour is gluten-free if you use certified gluten-free oats.
- 1/4 cup vanilla protein powder (or chocolate): Boosts the protein content and can be customized to your favorite flavor.
- 1 teaspoon vanilla extract: Enhances the flavor profile, making every bite more delicious.
- 1/4 teaspoon cinnamon extract: Adds a warm, spicy note that complements the sweetness.
- 3 tablespoons mini chocolate chips: These little bursts of chocolate provide just the right amount of indulgence.
Toolbox for This Recipe
To whip up these Protein Balls, you’ll need a few essential tools:
- Mixing Bowl: A large bowl for combining all your ingredients.
- Measuring Cups and Spoons: To ensure the ratios are perfect and your Protein Balls turn out just right.
- Spatula or Spoon: For mixing the ingredients thoroughly.
- Cookie Scoop or Your Hands: To portion out the balls evenly.
- Baking Sheet: To lay out your Protein Balls as they chill.
Cooking Protein Balls: The Process

Making Protein Balls is a straightforward process that takes just a few minutes. Follow these steps to create your batch:
Step 1: Gather Ingredients
Start by gathering all your ingredients on the countertop. This will make the process smooth and efficient.
Step 2: Mix the Wet Ingredients
In a large mixing bowl, combine the peanut butter and honey. Stir them together until they are fully blended and smooth.
Step 3: Add the Dry Ingredients
Next, add the oat flour, protein powder, vanilla extract, and cinnamon extract to the wet mixture. Stir until everything is well incorporated.
Step 4: Fold in Chocolate Chips
Once your mixture is uniform, gently fold in the mini chocolate chips, ensuring they are evenly distributed throughout the dough.
Step 5: Form the Balls
Using a cookie scoop or your hands, portion out the mixture into bite-sized balls and place them on a baking sheet lined with parchment paper.
Step 6: Chill in the Refrigerator
Refrigerate the Protein Balls for at least 30 minutes to allow them to firm up. This will help them hold their shape when you bite into them.
Step 7: Enjoy!
Once chilled, your Protein Balls are ready to enjoy! Store them in an airtight container in the refrigerator for a quick snack whenever you need it.
Smart Substitutions
Feel free to personalize your Protein Balls with these easy substitutions:
- Nut Butter: Swap peanut butter for almond butter, cashew butter, or sunflower seed butter for a different flavor.
- Sweetener: Use maple syrup or agave nectar instead of honey for a vegan option.
- Protein Powder: Try different flavors of protein powder like strawberry or cookies and cream to change things up.
- Add-Ins: Incorporate nuts, seeds, or dried fruits for added texture and nutrition.
Insider Tips
- For a smoother texture, blend the rolled oats into a fine flour before adding them to the mixture.
- If the mixture is too dry, add a splash of milk or more honey to achieve the desired consistency.
- Experiment with spices like nutmeg or cocoa powder to create unique flavor combinations.
- Make a double batch and store some in the freezer for an even quicker snack option later on.
Refrigerate, Freeze, Reheat
These Protein Balls are perfect for meal prep! Here’s how to store them:
- Refrigerate: Store in an airtight container in the refrigerator for up to a week.
- Freeze: For longer storage, freeze the Protein Balls in a single layer on a baking sheet, then transfer them to a freezer-safe container. They can last up to three months.
- Reheat: There’s no need to reheat these snacks; they are delicious straight from the fridge or freezer!
Frequently Asked Questions
Can I use regular flour instead of oat flour?
While you can use regular flour, it is recommended to use oat flour or blended rolled oats for a healthier, gluten-free option. Oat flour adds fiber and nutrients that all-purpose flour lacks.
How do I know if my Protein Balls are the right consistency?
The mixture should be moist and hold together when pressed. If it’s too crumbly, add a bit more honey or peanut butter until it reaches the desired consistency.
Can I omit the protein powder?
Yes, you can omit the protein powder if you prefer. Just increase the oat flour slightly to maintain the right texture.
What’s the best way to enjoy these Protein Balls?
Protein Balls are great as a pre-workout snack, an afternoon pick-me-up, or a healthy dessert. Pair them with a piece of fruit or a glass of milk for a balanced snack!
Ready to Cook?
Now that you have the recipe and tips for making Protein Balls, it’s time to roll up your sleeves and get started! These nutrient-packed snacks are not only delicious but also incredibly versatile. Enjoy experimenting with different flavors and ingredients to make them your own. Whether you’re snacking at home or on the go, these Protein Balls will be your new best friend!
Indulge in the joy of creating your own snacks and savor every bite of these Protein Balls. You won’t regret it!
Protein Balls
Ingredients
Equipment
Method
- Step 1: Gather Ingredients - Start by gathering all your ingredients on the countertop for a smooth process.
- Step 2: Mix the Wet Ingredients - In a large mixing bowl, combine peanut butter and honey until smooth.
- Step 3: Add the Dry Ingredients - Add oat flour, protein powder, vanilla extract, and cinnamon extract to the wet mixture. Stir until well incorporated.
- Step 4: Fold in Chocolate Chips - Gently fold in the mini chocolate chips until evenly distributed.
- Step 5: Form the Balls - Use a cookie scoop or your hands to portion out mixture into bite-sized balls on a baking sheet.
- Step 6: Chill in the Refrigerator - Refrigerate the Protein Balls for at least 30 minutes to firm up.
- Step 7: Enjoy! - Store in an airtight container in the refrigerator for a quick snack anytime.
Notes
- For a smoother texture, blend rolled oats into fine flour before mixing.
- If the mixture is too dry, add a splash of milk or more honey.
- Experiment with different spices for unique flavors.
- Make a double batch and freeze for quick snacks later.